 |
 |

Gen II SHO MTX Upper 60k Mile Service
Pictures and Guide by Joshua Langevin
This is a step by step guide to doing the upper 60k mile service on a Gen II MTX SHO. Many of these steps will be the same for the Gen I, as well as the Gen II ATX. When you remove any nuts/bolts or parts, please keep good track of them! I always try to put nuts and bolts back where I got them after removing the part.
Here is the Valve Gap Worksheet: PDF Format Excel Format. This can be very helpful for keeping track of which shims need to be replaced. Remember that the worksheet is in millimeters.
Required Tools
Rachet and socket set with various sizes and extensions, including 7mm, 19mm and spark plug socket.
Wrench set, at minimum you need a 12mm and 19mm
Various plyers, screwdrivers, etc
Torque Wrench (Strongly Recommended)
5mm Hex key, preferrably one that will fit on the end of an extension
Feeler guage, .15mm (.006") to .35mm (.014")
Tappet Compressor and Tapper Holder, Included in the SHOPP Valve Adjustment Rental Kit
Pick set (also included in the kit)
Vaccum Pump
Prybar
And also:
Intake Cleaner
Black RTV
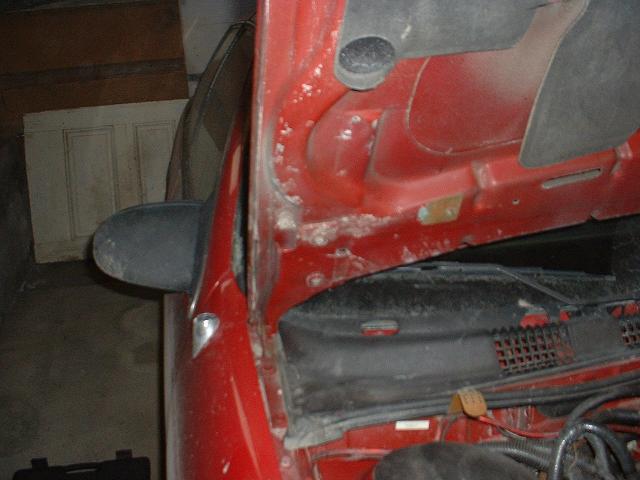
1. Remove the hood. This will make things a lot easier for you, especially when you get to taking off the rear valve cover. There are two 8mm bolts on each side. It would be best if you had an assistant for this step. Don't forget the cable for the hood light, and you have to remove the hood extenders.
2. Disconnect the battery, then remove it
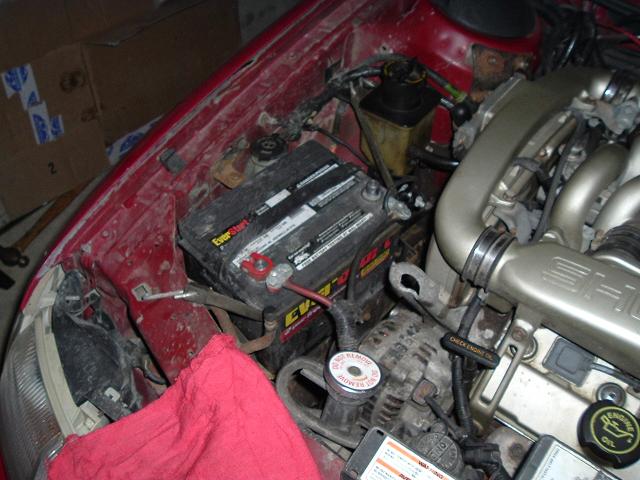
3. Remove the throttle body cover, there is one 8mm bolt.

4. Remove your intake tube and airbox. On this particular car the
airbox has been replaced with a cone filter. (I do not recommend doing this,
as it does not increase performance.) Pop the cover of the intake box off,
remove the filter, and then remove the bottom of the box. Then unplug your
MAF sensor. Also, don't forget about the Air Intake Temp sensor that is plugged into the airbox.
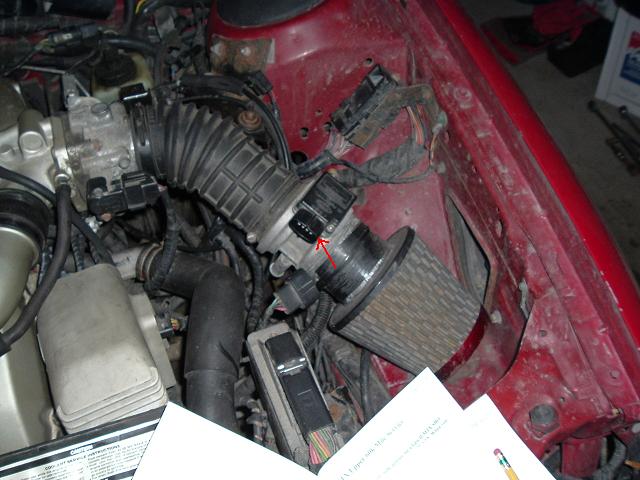
Now loosen the hose clamp that holds the intake tube to the throttle
body, and remove it.
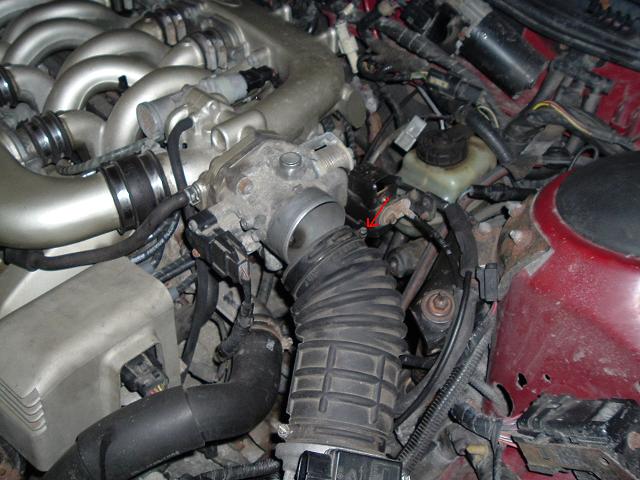
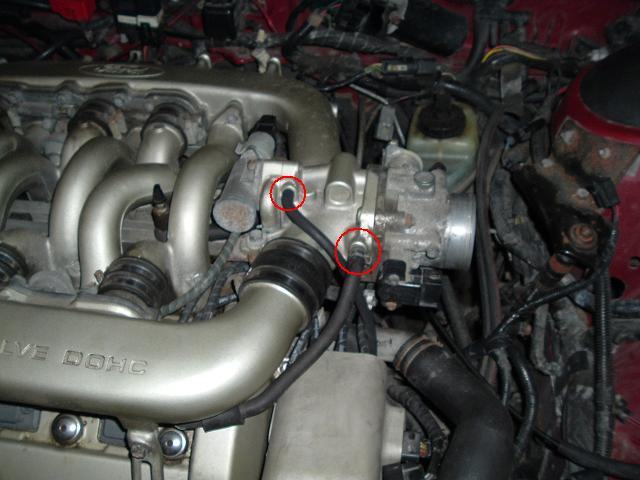
5. Let's now disconnect everything from the throttle body. The throttle
cable is held on by two 10mm bolts. Remove them, then the clip that holds
the black cruise control cable, then disconnect the thottle cable. You should be able to tell where the cruise control cable clip goes.
Then remove the vaccum line and the hose that connects here
6. Now we will go about disconnecting ALL of the vaccum lines, coolant
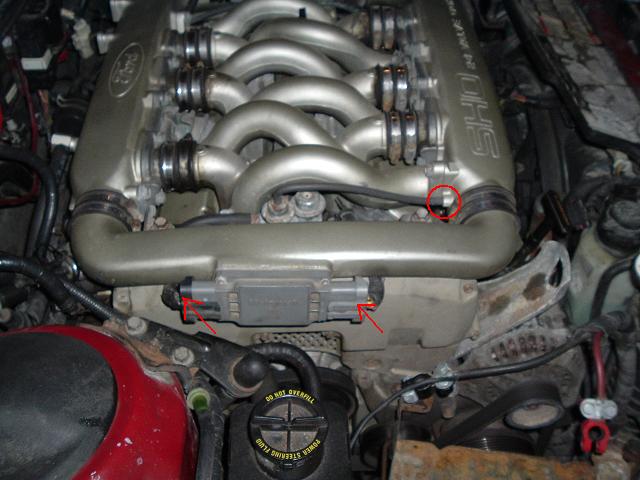
lines, and electrical connectors from the intake manifold. Start here by
disconnecting the connector that goes to the secondary runner control box. Also make sure that the vacuum lines that run to the secondary's control
box are not wrapped around anything. They do not need to be disconnected. If you have an ATX, you will need to disconnect the EGR in this area.
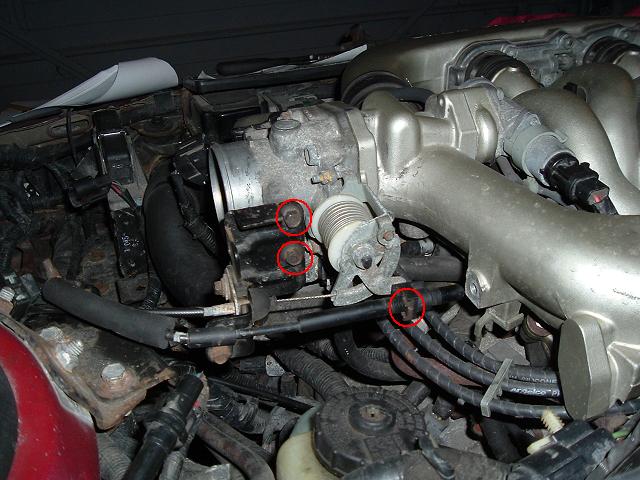
Then remove the three lines that are underneath the throttle
body, one large one and two small ones. You may find it easier to disconnect
the large PCV line during step 8 when you pull the intake off.
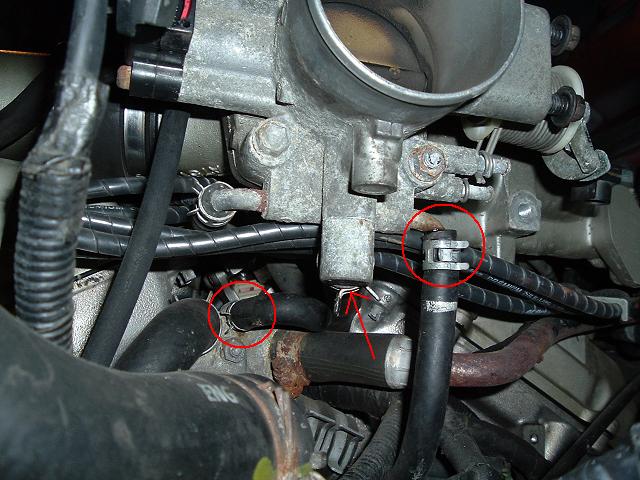
Then remove the vaccum line and the hose that connects here
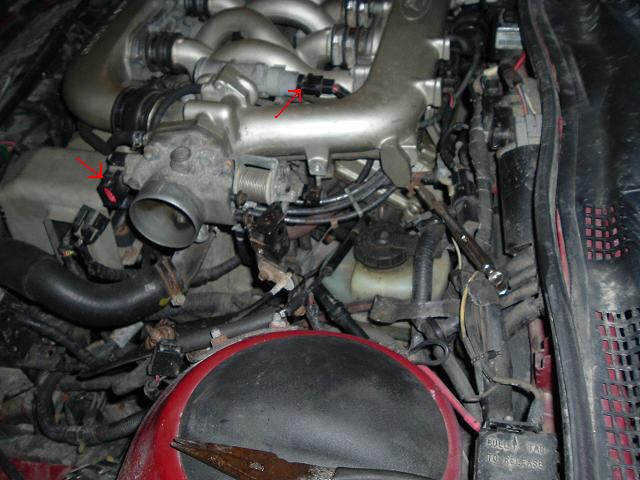
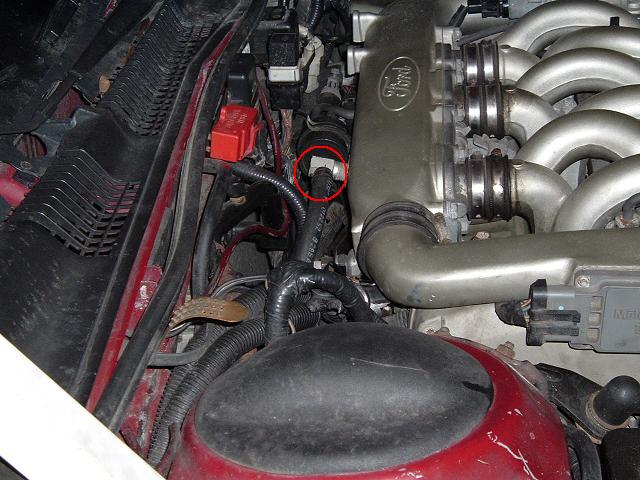
Then remove this vacuum hose, and the two electrical connectors going
to the DIS
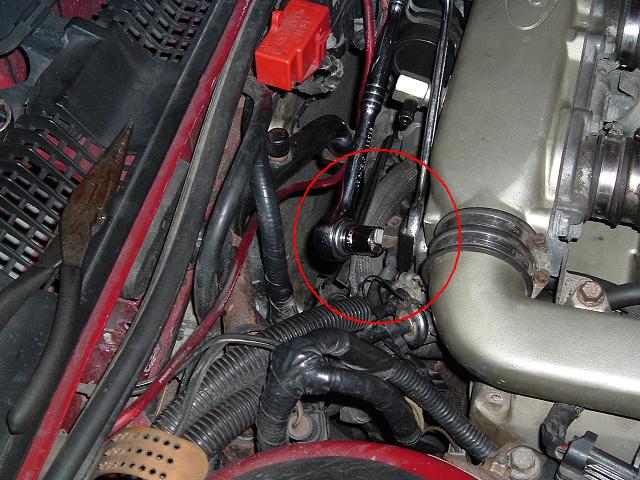
And lastly the line connecting here
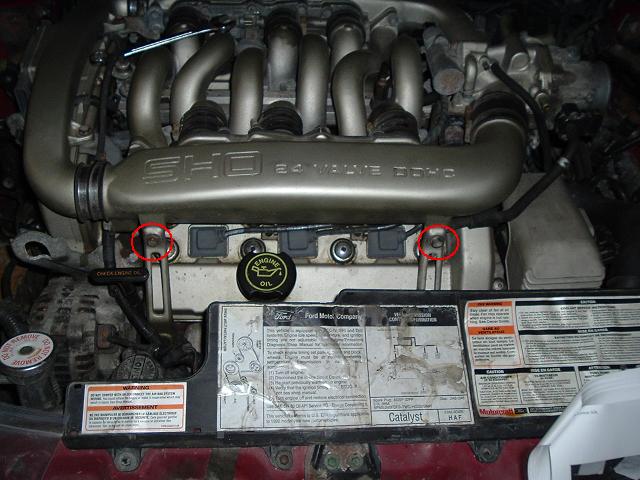
7. Since all the intake is freed from all of those, we need to loosen
and remove the bolts that are holding it on. Start in the area of the last
step by removing the 15mm nut that holds on the ground strap. You will probably
have to hold the bolt still with a 19mm wrench to get the nut off. Then remove the bolt.
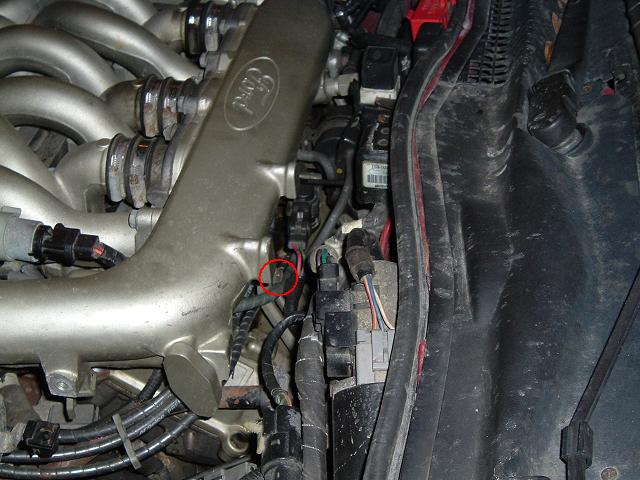
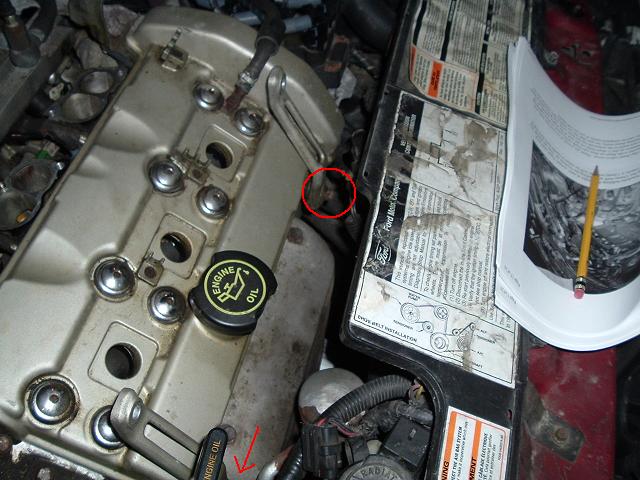
Now come around to the front and remove the two 12mm bolts holding
the intake and front brackets together, here
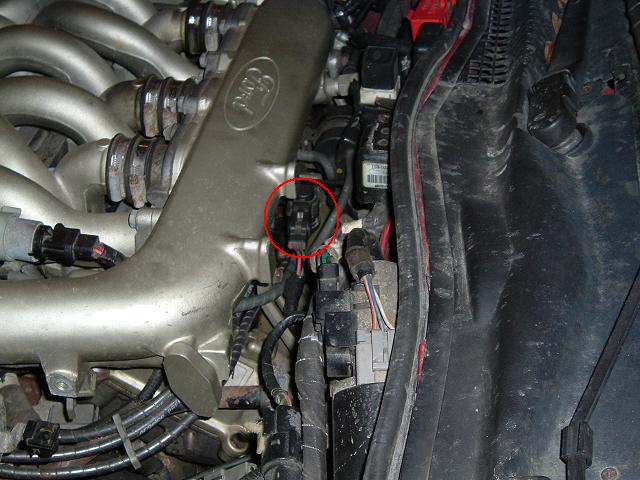
There is one more of these 12mm bolt on another bracket on the back,
near the plug for the secondary's controller.
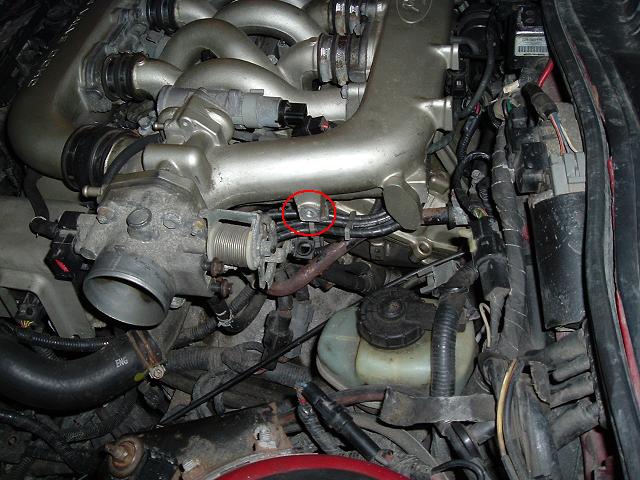
Also remove the 12mm bolt from here that holds up the metal and rubber coolant hose. In this area there is also a clip that holds the spark plug wires to the intake, make sure the wires are freed from it.
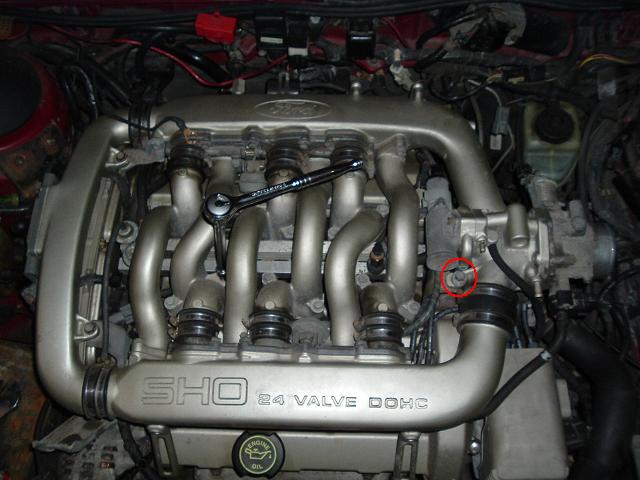
Now loosen this 12mm bolt and then the twelve 10mm bolts that hold the
intake to the top of the heads. None of these bolts need to be removed,
but loosen them all of the way. Make sure you get all of them.
8. Now, go back and double-check that you got everything. Once you
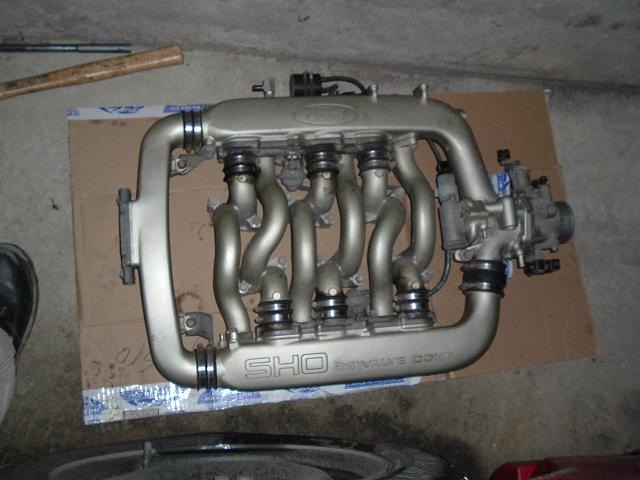
are sure, carefully remove the intake. An assistant is handy, but not needed. Just be ready, the intake weighs about 30 lbs! Remeber that PCV hose that runs to the bottom of the throttle body, if you didn't disconnect it then tilt the throttle body side of the intake up and pull the hose off. Set the intake on a large piece of cardboard or something similar.
9. Go ahead and remove all the spark plug wires to get them out of
the way, along with the coilpack cover. Now remove the intake gaskets. These can be reused, but if they are worn (which they probably are) you should replace them. Carefully remove them and pick up any pieces of dirt, etc that is sitting
near the intake ports. Now take some good carb cleaner and blast all that
carbon out. You can take a rag and clean out the ports as best as you can.
When you are done cleaning them, take some clean rags and place them over
the intake ports to prevent any junk (or tools!) from falling in there.
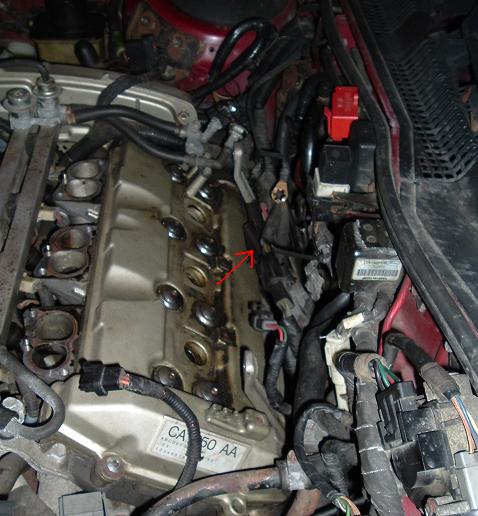
10. Remember those four brackets holding the intake at
each corner? These need to be removed by just loosening the 12mm bolt and
pulling the brackets up. They are slotted.
The rear ones are very hard to reach, a 12mm wrench will be easier to handle back there than a socket wrench. You will need to hold this wiring harness assembly out of the way with a prybar or something.
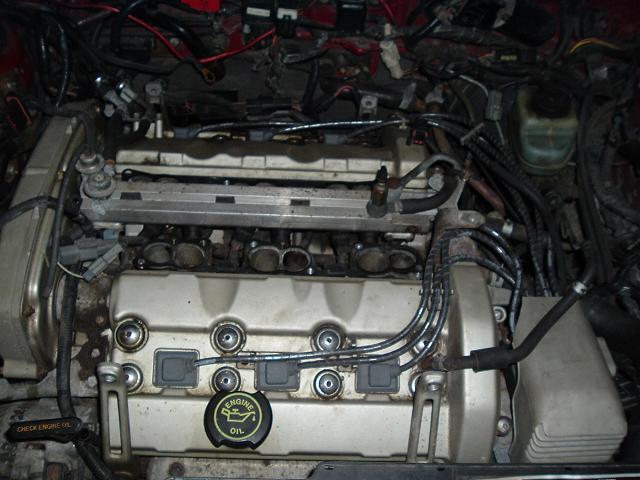
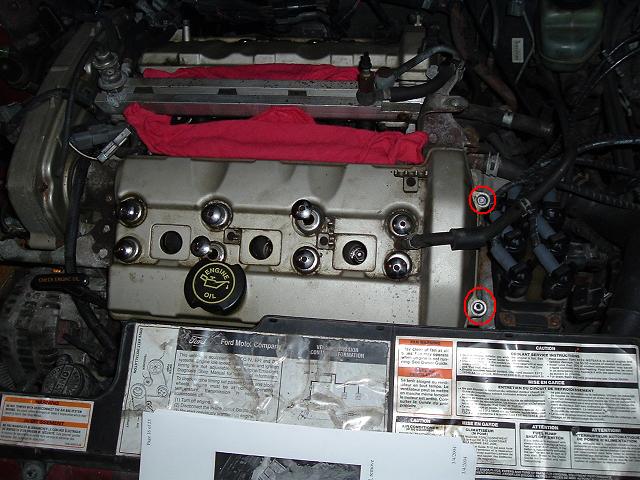
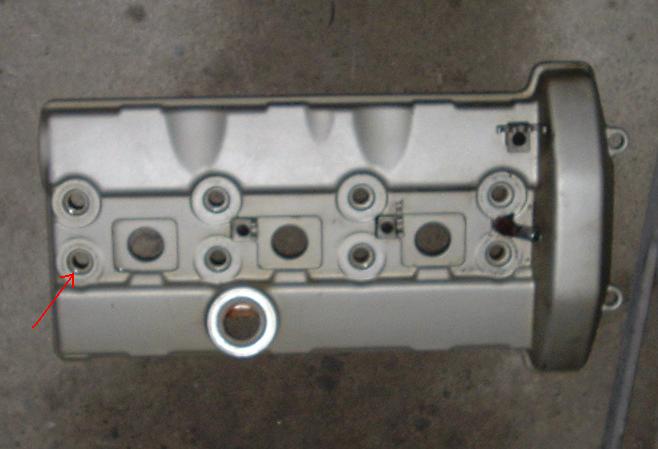
11. We will now remove the front valve cover. There are a total of
10 5mm hex bolts that hold the intake on. Be careful with them as they can
break easily (more so when tightening them) but pay special attention to
the 2 short bolts on the rear of the engine. Loosen all 10 bolts, the 8 long
ones do not need to be removed (on the front cover, you WILL remove them
on the back). When loosening these bolts, be sure that the hex head is fully inserted into the valve cover bolts, as they can be stripped easily if you are not careful.
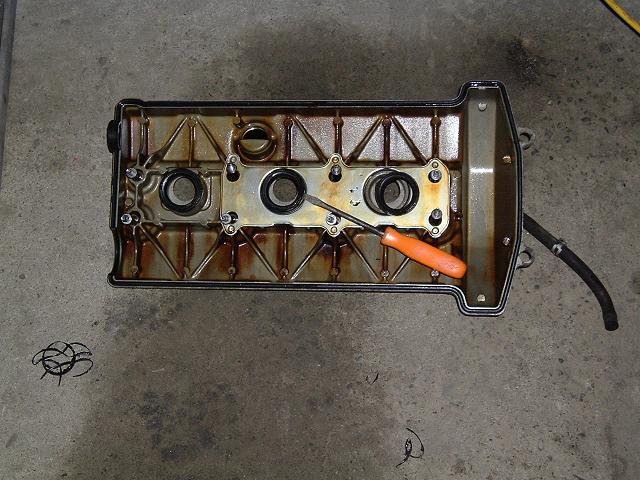
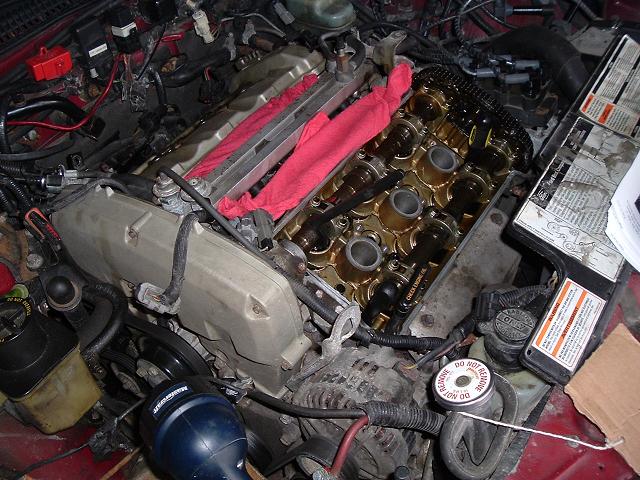
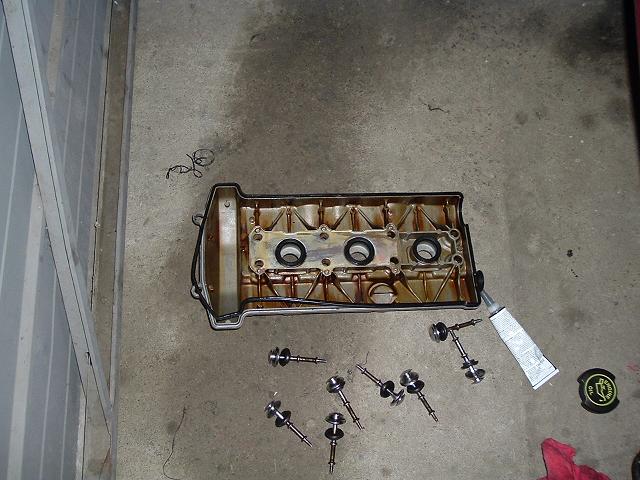
And remove the front valve cover. Go ahead and clean the valve cover
really good, remove the valve cover gasket and the plug well seals (pry them out with a screwdriver).
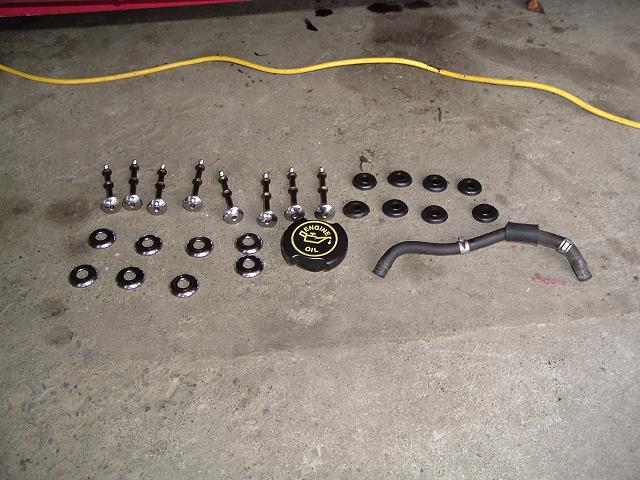
Here are all the valve cover bolts, washers, and seals removed and cleaned. The bolts sometimes don't want to come out, you can tap the threaded end with a hammer to pop them out. Also you'll need to use a screwdriver to pop out those little seals.
Then you can clean the valve cover without everything being in the way.

Place a screwdriver or shop towels over the oil return passages here to prevent anything from falling down into the oil pan, which would be very very very bad. If you happen to drop something in there, you're going to be removing the oil pan to get it out. You don't want that :)
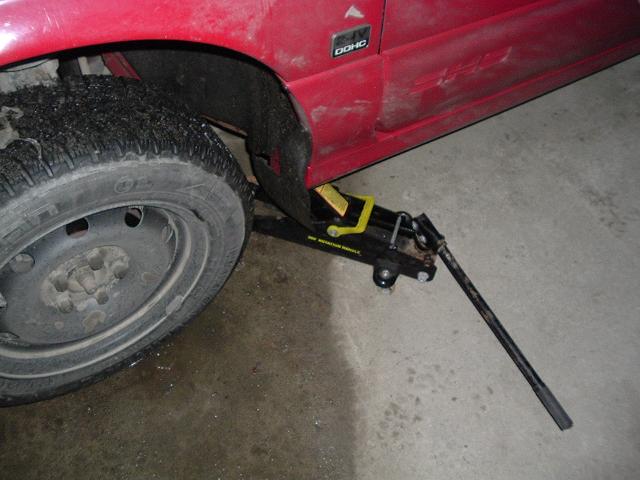
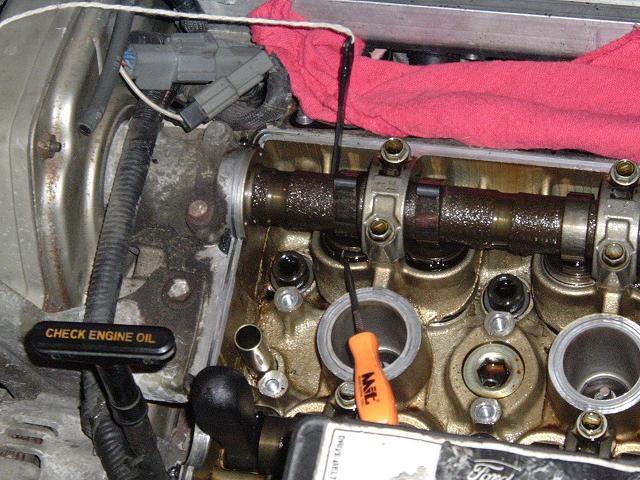
12. Now on to that actual valve adjustment procedure. First though, jack up one side of the car, just enough that the tire is off the ground. You turn the tire to rotate the engine (put the car in fith gear).
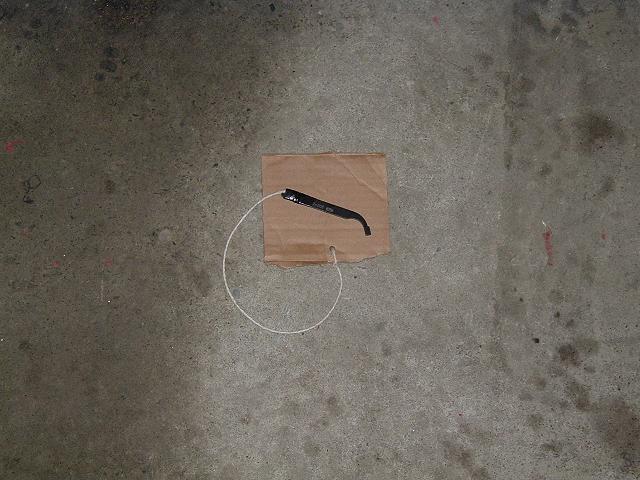
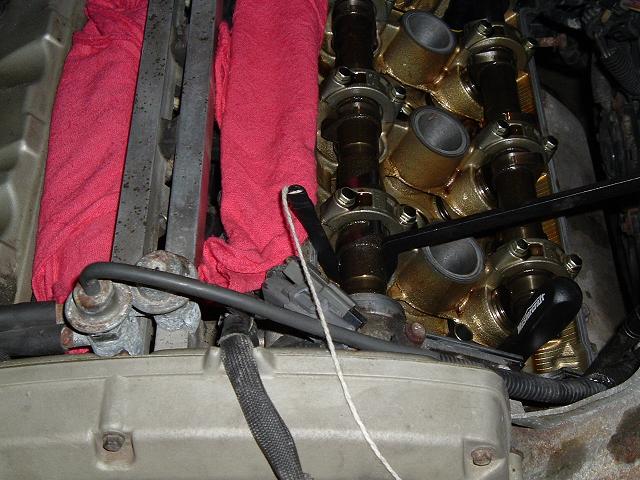
Then loosen all of the spark plugs a few turns. This is so the air being compressed in the engine can escape, otherwise you will find it difficutlt to rotate the engine. Also, tape a piece of string to the handle of the tappet holder now before you get started, then tie the other end to something big (like a piece of cardboard). The reason being that the holder will go flying at least once and it will take forever to find it. DO NOT SKIP THIS STEP OR YOU WILL REGRET IT! Also, take some electrical tape and tape up the ends of a pair of needlenose pliers, to safely remove the shims, or if you have a magnet, use that.
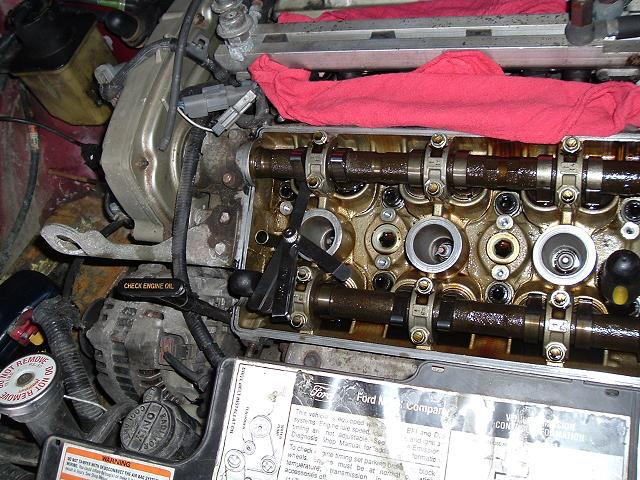
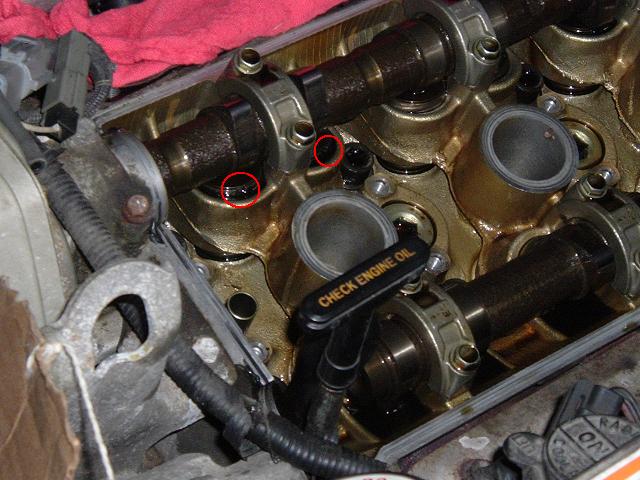
Now rotate the engine until the first set of intake cam lobes are pointed straight up. Then use a feeler guage to measure the distance between the bottom of the cam lobe and the valve shim. The intake side (closer to center of the engine) should be between .15mm and .25mm. (.006 and .010 inches) and the exhaust side (outside cams of engine, ie, close to the front bumper on the front and closer to the firewall on the back) should be between .25mm and .35mm (.010 and .014 inches). In this pic we are measuring the intake side. The gap measurement is the thickest feeler guage that fits between the bottom of the cam lobe and the valve shim.
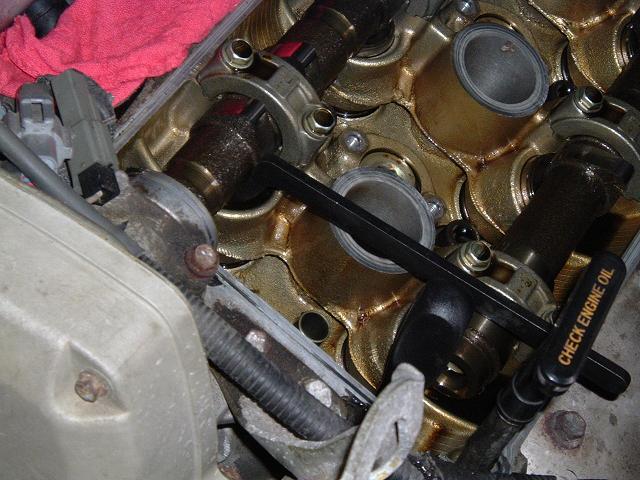
And here we are measuring the exhaust side, again the engine has been turned and the cam lobes are pointing straight up.
Once you measure the gap remove the shim, whether or not the gap
is within tolerance. If the gap was within tolerance then inspect the shim very closely for wear, scratches, etc. If it is damaged at all, replace it. If it looks okay, then reinstall it, and then check the gap again. How do I know if my shims are damaged or too worn?
------------------------------------------------------
If you are using the valve gap worksheet, follow these instructions:
1. Record the gap measurement in the "1. Gap - As Found" field.
2. If the gap was not within spec, then record the size of the shim (found on the bottom of the shim, ie: 2525 is a 2.525mm shim) in the next field, "3. Old Shim".
3. Then do the math shown in the next field, "4. Req Shim [1-2+3]" and record the number you come up with. Find a shim that is closest to the number in field 4. (If you do not have the shims with you, this is the size you will need to order.)
4. Now put some oil on the new shim and install it. Record the shim you installed in the field "5. Shim Installed" and record the the new gap in "6. Gap - As left".
------------------------------------------------------
If you replace it with a new shim, double-check the gap again to make sure it is the correct size. Always put oil on the shim before you install it.
To remove the shim, first rotate the bucket (what the shim sits in) around until the "slot" is facing you.
The tool usually will stay in this compressed position
Then place the tappet hold on the edge of the bucket, not on the
shim, like this. Slowly uncompress the bucket with the tool until the tappet holder is in place. If you put the tappet holder on the shim instead of the bucket's lip, you won't be able to remove the shim. You may have to do it a few times before you get it right.
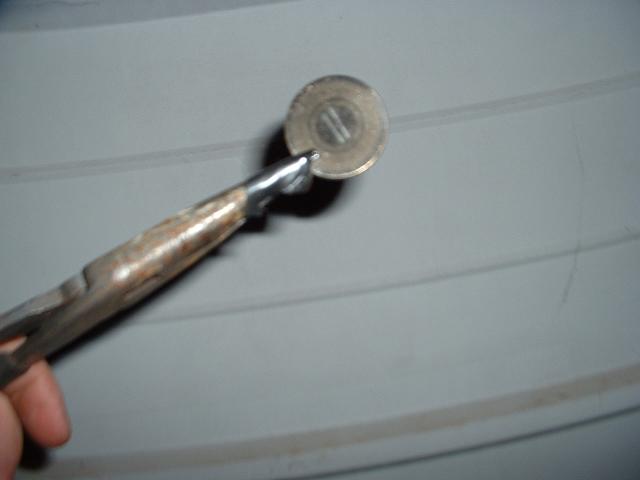
Then remove the tappet compressor. You can now use a pic tool to
pop the shim out. Then remove it with your needlenose pliers or magnet.
Examining the shim for wear or damage. Notice the tape on the pliers
to prevent scratching the shim.
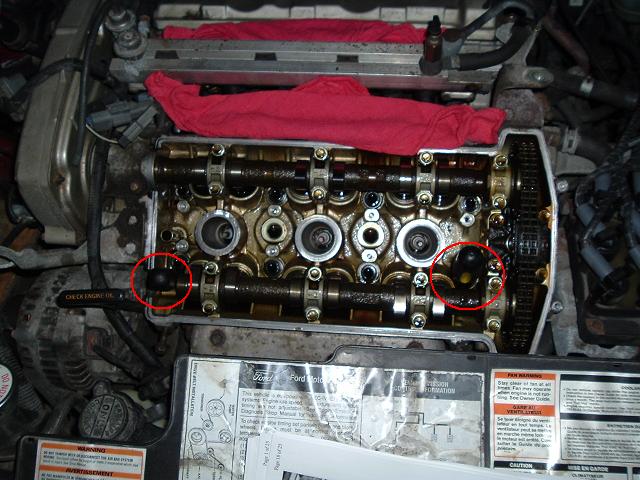
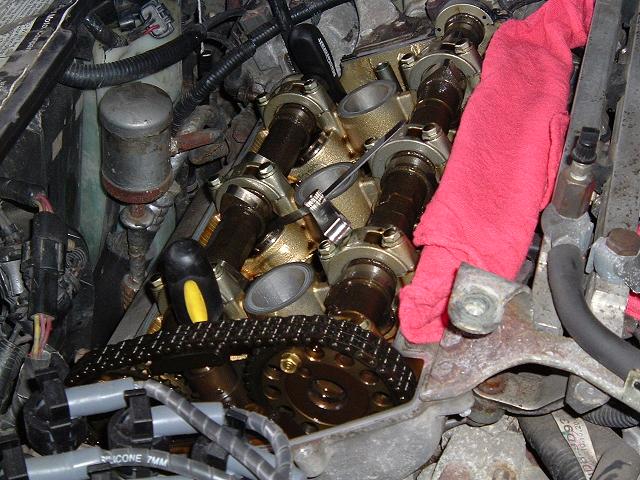
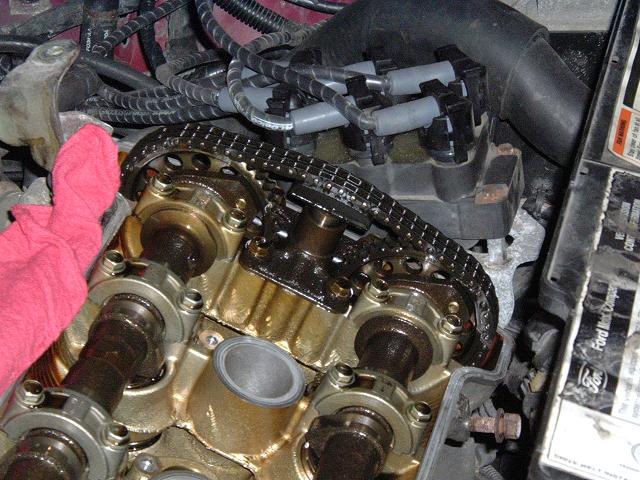
Install the shim securely, then compress the tappet several times using the special tool to make sure it is seated correctly. Double-check the gap clearance to make sure it is right. Repeat this process for the whole intake side, then the whole exhaust side. Then go on to the next step. Take your time and be patient, it is tedious and time-consuming. Before you replace the valve cover in the next step, check the condition of the timing chain and tensioner. Here you can see the "wear block" that the chain rides on. This one is worn maybe 1/4 of the way. The chain is tight.
13. Now replace the valve cover gasket and the plug well seals on
the valve cover. When they are installed, put a bead of black RTV on the
plug well seals. Let it dry for a couple minutes (while you're working on the next steps).
Also put a bead of black RTV on these spots

Before replacing the valve cover, put some black RTV on the edges of each of the bolt holes and install the valve cover bolt seals. Then with the valve cover bolts NOT installed, replace the valve cover. Then install and tighten the 10 5mm Hex bolts to about 12 ft/lbs. Be careful not to break them, remember that's ONLY 12 ft/lbs.
Once you replace the cover, remove the spark plugs from the front
bank. First inspect the plug well carefully for oil, water, dirt etc. If you find any (very likely) clean them out by spraying intake cleaner down inside. Then use a vacuum pump to suck all of it out. You don't want to remove the spark plugs and allow any dirt or anything down into the cylinder. Now you can remove the plugs. When they are out, use a vacuum pump to remove everything from the
cylinder. A lot of cleaner may have gotten down there from cleaning the intake ports and you want to get rid of it.

Once they are cleaned out, replace the plugs with new ones, gapped to .042 - .046 inches. Remember to coat the plug threads with never-seize. Do not tighten the spark plugs all of the way yet, since you still want the air to be able to escape.
Now we will move on to the rear cover on page two.
60k Parts List Page One Page Two