 |
 |

Gen II SHO MTX Upper 60k Mile Service - Page Two
60k Parts List Page One Page Two
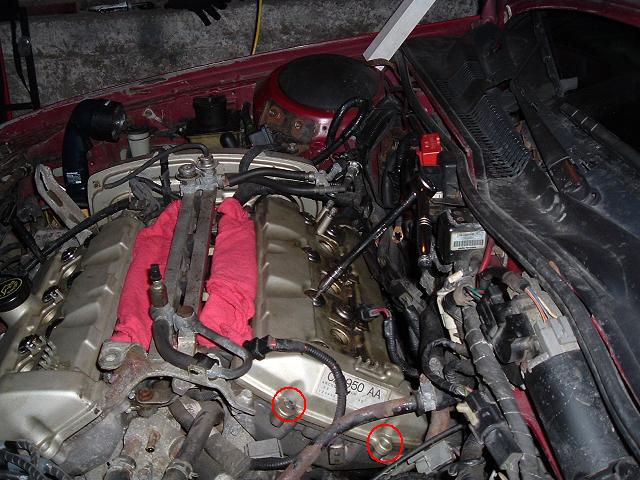
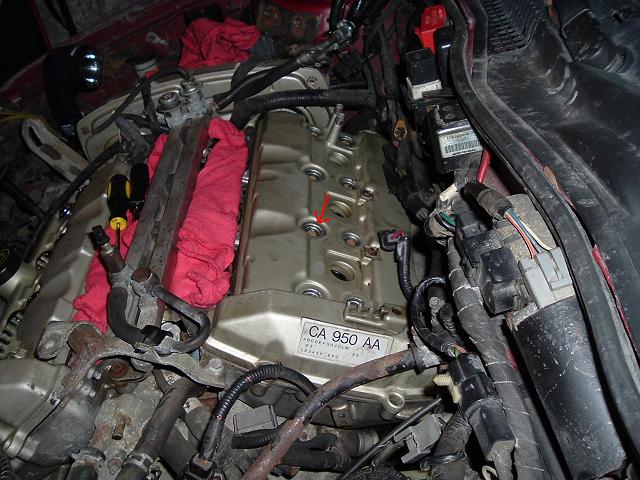
14. Remove the two 10mm bolts holding the fuel lines to the rear
valve cover.

15. Then loosen and remove all ten of the 5mm Hex bolts.
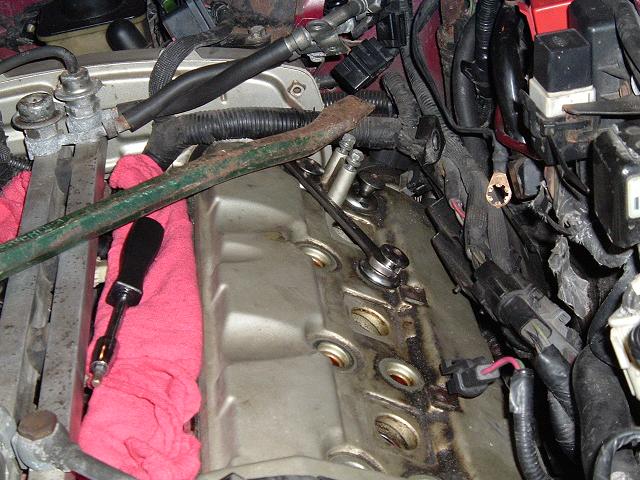
Removing the eight long valve cover bolts can be difficult as they
don't like to come out. You may be able to use and open end wrench and a
prybar to pop them out, like this
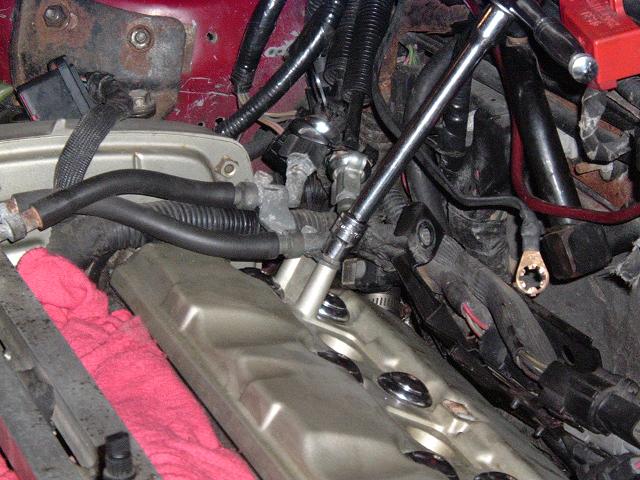
Not removing the bolts will make removing and installing the rear
cover VERY difficult. Once it is done, remove the cover. It will be a little
bit difficult because of the wiring harnesses that you have to hold out of the way, so be patient.
Once it is out go ahead and clean it well.
16. Now go ahead and measure the gaps, check the shims, and replace
them as needed. The procedure is the same as what you did on the front. Remeber
to block those oil passages with screwdrivers or something before you get started.
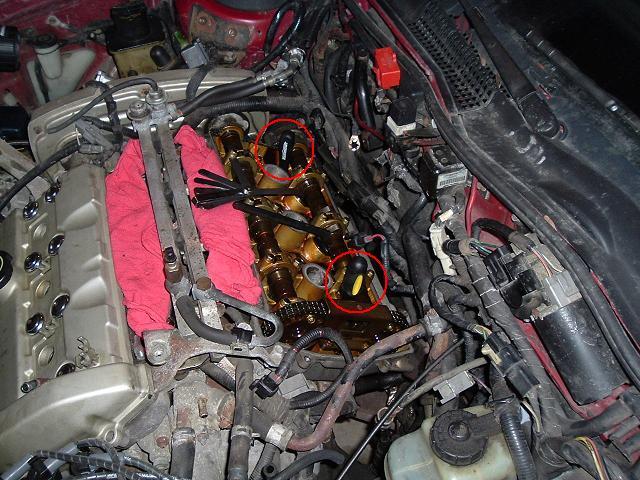
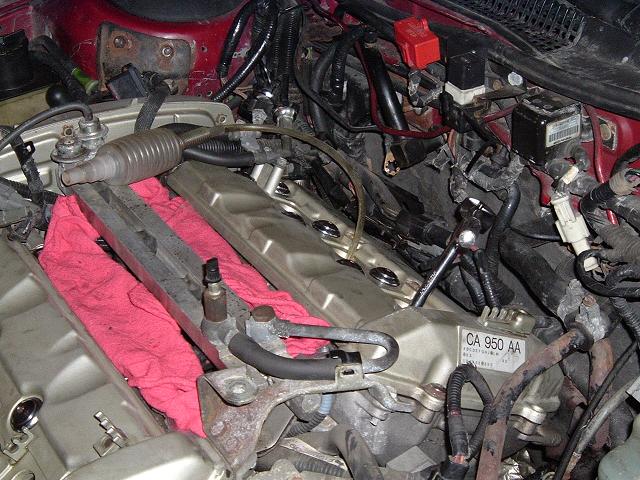
17. Once the procedure is complete, remove the old gaskets from the
valve cover (probably this was done when you cleaned it) and install the
new ones. Remember the black RTV on the plug well seals, and also put a bead
of RTV on these places

18. Now, with NO bolts in the valve cover, reinstall it. Make sure you get this right, as it can be very easy to "roll" the gasket on the very back, if this happens your car will leak oil all over the exhaust manifold and the cat. If you get a lot of smoke coming from the back of the engine bay when you start it up you know what happened. Prevent this by triple-checking the valve cover gasket, a small mirror is handy for this. If in doubt, pull it out, and do it again. Like on the front cover, put black RTV in where the valve cover bolt seals will go.
Now install and tighten all ten of the 5mm Hex bolts down to 12 ft/lbs. Then reinstall the two 10mm bolts holding the fuel lines to
the rear cover.
19. Remove the old spark plugs. If there is a lot of oil or anything
down in the wells, clean it out first. Now use a vacuum pump to remove all the cleaner and oil from the cylinders.
Install new spark plugs, be sure to gap them to between .042 and .046 inches, and use never-seize on the threads. Tighten them, then go ahead and tighten the front ones as well, which you had left loose.
20. Now install and route your spark plug wires and coilpack cover. Put some dielectric grease on each end of the spark plug wires, where they connect to the plugs and to the coilpack. Remember to route them correctly, the coilpack has a "gotcha"... the sequence is:
Engine
1 2 3
4 5 6
Coilpack
5 1
6 2
4 3

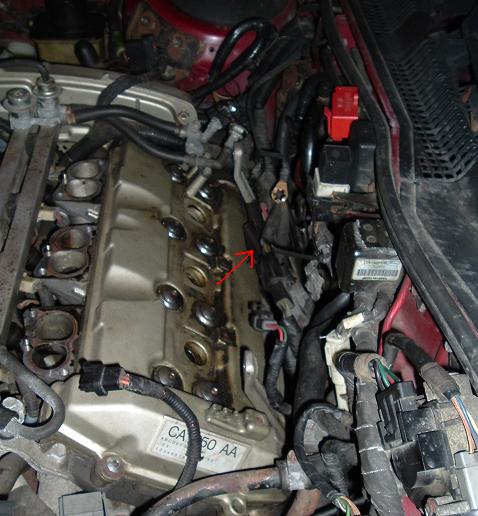
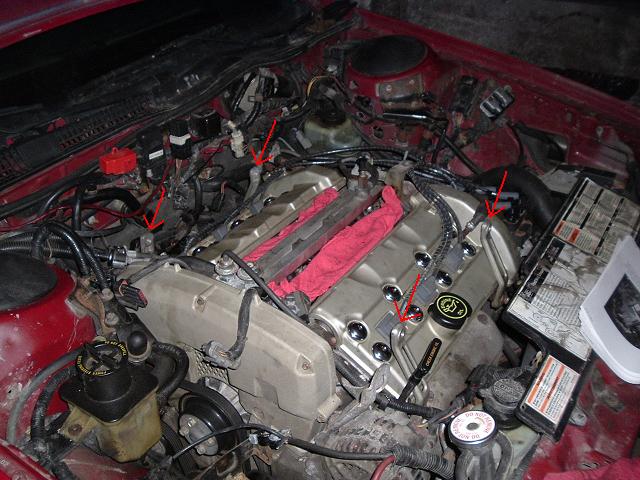
21. Now we will get ready to install the intake manifold. We have to replace those four brackets at each corner. The one being pointed out in the picture is the one that the ground strap connects to, notice it is different from the rest.
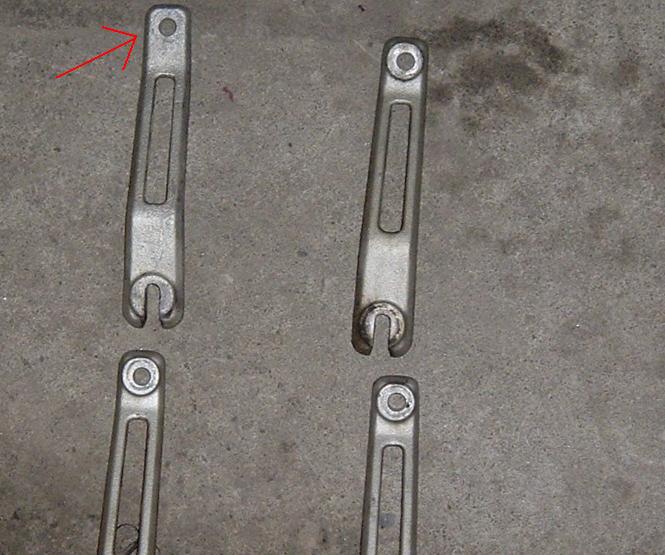
Install the brackets, but don't tighten the bolts all the way as you need to be able to move them around to match them up with the manifold. The unique bracket pointed out above goes on the far left in the pic. Remove the rags you have over the intake ports and install the new gaskets.
Now loosen all of the hose clamps connecting the runners to the intake,
and remove the crossover tube by taking off the two 12mm bolts. This is so
the manifold can flex freely when you install it, otherwise it will not seat
correctly. Now gently place the intake manifold back on then engine. Remember
that PCV hose that connects under the throttle body? Now is the time
to connect it by lifting up this side of the intake and sliding the hose
on as you lower the manifold.

22. Now it's time to bolt everything down again. First make sure
that there are no lines or wiring under the manifold. The connector going
to the idle control likes to get caught under there. Start with the twelve
10mm bolts between the runners. Just get them hand tight for now. Make sure
that the manifold is set down where it is supposed to be, there are several
small guide rods to help. Twelve bolts. Count them out loud as you fasten
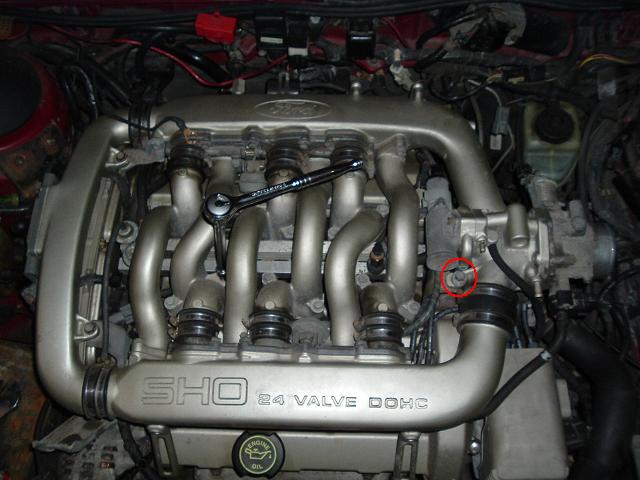
them. Tighten the 12mm bolt up near the throttle body. You can
reinstall the crossover tube.
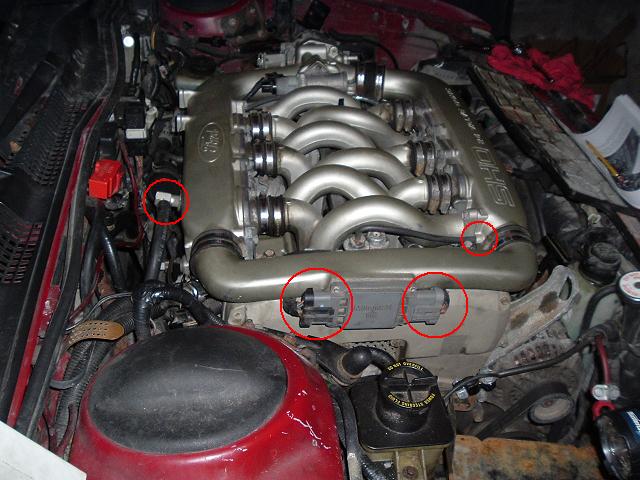
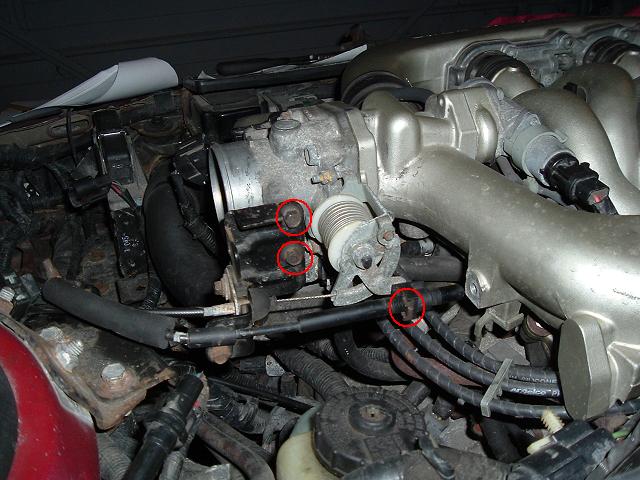
Now go around and install the brackets to the manifold. There's one
near the secondary's controller, two in the front, and one more here. With
this last one, install the 19mm bolt first, then the groundstrap to the bolt with the 15mm nut. If your car doesn't start, you may have forgotten the ground
strap.
Now go back and tighten all of the bolts. The 10mm manifold bolts
should only be tightened to 10-15 ft/lbs, they are very easy to snap. Tighten
down the bolts holding the brackets to the intake and also the 12mm bolt
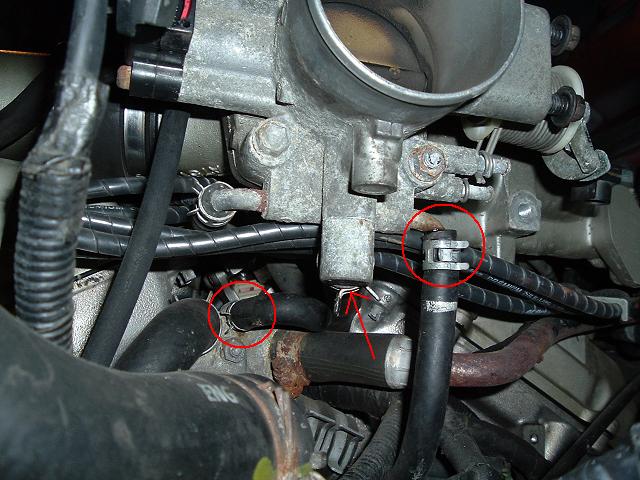
near the throttle body. Tighten all of the hoseclamps on the intake (7mm
bolts or flathead screwdriver).
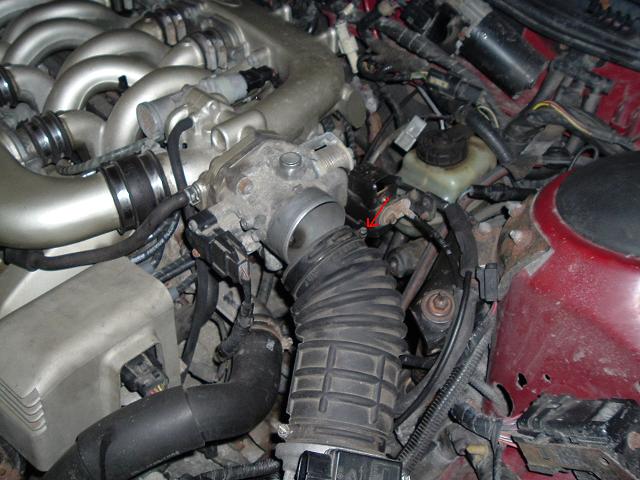
23. We will now go about connecting all of the wiring and lines to
the intake manifold. Start with the coolant line in the above pic. Then connect
this small vacuum line going to the fuel regulator and plug in the DIS.
Now these two lines and electrical connector going to the throttle body.
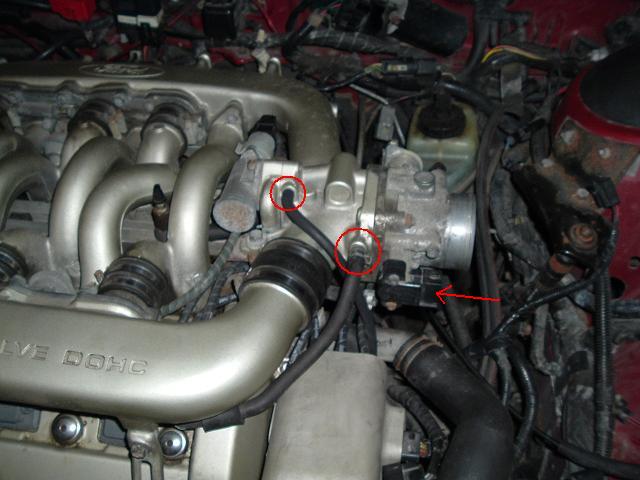
And the three lines under the throttle body, the large one
should already have been connected.
Now the idle controller here, and lastly the secondary's controller needs to be plugged in. Reinstall the bracket that holds the metal and rubber coolant line with the 12mm bolt. If it is an ATX, connect the EGR now.

Install the throttle cable and cruise control cable. You should be able to tell where the cruise control cable clip goes by the small rust mark on the black casing. Tighten the cable's linkage with the two 10mm bolts.
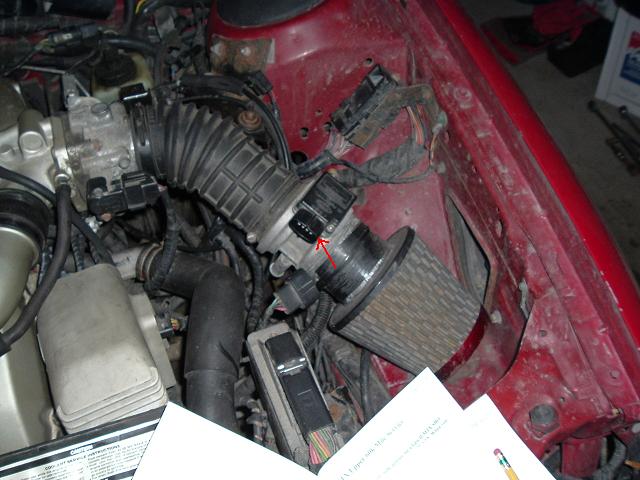
24. Now hook the intake tube back up to the throttle body and tighten
the hose clamp.
Plug your MAF sensor in, and install your airbox with a new filter. Don't forget the Air Intake Temp sensor
Install your throttle body cover with the one 8mm bolt. Install the
battery.

Now you're done. WAIT! Before you go and start it up, go back and
check every step over and make sure everything is tightened down and everything
is connected. Then start 'er up! :)
60k Parts List Page
One Page Two