 |
 |

CV Joint (Halfshaft) Replacement
Gen I & II MTX SHO
Pictures and Guide by Joshua Langevin
Pictures and Guide by Joshua Langevin
This is a guide to replacing the passenger side halfshaft in a '92 SHO. The driver's side should be very similar, I will try to point out the differences. NEVER remove both halfshafts at the same time, if you need to then put a dowel of some kind in one side first.
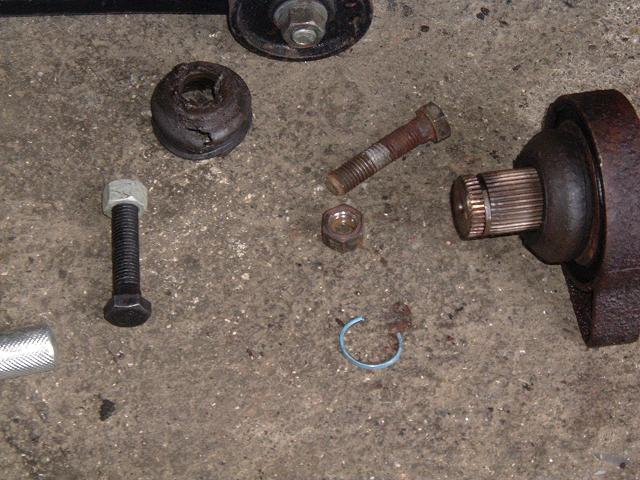
There are several parts that you must have before starting the job. First you need a new halfshaft locknut, but this should be included with your new/rebuilt shaft. The others you will not be able to get at your local parts store, and the Ford Dealership will most likely have to order them. Here is a picture of the parts: one circlip that goes on your intermediate shaft (new blue one is shown, you can see the old one one the shaft), one nut and bolt for your balljoint (both old and new shown), which cannot be reused and is specific to this application (it has some splines on it which prevent it from spinning), and also shown is the balljoint boot that I ripped. You can't get that anywhere, I ended up finding a good used one. Be very careful not to rip the boot.
While you're in here, take a good look at the balljoint, tie rod, and tie rod ends, if they need to be replaced now is a good time. Also, if you are leaking transmission fluid from the halfshaft seal, make sure you have one or two of the Timken 3622 seal on hand.
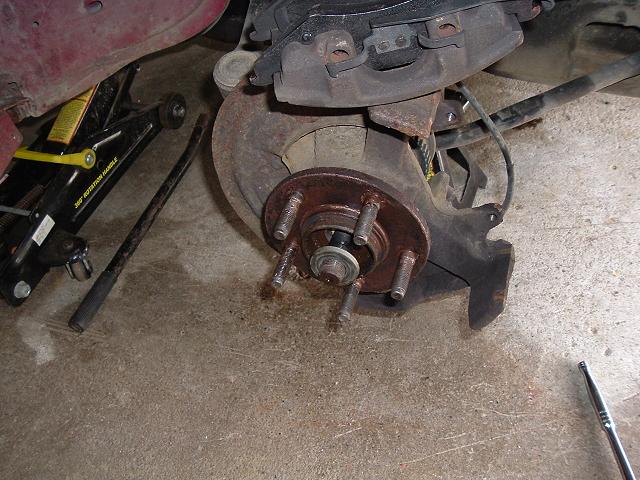
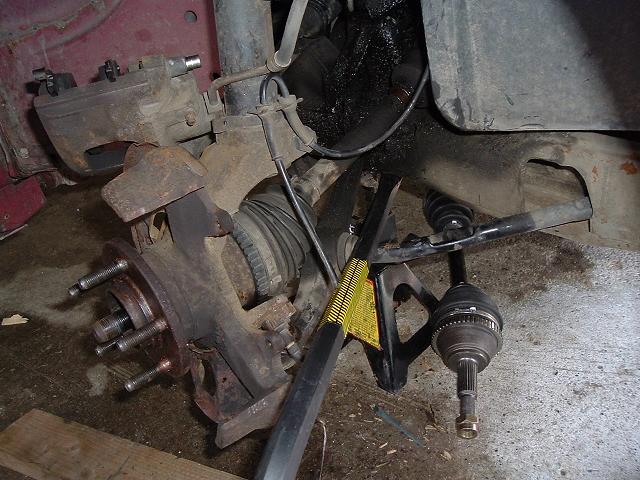
1. NOTE: Before doing anything, you can loosen the 30mm hub nut as shown later in this step, it will be easier before jacking up the car. Loosen the lug nuts, safely jack up the car, remove the wheel and place the car on jackstands. You will probably want to use two so that the front of the vehicle is high enough to work under. NOTE: You do not have to remove the brake caliper, however it makes it much easier to get the halfshaft out of the hub if you can use a jaw puller. To do this you will have to remove the braker rotor as shown in these steps. Remove the brake caliper by loosening the two T-40 Torx bolts here.
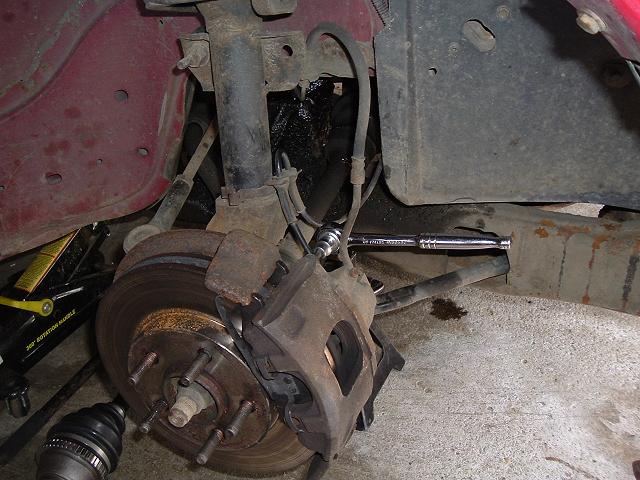
Then remove the loaded caliper and set it safely on top of the whole assembly. Remove the brake rotor. For more info on removing the brakes, see the SHO Front Brake Guide
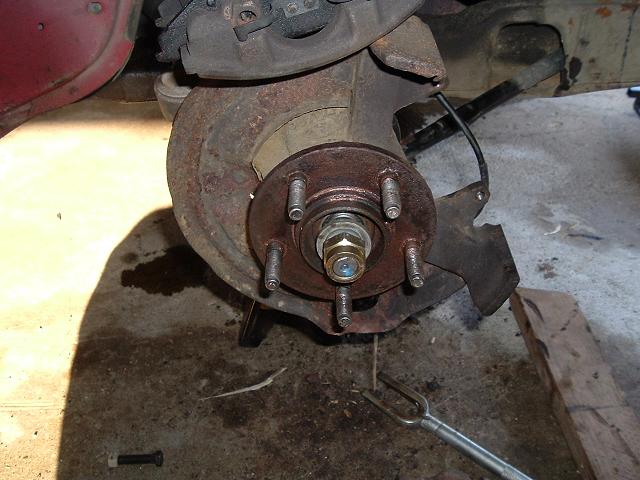
You will now have to remove the 29mm locknut that is attached to the end of the halfshaft. You can pick up a 30mm deep socket from most any auto parts store for this very task. You will also have to put a bar through the lug nuts to stop the halfshaft from spinning.
Remove this washer as well. The new halfshaft will have a new locknut, (which cannot be reused) but you will reuse this washer. Don't loose and don't forget to put it on when you install the new shaft.
2. Most instructions you read will tell you to remove the ABS sensor located here. Personally, I could not get it out for the life of me, and I had no trouble replacing the halfshaft with it there. So it's up to you.
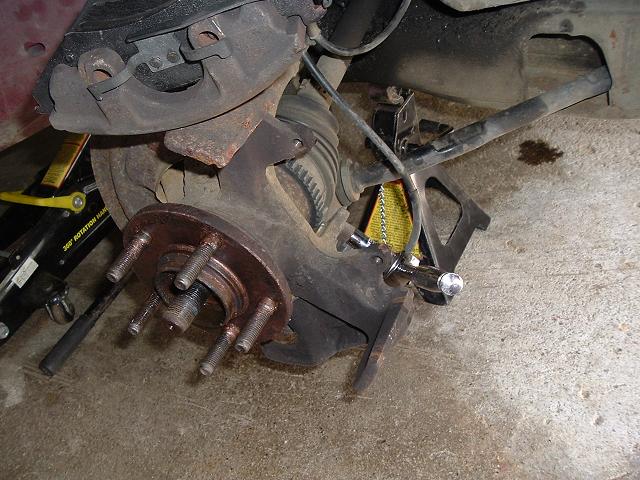
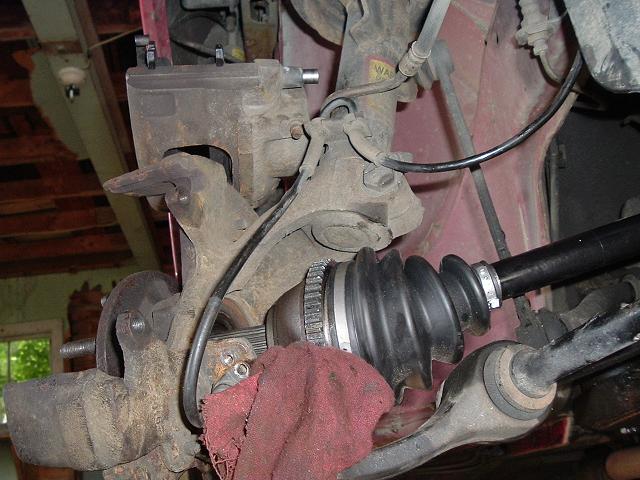
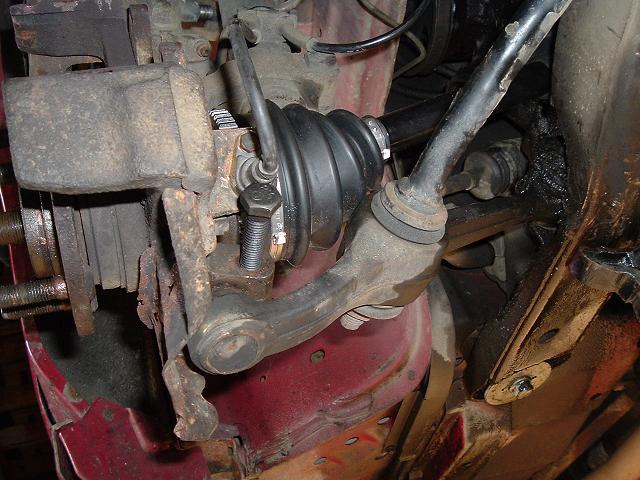
3. Now remove the balljoint pinch bolt. Loosen the locknut located here, then tap the end of the bolt to get it out.
4. Once the pinch bolt is removed, seperate the balljoint pin from the spindle using a balljoint seperator. You'll have to tap the seperator in there and then pry down on it. Be very careful not to rip the balljoint boot.
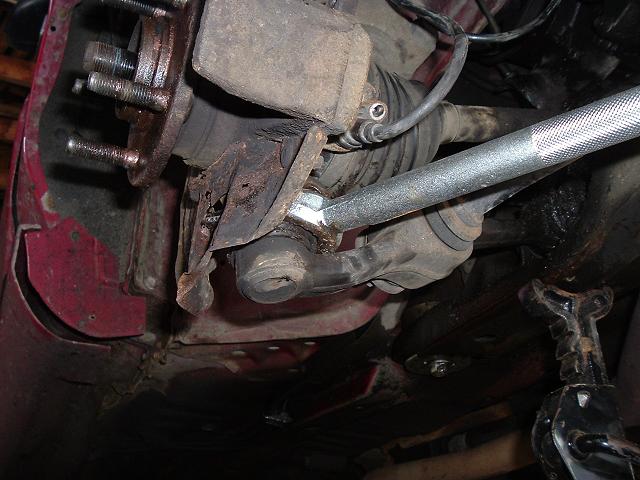
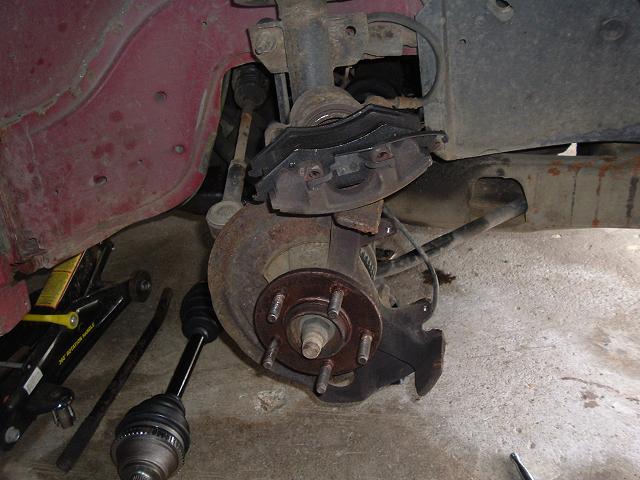
5. Now using a large prybar, pry down on the lower control arm (the balljoint is at the end of the LCA) and swing the spindle off and away from the balljoint. Place a rag or something over the balljoint boot to protect it. If you rip it, you will not be able to buy a new one and will have to replace the whole LCA (about $90).
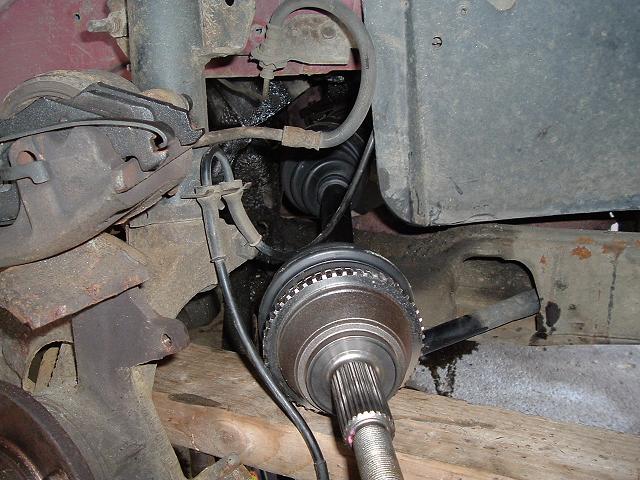
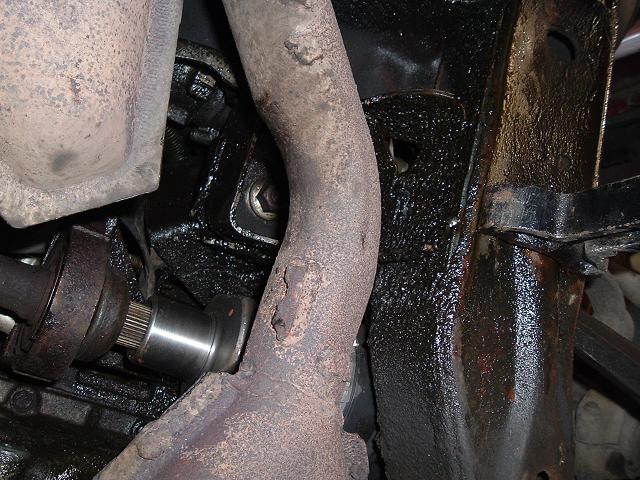
6. Pry the halfshaft out of the intermediate shaft using a prybar or large screwdriver at this location. (In this pic the halfshaft has been removed.)

While prying it out you may need to push the spindle away. You can have an assistant do it or do it with your foot like this:

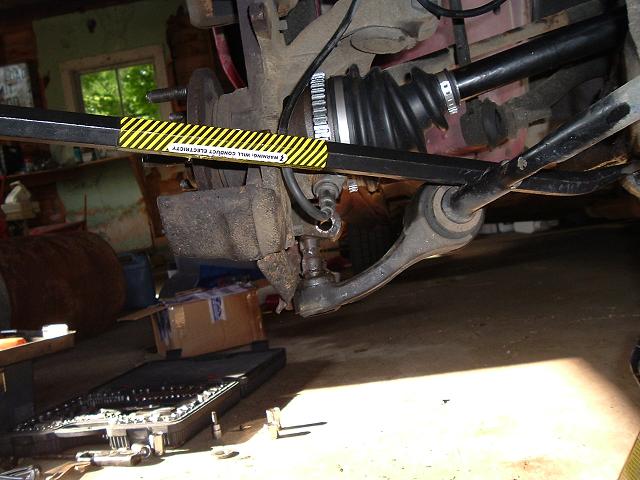
Once you have the halfshaft seperated, support it underneath or hang it with a piece of wire so it doesn't fall while you work on the other end.
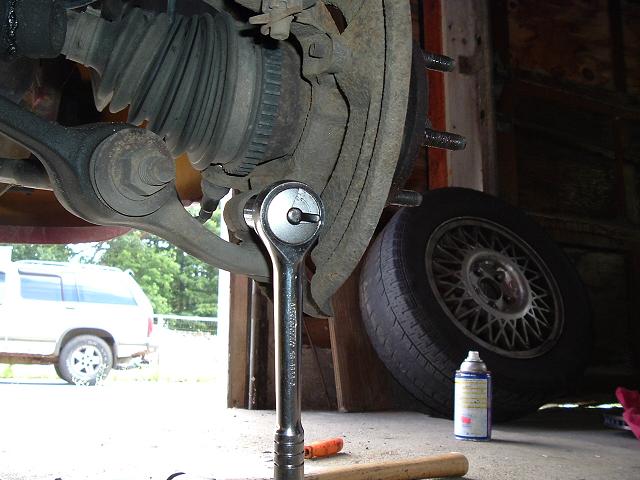
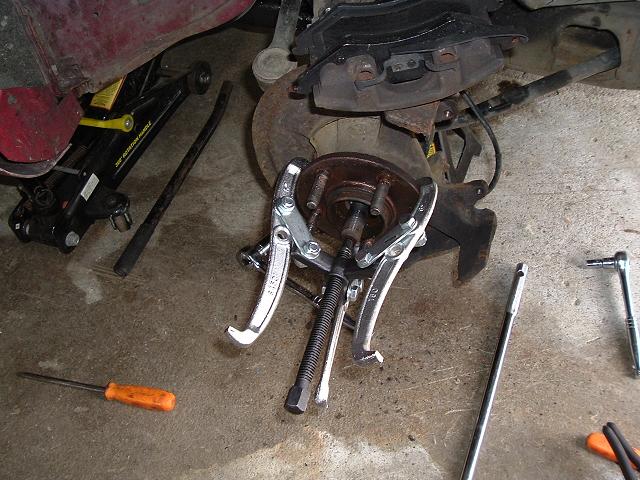
7. Now press the halfshaft out of the spindle. You may very well be able to do this by hand, or you can use a jaw-type puller, like this:
And remove the halfshaft. (new halfshaft shown)
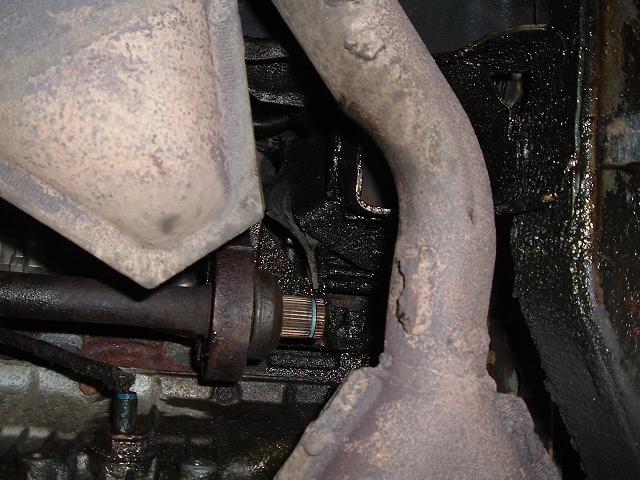
8. Here is the intermediate shaft, notice the circlip that sits at then end of it. This clip must be replaced. You can remove it using a couple of screwdrivers, then push the new one on. (new clip shown)
9. At this point you may move to the Halfshaft Seal Replacement Guide if you are leaking transmission fluid from the seal.
Now install the new halfshaft onto the intermediate shaft. Carefully line up the splines and push it on. Do not hammer the shaft on as this will damage it. Don't worry if you can't press it on all the way, it will go on the rest of the way later.
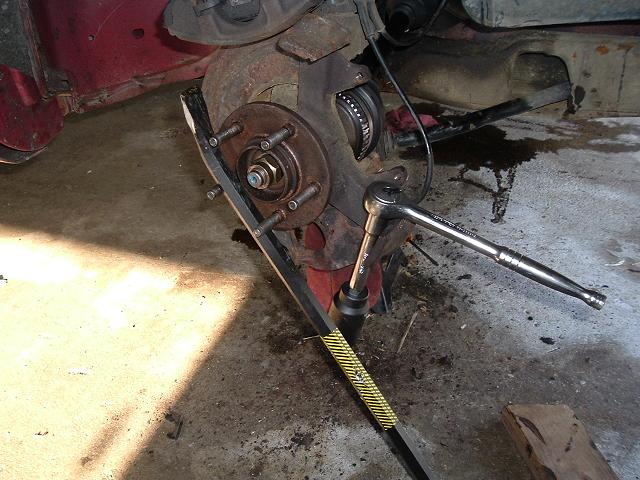
10. Now carefully move the halfshaft into position to go into the spindle, watch out for the ABS sensor (if you didn't remove it). Note the rag protecting the balljoint boot.
11. Once you carefully line up the splines with the spindle, you can install the washer and the new locknut, and begin tightening the nut. This way you can pull the halfshaft into the spindle.
12. Before reinstalling the balljoint, make sure that the boot is full of grease. (It may have oozed out when you removed it from the spindle. Note: in this picture the boot is missing) Now use a prybar to push down the LCA (lower control arm) enough to push the spindle in towards the engine. Once you get it lined up above the balljoint pin, you should be able to wiggle the pin in there. You might need to tap on the bottom of the balljoint a little. This should also press the halfshaft onto the intermediate shaft the rest of the way.
13. Now once the pin is all the way in, install the new pinch bolt. You will likely have to tap it in with a hammer. Make sure you put it in the right way, as shown in this picture. Also reinstall the ABS sensor if you took it out.
Tighten the 18mm balljoint nut up all the way and torque it to 40-55 ft/lbs.
14. Now you can tighten up the halfshaft nut all the way. The nut needs to be torqued to 180/200 ft/lbs, however, it will be much easier torque once you install the wheels and lower the vehicle, so wait until then. Go under the car and check to make sure that the halfshaft is fully installed onto the intermediate shaft.
15. Install your brake rotor and caliper, tighten the two T-40 Torx bolts. For more info on installing the brakes, see the SHO Front Brake Guide
Then install the wheel, lower the vehicle, torque the lug nuts, and make sure that the hub nut has been torqued all the way to 180/200 ft/lbs. You should be good to go!