 |
 |

Ball Joint (LCA) Replacement Guide
The symptoms of
worn ball joints are loose steering and knocking or rattling sounds
from the front end. You can check for a bad ball joint by jacking up
the car, grasping the tire at the 12 o'clock and 6 o'clock positions,
and trying to wiggle it back and forth. Play at this position will be
due to bad ball joints.
You will need:
Lower control
arms, either Moog K8577 (Driver side) or Moog K8579 (Passenger side)
Optional, recommended, Strut Rod Bushing Kit, Moog K8516
24mm Socket
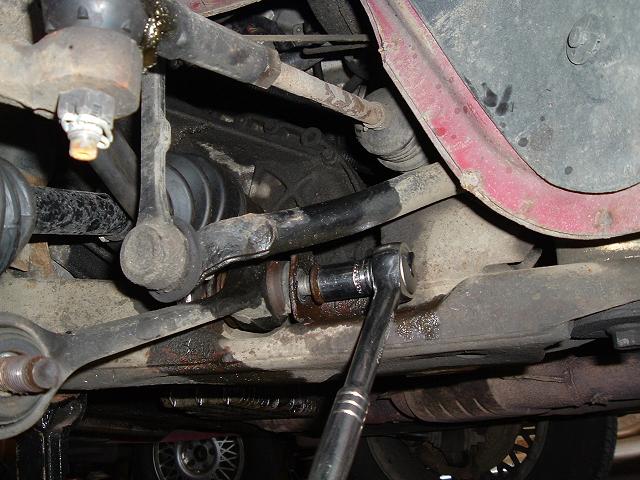
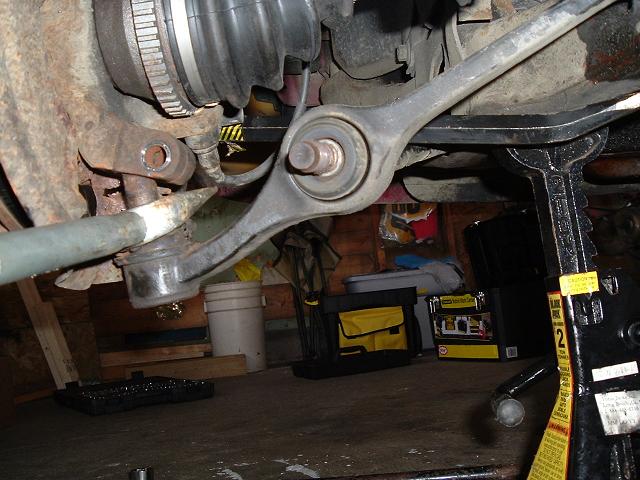
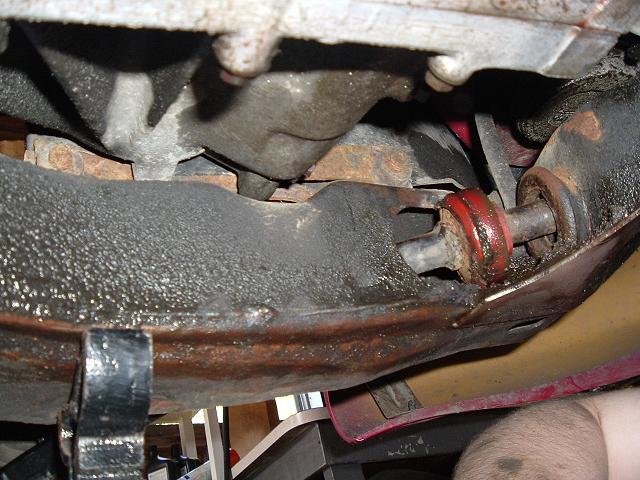
1. Loosen the lug nuts, jack up the vehicle and safely support it with
jackstands, and remove the wheel. Remove the nut from the LCA (Lower
Control Arm) bracket bolt, where it connects to the subframe. You will
likely need to hold the nut and back the bolt out with a rachet as
shown here. Remove the bolt. You will have to pry/tap it out.
2. Remove the
strut rod to LCA nut. The manual says to use an open end wrench on the
flat area of the strut rod, but this did not work for me. I used a
large wrench on the strut rod to subframe nut here
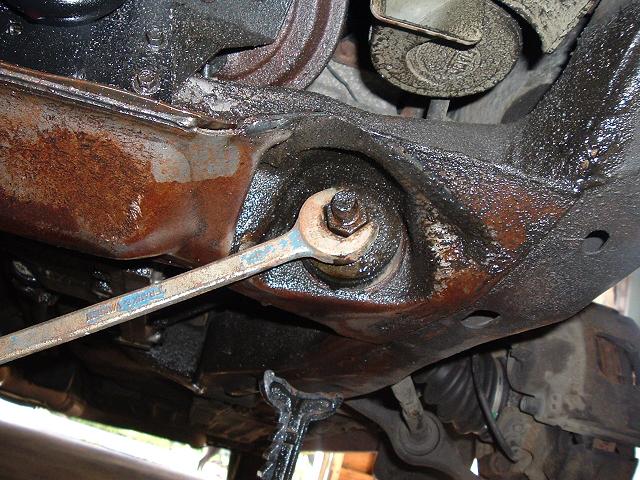
And then was
able to loosen the nut here. However, if you may need to use a wrench
on the strut rod if that doesn't work for you. Remove the nut and the
metal plate.
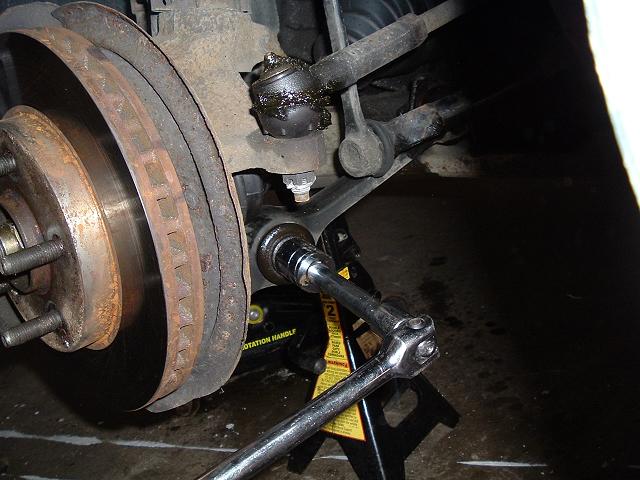
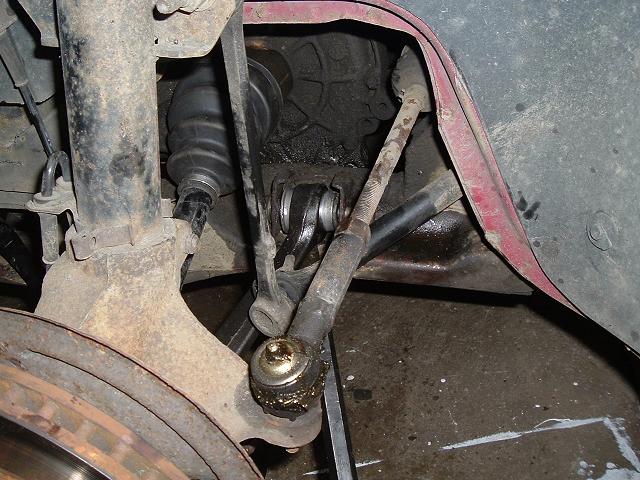
3. Now remove
the knuckle pinch nut and bolt. You probably have to hold the bolt
still with a wrench and the remove it with a punch (or a screwdriver).
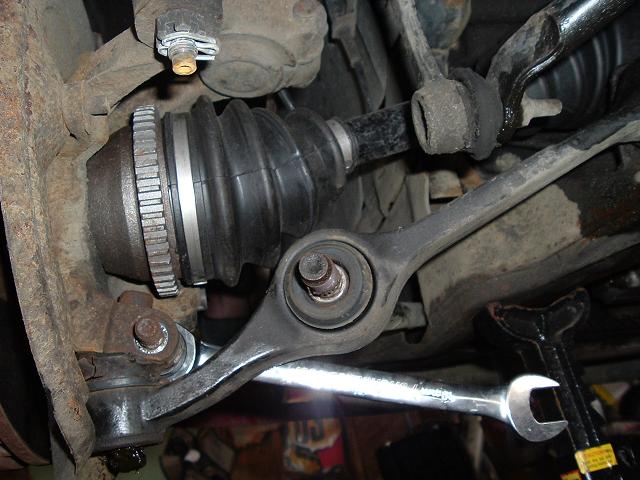
4. Then
separate the ball joint from the knuckle using a balljoint separator
tool. It is possible to separate it using a long prybar on the strut
rod, but doing so doesn't always work. For the couple of dollars that
you will pay for the tool it's worth it, and you will also be able to
use it to separate tie rod ends.
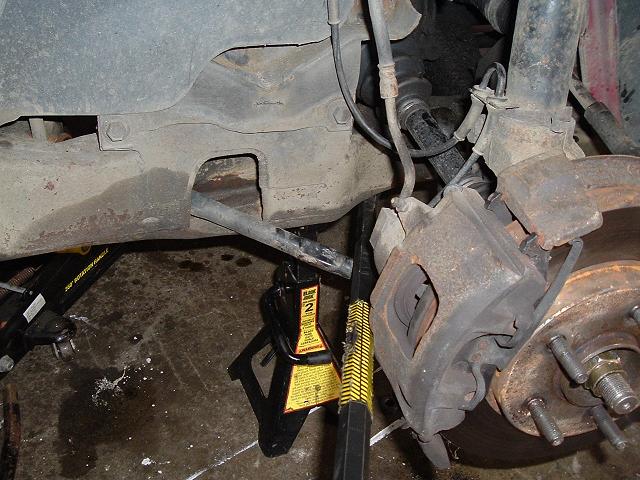
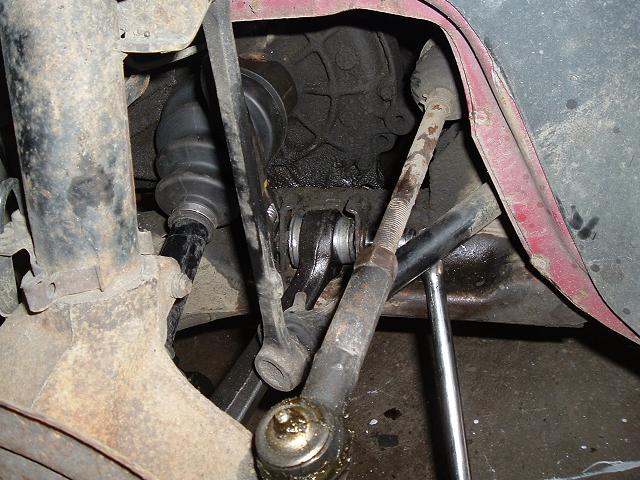
5. Now use a
prybar on the strut rod and pry the LCA down. This will allow the
knuckle to swing free. Push the whole hub assembly towards the front of
the vehicle. NOTE: Be careful not to pull outwards on the hub assembly
because this could separate the internal parts of the CV-joint, causing
it to fail.
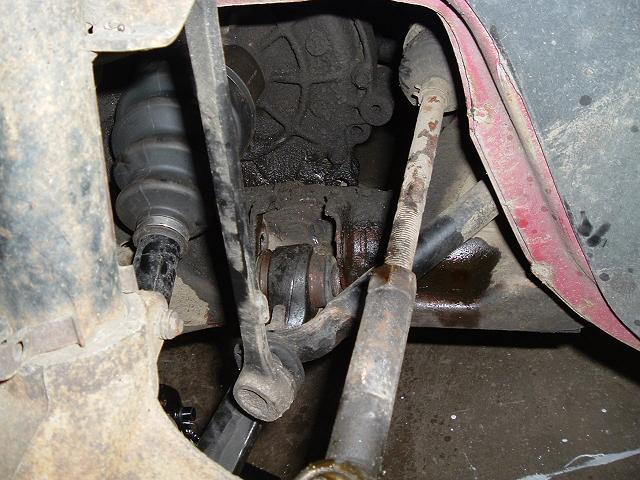
6. At this
point you may need to remove either the top or bottom sway bay link
nuts for clearance. I believe this is only the case if you have the
original cast endlinks on your car. Now using a prybar, remove the LCA
from the bracket in the subframe as shown here. The LCA will now be
loose. Now pull it off of the strut rod.
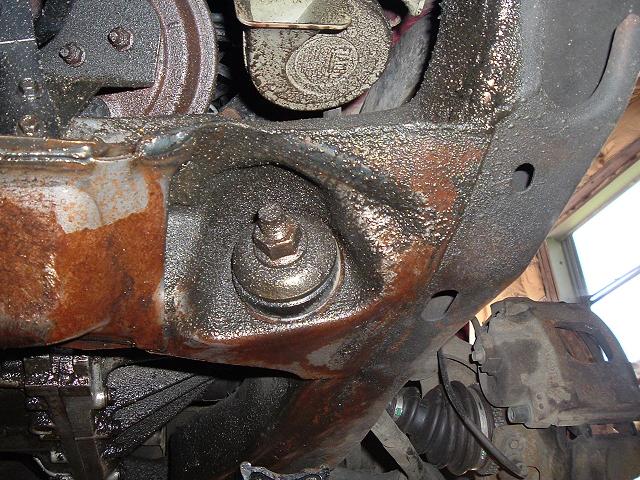
7. (Skip this
step if you are not replacing the strut rod bushings) Now remove the
strut rod to subframe nut. Here you will have to hold onto the flat
part of the strut rod with a wrench to stop it from turning. Remove the
metal plate and bushing.
8. The strut
rod will no be free, but you will not be able to remove it. The second
part of the bushing is inside the subframe and it tightly pressed onto
the strut rod. You will be able to access it here. Most likely you will
have to pound the old bushing and plate off with a hammer. This is the
same place that you will install the new bushing.
9. Here is the
new metal plate and bushing installed. You can see they have been
liberally greased. This will prevent squeaks and corrosion. You won't
actually be able to install the strut rod as it's shown here, you have
to do it in the location shown in the above picture, however here is a
good view of how they go together. Install the new bushing and plate.
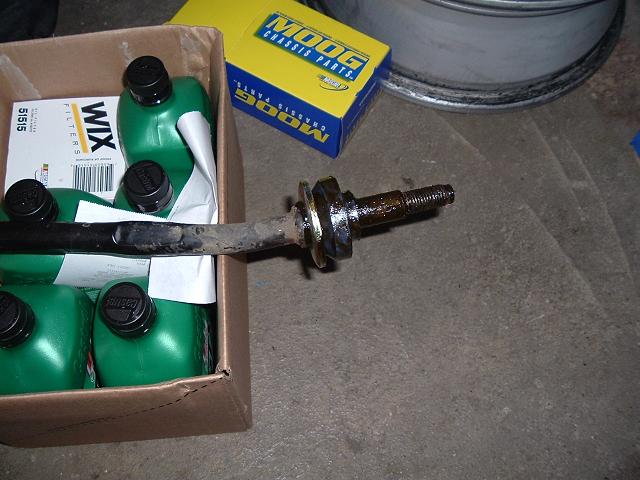
Then install
the front bushing and plate, and hand tighten the nut.
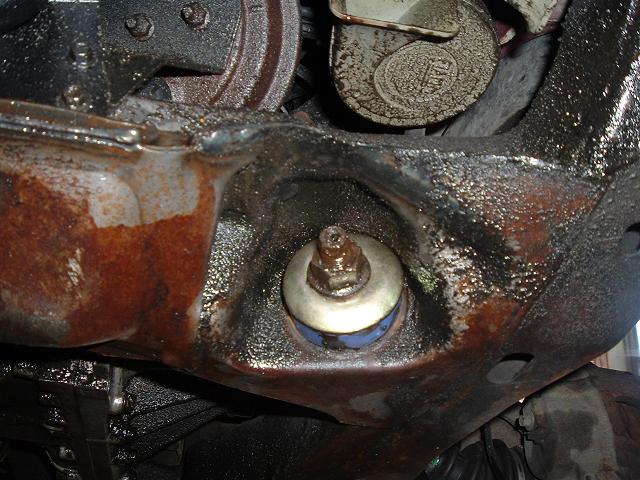
10. Install the
grease fitting and grease boot onto the new balljoint. Then press the
LCA onto the end of the strut rod and tighten the nut. Tighten the nuts
at each end of the strut rod, in the pics above and below this text, to
70-95 ft/lbs. You will have to use a wrench on the flat parts of the
strut rod to keep it from turning.
Install the LCA
into the subframe bracket. You will probably have to tap it in there
with a hammer.
Now line up the
nut and bolt, which will take some wiggling around to get the bolt to
go all the way through. A hammer and prybar will be helpful to position
the LCA. Then tighten it up. You will probably find it easiest to hold
the nut with a wrench and use a socket on the bolt. Tighten the bolt to
73-97 ft/lbs.
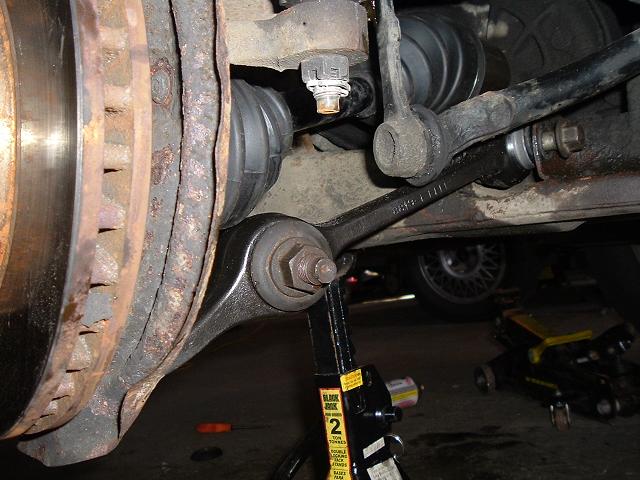
11. Use a prybar on the strut rod to press the LCA down, then swing the knuckle over and insert the balljoint into it. Then install the new pinch bolt and nut, and tighten them to 40-53 ft/lbs.

Now reinstall
the swaybar link bolt if you removed it in step 6, fill the new
balljoint with grease using a grease gun, install the wheels, lower the
vehicle, and torque the lug nuts.