 |
 |

Front
60k Page
Three
60k Parts List Page One Page Two Page Three
25. We will now replace the timing belt sprocket. Sometimes it will slide on with no problem, but that is pretty rare. Do NOT hammer the sprocket on. You can heat it up using either a propane torch or even set it on a heater. Once it is hot enough, you will be able to slide it on with no problem, using gloves. Notice that the sprocket is not pushed on all the way, this is to let it cool so it doesn't damage the crankshaft seal. Once it is cooler slide it on all the way.
26. Now we will line up all the timing marks. First line up the two camshaft sprockets. You must line up the indent on the cam sprocket with the line on the rear timing belt cover. The one on the right is easy because it is between the compression of the springs, but the one on the left is a little harder because it is in the middle of a compression. You can turn the sprockets by hand (using gloves!) to line them up.
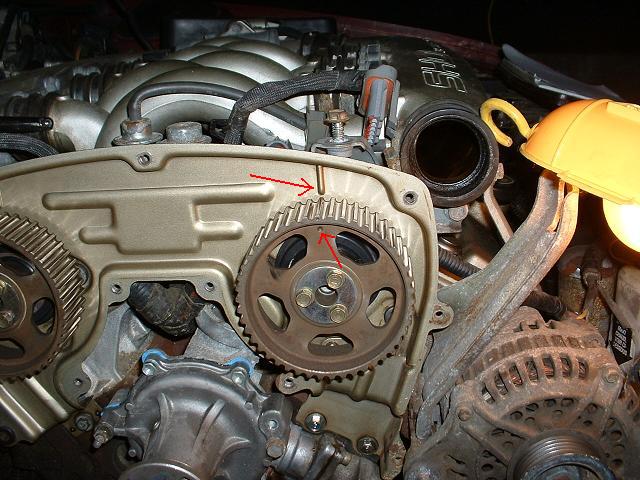
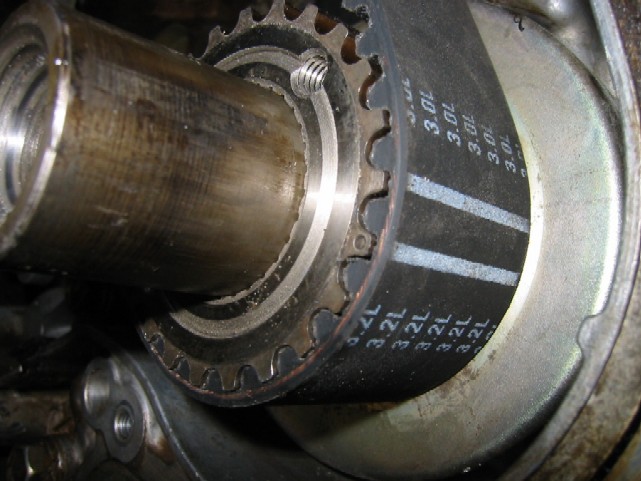
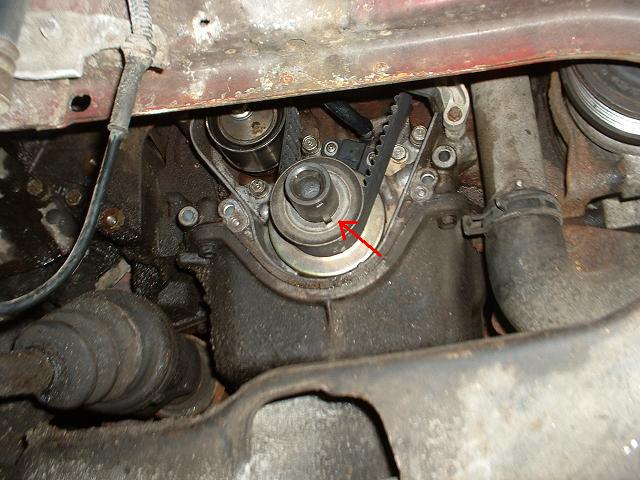
Then we'll line up the timing belt sprocket on the crankshaft. There is an indent similar to the ones on the cam sprockets that needs to be lined up with the line on the housing, shown here

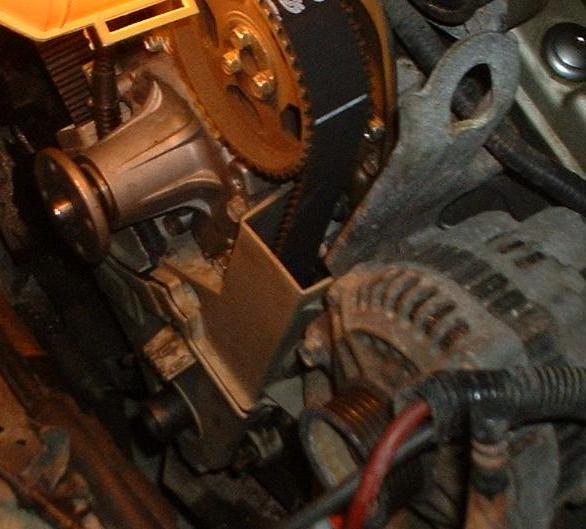
27. We are now ready to install the timing belt. There are three white lines on the belt, line up these two with the cam sprocket indents and the line on the rear timing belt cover, as seen here. Also, the writing on the belt should be readable from the driver's side fender. (i.e., it is upside down in the pic.)
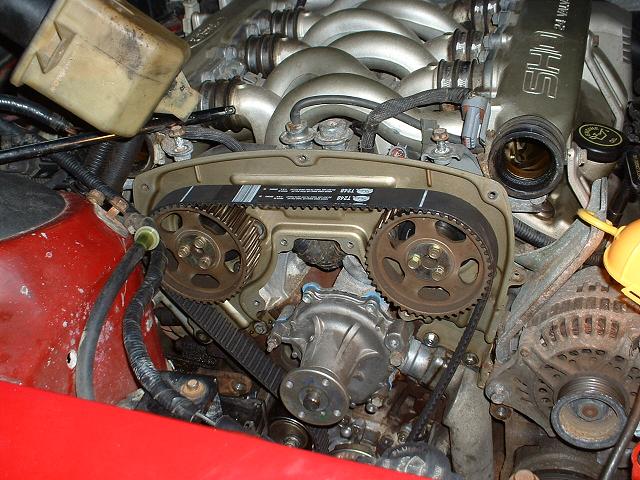
And line up the correct white line with the indent on the timing belt sprocket and the line on the housing. There are two lines, one for the 3.0 (MTX) and one for the 3.2 (ATX). Make sure you use the right one!
ATX:
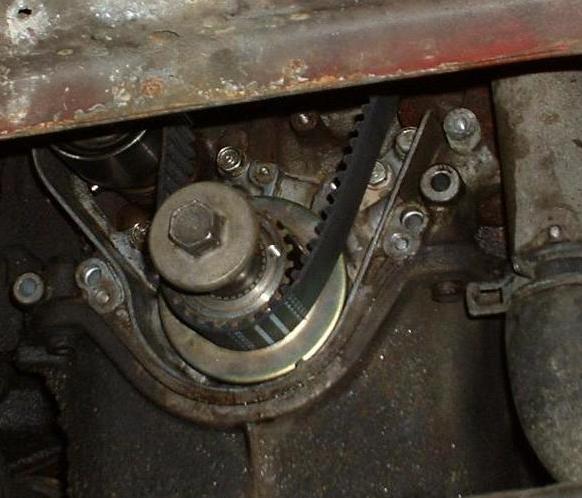
28. The following steps are different for the ATX and MTX, the different steps will be shown. Once you are sure the timing belt is on all the way, and it is on correctly, loosen the 14mm bolt holding the timing belt tensioner in place. It will tighten against the belt. (MTX)
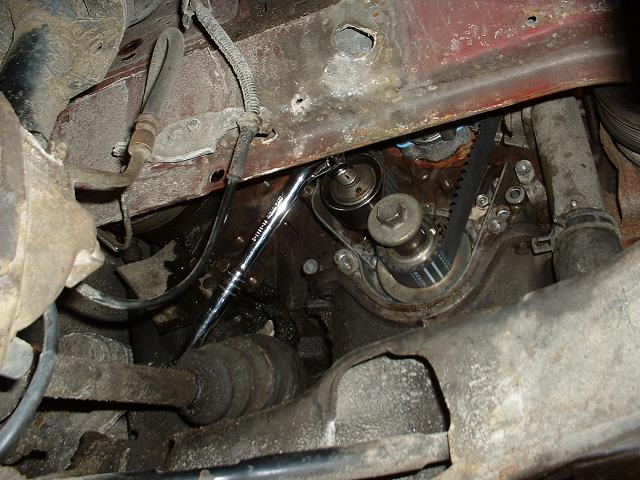
Then using an 8mm hex key, tighten the tensioner even further against the belt. It will be pushed back. Do this a couple of times to make sure the tensioner is secure against the belt. (MTX)
You can now tighten the 14mm bolt. You don't want this one coming loose. Be sure to torque it to between 24 and 38 ft/lbs (MTX)
Now for the ATX:
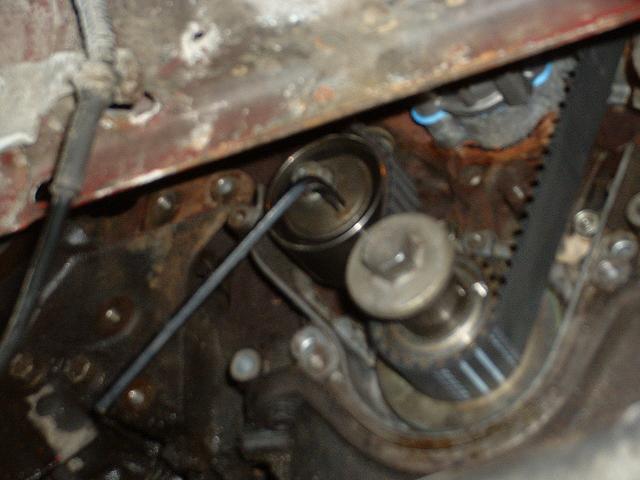
After installing the timing belt and aligning the timing marks on the belt to match the pulleys, simply pull out the Allen wrench to add tension back onto the timing belt. (ATX)
29. We will now install the middle timing belt cover. First pre assemble the CPS and grommet into the middle cover to make it easier for you later, like this
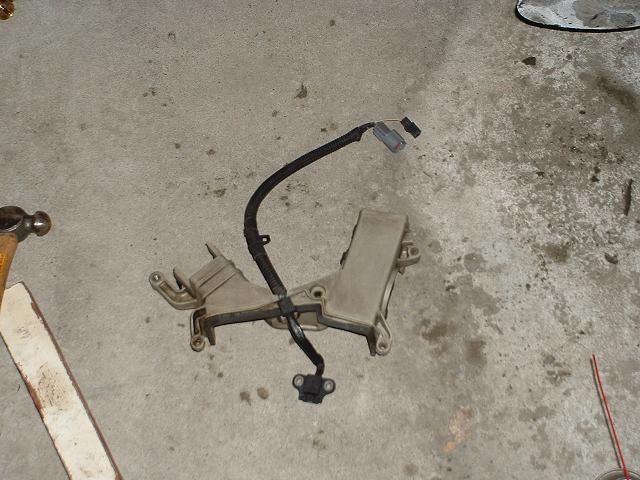
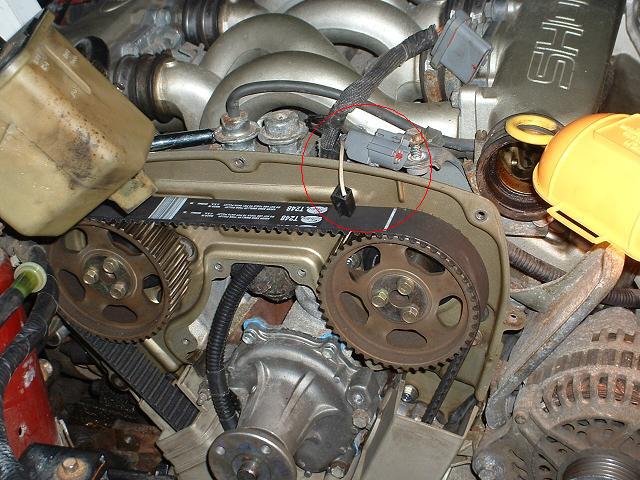
Then install the cover with the two 8mm bolts. Tip: the left side of the cover goes behind a part of the rear timing belt cover. Now route the CPS wiring up behind the rear timing belt cover. This can be a little difficult. It may help to hold the wiring harness out of the way with a long screwdriver while you push the bigger of the two CPS plugs up through. You could also tie a string or wire to the plug and use that to pull it up through. Go ahead and plug in the CPS so that you don't forget later.
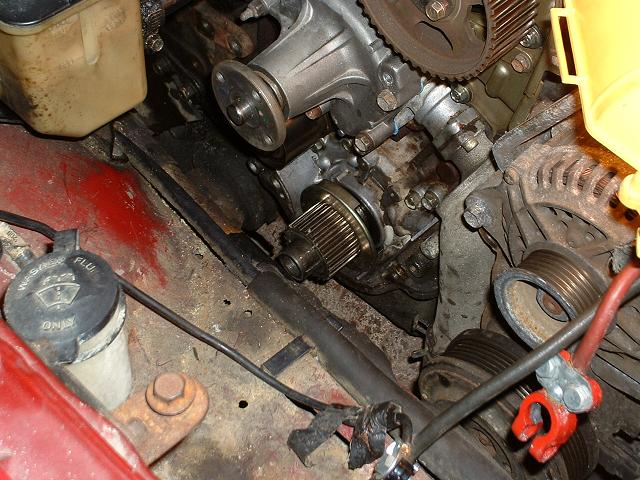
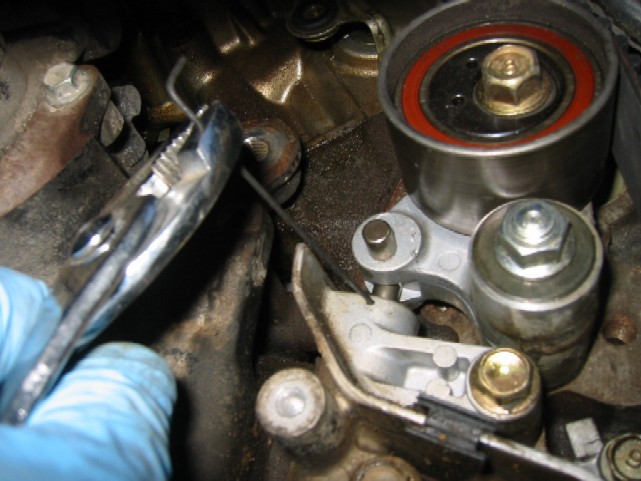
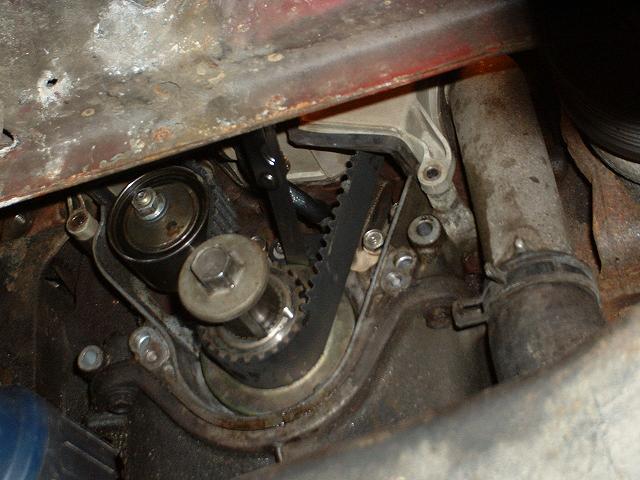
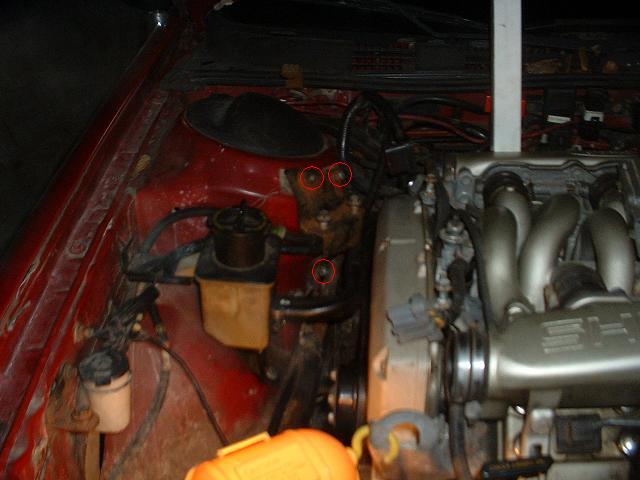
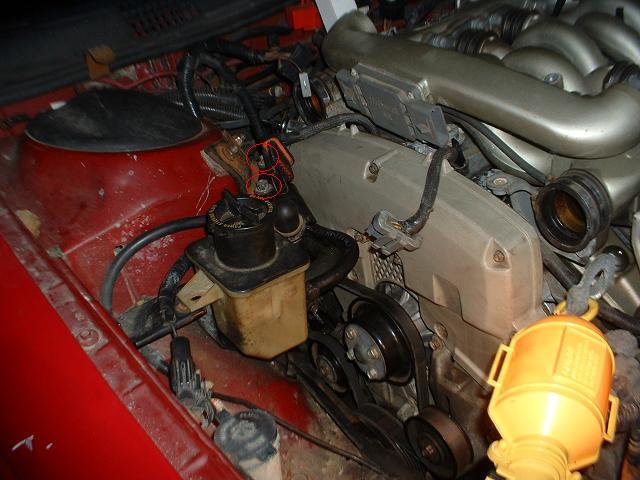
30. Now install the CPS itself. There are two phillips screws or 5.5mm hex bolts holding it on. If you cannot get the CPS in, one of the metal vanes from the timing belt sprocket may be in the way. You'll have to rotate the crank until you can get it in. Either use the crank bolt if you still have it installed, or you can slip the engine damper on a little bit and turn it by hand. Start the screws but don't tighten them all the way yet. You must gap a space between the metal vanes on the timing belt sprocket and the CPS to .03 inches, or .76 mm, shown here.
Now remove the crank bolt (by putting the car in 5th gear or using a strap wrench) and install the washer that goes over the timing belt sprocket. You'll know which way it goes by the pattern on the washer made by the sprocket.
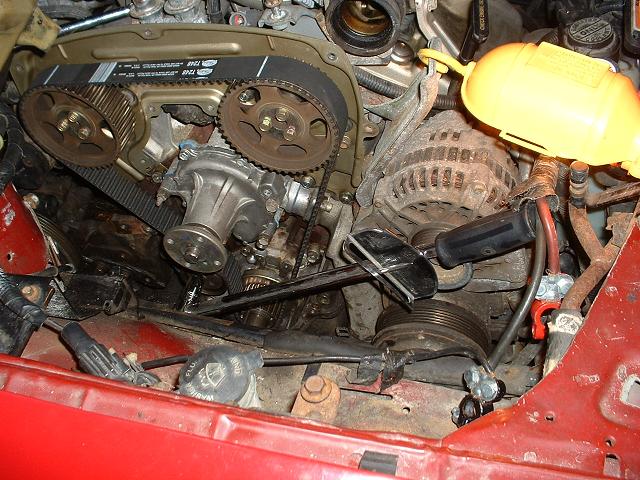
31. Install the lower timing belt cover by tightening the four 8mm bolts.
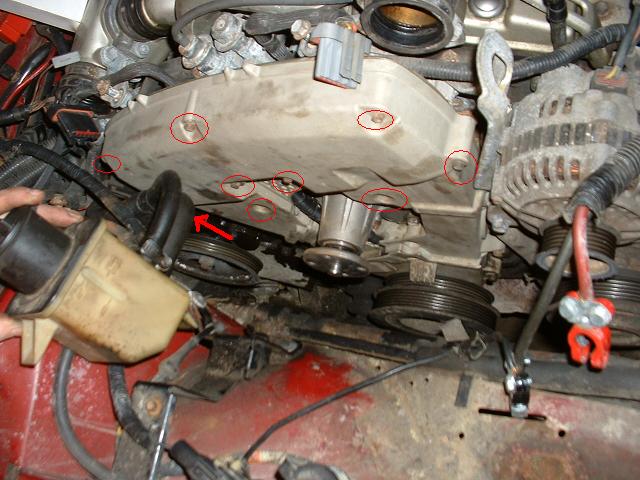
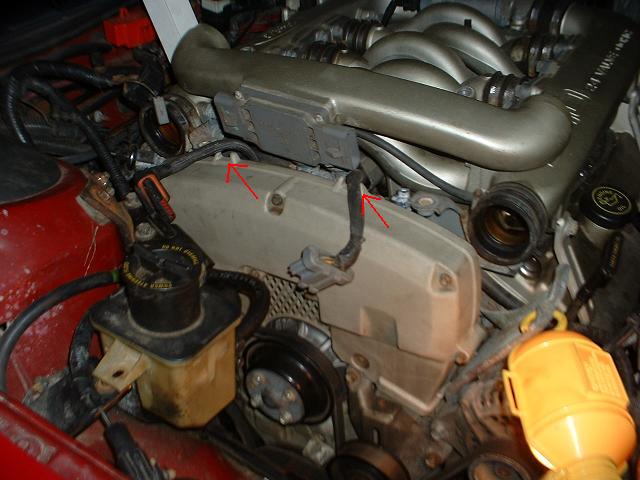
And the upper timing belt cover with the nine 8mm bolts. The ninth is just out of view where the arrow is pointing.
Now we will install the crankshaft damper, which is the crank pulley for both accessory belts. Heat up the damper the same way as the timing belt sprocket. There is no need to hammer on the crankshaft damper! There were a bunch of marks on the crankshaft of this car where someone had hammered it on. Don't do this! Once the damper is hot enough, it will slide right on far enough that you can thread the crank bolt in and use that to pull it in the rest of the way.
Now to tighten the crank bolt. It is very important that this bolt be torqued correctly!!! If you don't you will have big problems down the road. One method of doing it is shown here. The car is in 5th gear, the left front tire is on the ground, and a 1/2 inch breaker bar is wedged in-between the lug studs to stop the wheel from turning. The parking break is on. This will stop the crank from turning while you torque the bolt. Tighten the bolt as much as you can with a ratchet, then use your torque wrench and tighten it to at least 120 ft/lbs.
32. Install the two accessory belt tensioners. The one on the left has three 12mm bolts, the one on the right has two 12mm bolts and one 14mm bolt.
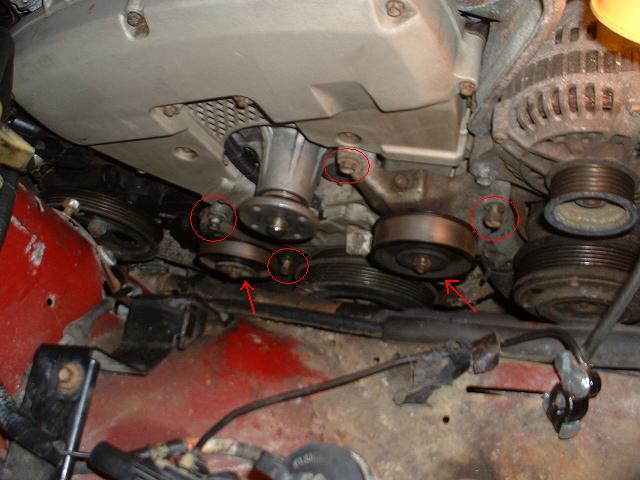
Then install the waterpump pulley, making sure there is no debris inside so that it goes on straight. You can wait until later to tighten the bolts all the way, or if you have a strap wrench you can do it now.
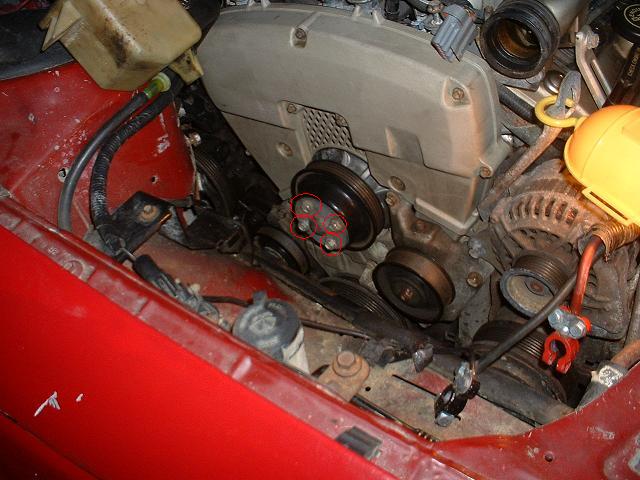
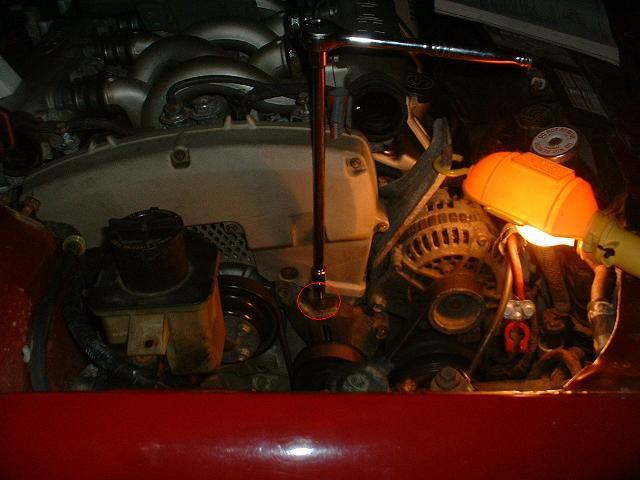
33. Install the accessory belts and tighten them. Start with the narrow one. Once it is on all the pulleys, use a 5mm hex on a long extension to tighten the belt up by turning the bolt clockwise. How tight should it be? There is a special tool for measuring belt tension, however most people don't have one. Put simply, you want them as loose as possible without slipping. Tighten the 14mm tensioner nut well, but don't overdo it. Once this belt is tight, tighten the four power steering pump bolts if you haven't already.
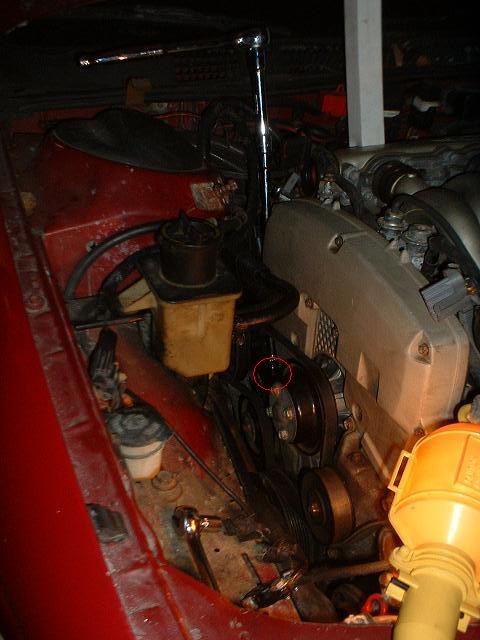
Move on to the wider belt the same way. Tighten the 14mm tensioner nut.
34. Install the engine dampener. Start with the bracket that connects to the strut tower. There are three 13mm nuts.
Then install the damper itself. The lower bracket has two 10mm bolts, the upper one has two 13mm bolts. Connect the lower one first. Here you can see the dampener installed (behind the power steering reservoir)
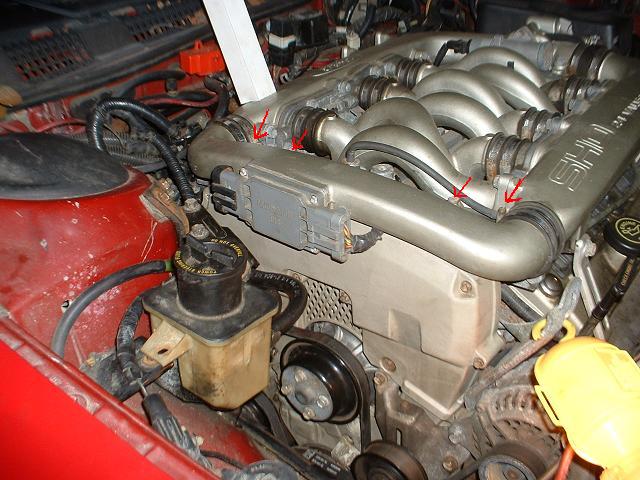
35. Install the intake crossover tube. Make sure that the DIS wires are going through these tabs
Then install the crossover tube with the two 14mm bolts, and tighten the hoseclamps. Plug in the DIS. Also reinstall the 8mm bolt that holds down the power steering reservoir.
Reinstall the battery tray, hook up the battery, say a little prayer, then start it up! Now go enjoy your SHO! ;)
60k Parts List Page One Page Two Page Three