 |
 |

Tie
Rod End Replacement
Pictures and Guide by Joshua Langevin
Symptoms of loose tie rod ends are looseness in the steering, uneven tread wear, etc. To check for them, jack up your car just enough to get one of the front wheels off the ground, grasp the tire at the 9 o'clock and 3 o'clock positions, and push/pull each way (as if trying to turn the tire back and forth) and check for play or looseness. If you can do this at the same time as an assistant looks at the tie rod end, you will be able to see if it is wiggling around in there. Another cause of play when doing this test is a worn balljoint.
Replacing tie rod ends is a very simple job and should take only about 30 minutes.
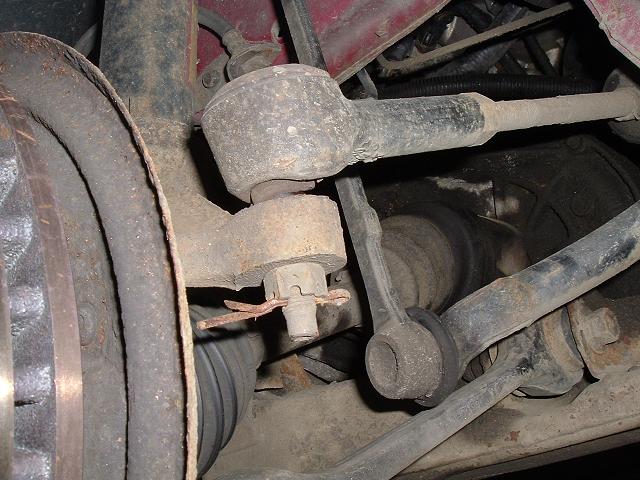
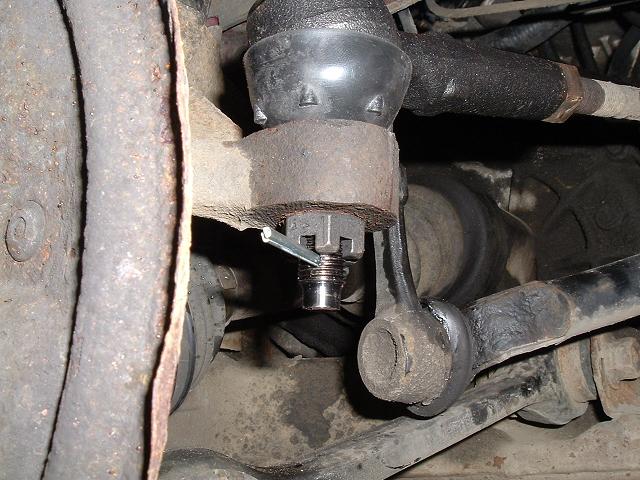
1. Loosen the lug nuts, jack up the side of the car that you're working on, and remove the wheel. Support the car with a jackstand. Locate the cotter pin that goes through the tie rod end bolt and straighten it, then pry/push/pull it out. Then remove the castle nut.
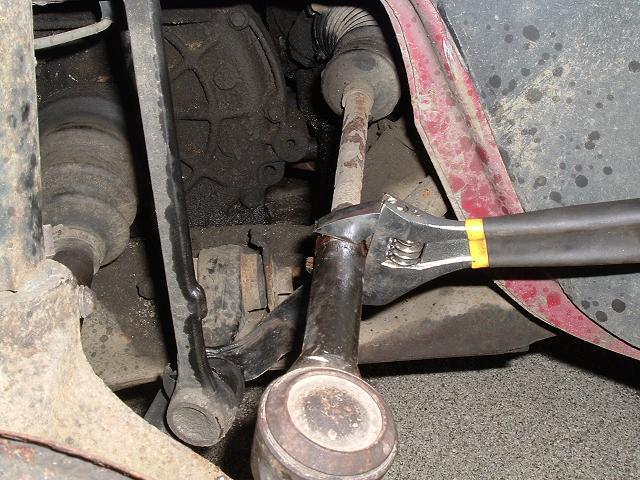
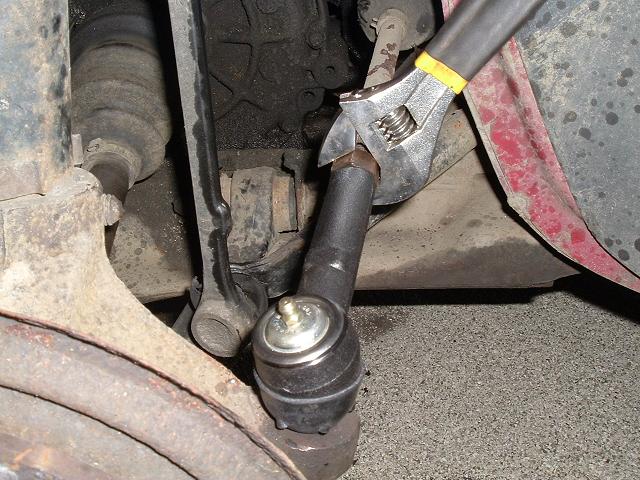
2. Now locate the nut that tightens up against the tie rod end, and loosen it. NOTE: "Loosening" it will require turning it clockwise, turning it away from the tie rod end.
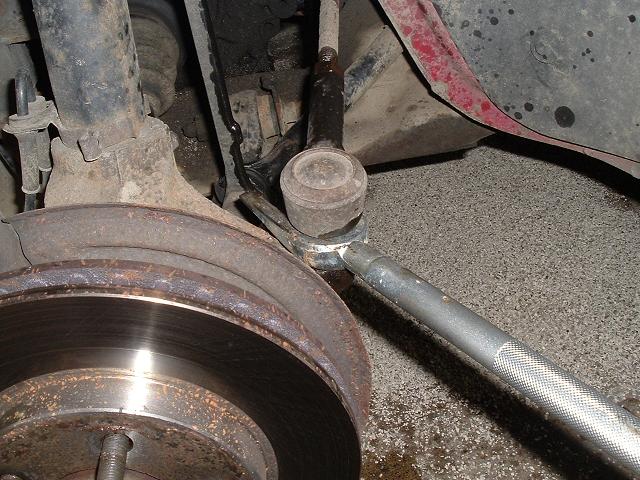
3. With that nut loosened, use a tie rod seperator tool to get the tie rod end out of the knuckle. Alternately, you can use a jaw type gear puller here, or you can leave the castle nut on there a little bit and hammer on the bottom of it, or hammer on the upper part of the tie rod end in an upward fashion. (Just spend the $5 for the tool and do it right, will ya? :D )
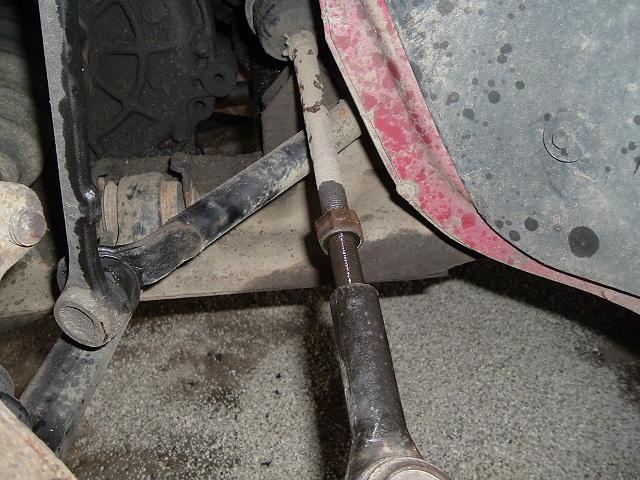
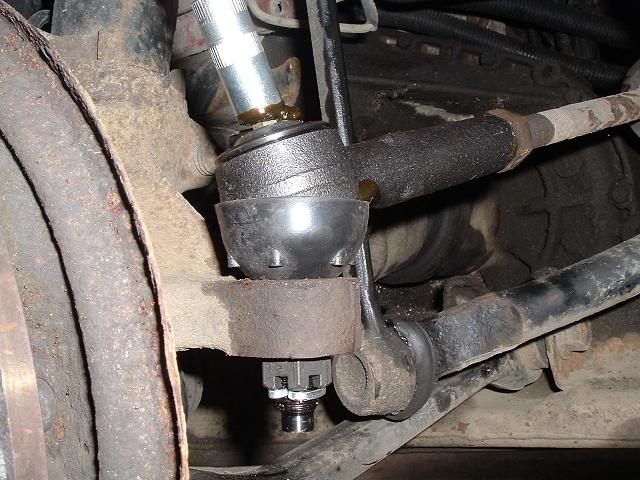
4. Now turn the whole tie rod end counter-clockwise, screwing it off the tie rod. Important: Count how many turns you make and remember the number, so that you install the new tie rod end correctly.
5. Install the new tie rod end, being sure to screw it on the same number of turns as the one that you removed. Go ahead and pop it into the knuckle. Then tighten the nut.
6. Now install the new castle nut and cotter pin. Bend the cotter pin so that it goes tightly around the bolt, just like the one that you removed.
7. Lastly, use a grease gun to fill the tie rod end up with quality grease, until it starts to ooze out. Remember to grease the joints often for best results. (I try to at every oil change.)
Install the wheel, lower the vehicle, torque the lug nuts, and you're all set to go!
Symptoms of loose tie rod ends are looseness in the steering, uneven tread wear, etc. To check for them, jack up your car just enough to get one of the front wheels off the ground, grasp the tire at the 9 o'clock and 3 o'clock positions, and push/pull each way (as if trying to turn the tire back and forth) and check for play or looseness. If you can do this at the same time as an assistant looks at the tie rod end, you will be able to see if it is wiggling around in there. Another cause of play when doing this test is a worn balljoint.
Replacing tie rod ends is a very simple job and should take only about 30 minutes.
1. Loosen the lug nuts, jack up the side of the car that you're working on, and remove the wheel. Support the car with a jackstand. Locate the cotter pin that goes through the tie rod end bolt and straighten it, then pry/push/pull it out. Then remove the castle nut.
2. Now locate the nut that tightens up against the tie rod end, and loosen it. NOTE: "Loosening" it will require turning it clockwise, turning it away from the tie rod end.
3. With that nut loosened, use a tie rod seperator tool to get the tie rod end out of the knuckle. Alternately, you can use a jaw type gear puller here, or you can leave the castle nut on there a little bit and hammer on the bottom of it, or hammer on the upper part of the tie rod end in an upward fashion. (Just spend the $5 for the tool and do it right, will ya? :D )
4. Now turn the whole tie rod end counter-clockwise, screwing it off the tie rod. Important: Count how many turns you make and remember the number, so that you install the new tie rod end correctly.
5. Install the new tie rod end, being sure to screw it on the same number of turns as the one that you removed. Go ahead and pop it into the knuckle. Then tighten the nut.
6. Now install the new castle nut and cotter pin. Bend the cotter pin so that it goes tightly around the bolt, just like the one that you removed.
7. Lastly, use a grease gun to fill the tie rod end up with quality grease, until it starts to ooze out. Remember to grease the joints often for best results. (I try to at every oil change.)
Install the wheel, lower the vehicle, torque the lug nuts, and you're all set to go!