 |
 |

Beginner's
Guide: Changing the Engine Oil - V6 Engine
Pictures and Guide by Joshua Langevin
This is a step by step guide to changing
the oil on an SHO. The steps here are the same for every car, with minor
variations. Changing your engine oil frequently is the best thing for your
engine and will keep it running happy for years to come.
What kind of oil should I use? Which oil filter should I use?
Items Needed
5 and 1/2 quarts of oil and a new oil filter
Oil drain pan
Jack and two jackstands
17mm wrench or socket wrench
Funnel
Plastic grocery bag
Oil filter wrench (not always needed)
You may want to run the engine for a few minutes so that the oil is warm and will drain better before you begin.
1. Make sure that the parking brake is set,
and put blocks behind the wheels for extra safety. Jack up the car from the proper jacking point on the car's
frame.

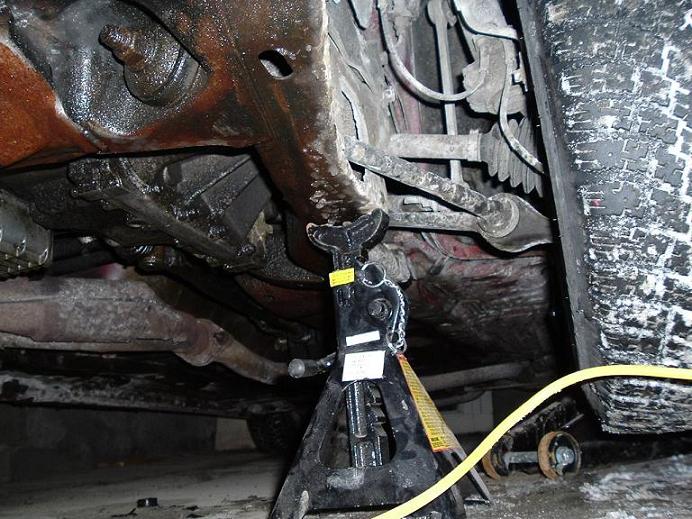
2. Place jackstands under the subrame and
lower the jack so that the car is resting on the jackstand. Always
use jackstands when you are going to be working under the car. Repeat
the process for the other side.
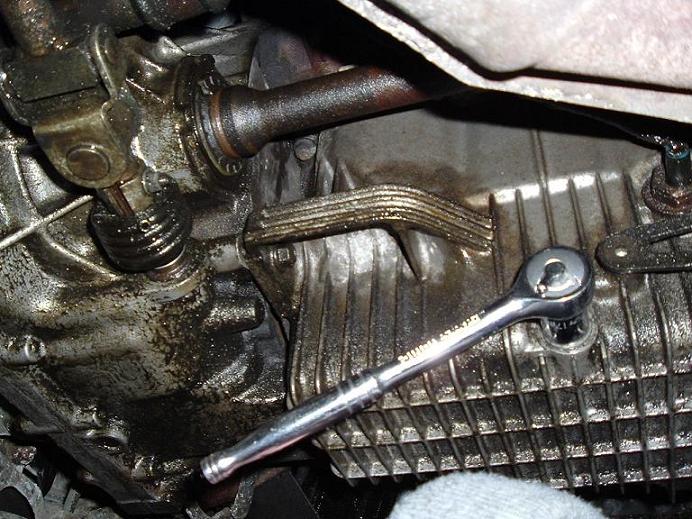
3. Using a 17mm socket and rachet or a 17mm
wrench, loosen the drain plug on the back of the oil pan. Just loosen it
until you can turn it with your fingers. Do not remove it yet.
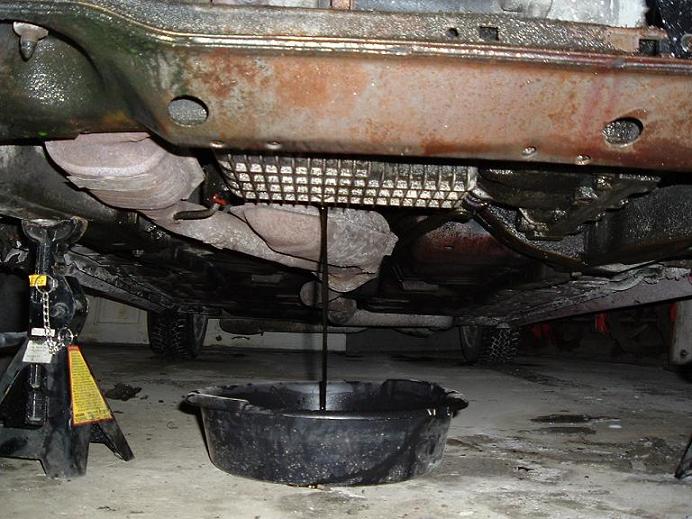
4. Position an oil drain pan under the drain
plug. Notice the jackstand on the other side, holding up the subframe.

5. Now remove the oil drain plug with you
fingers. If you ran the engine before changing the oil, be careful! The oil
will be hot. Make sure the oil drain pan is positioned correctly.
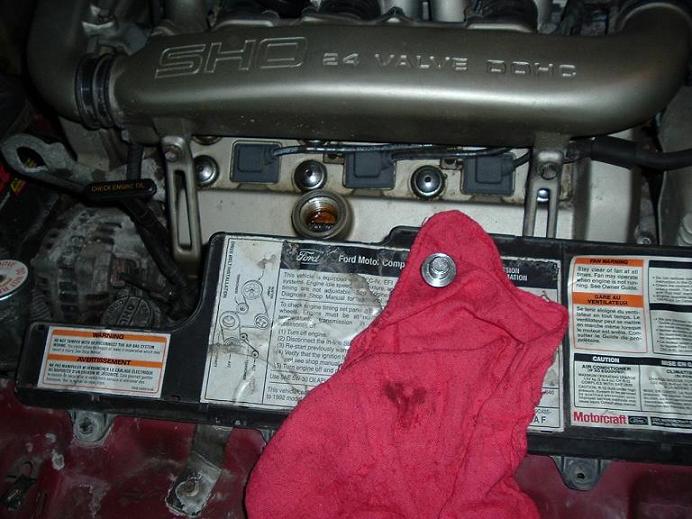
6. Remove the oil filler cap to help the
oil drain better. While the oil is draining, check the oil drain plug for
any metal chips, etc. They are usually magnetic. If there are metal chips,
there could be a problem with your engine. Don't loose that oil drain plug.
7. Once the oil has finished draining, replace
the drain plug. Be careful, making sure that you do not cross-thread the
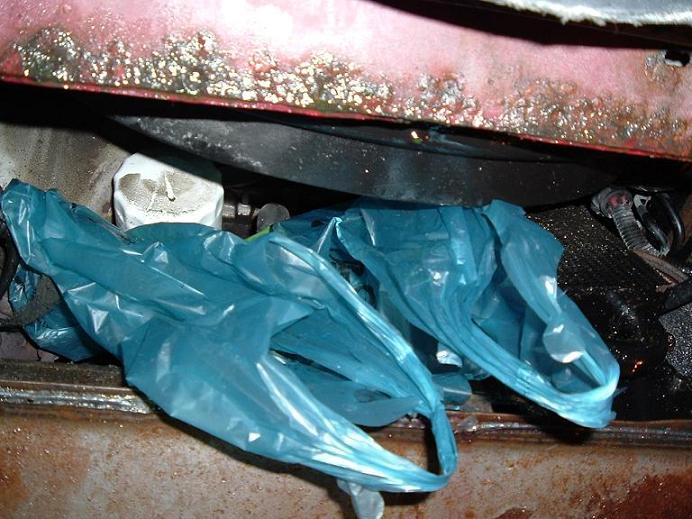
bolt. Tighten it securely. Now, place a plastic bag or something similar
under your oil filter and over your starter. The reason for this is that
when you remove the oil filter some oil will drain out, and I for one don't
like it dripping all over my starter.
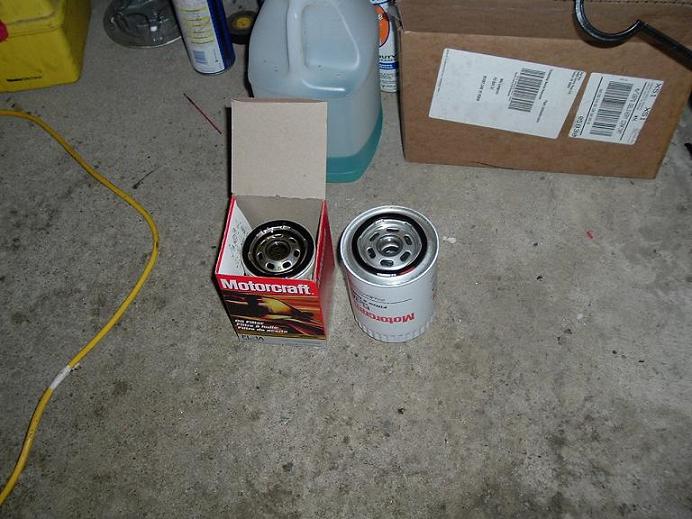
8. Now remove the old filter.
Remember to
position the oil drain pan underneath since some oil will come out.
Then
drain the oil out of the filter into the pan by turning it upside down.
Usually
you can loosen the filter with just your hands, but a oil filter wrench
may
be needed. Open the box for the new filter and put the old filter in
there,
as seen here. See that black rubber ring on the filters? Make sure that
you
take some oil on your finger and wipe it on that rubber seal. A good
idea is to put the filters face to face, you can then compare to make
sure you have the correct one and also to get the oil onto the new
filter's seal. If you don't
the filter will not seat correctly. If you are wondering, the
difference
in size with these filters is because the old stock one is being
replaced
with a larger and widely available Motorcraft FL-1A.
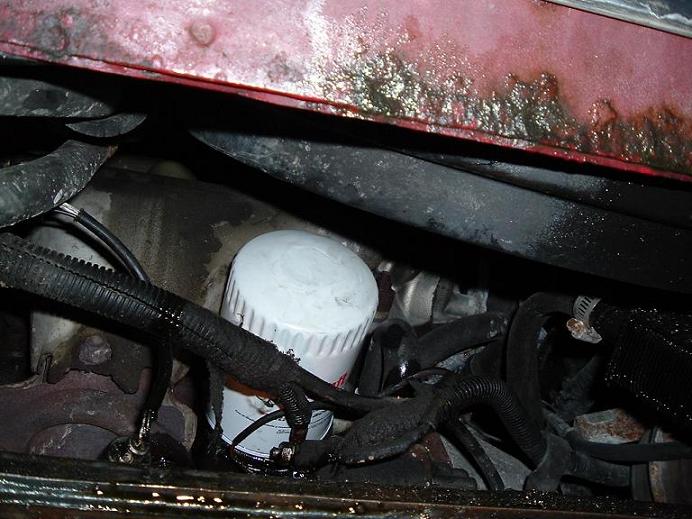
9. Install the new filter securely. You do
not need to use a filter wrench to tighten it, however you do want to tighten
it as much as you can with both hands. (Within reason). Do not crossthread
the filter.
10. Now, using a funnel, pour 5 and 1/2 quarts of oil into the engine.
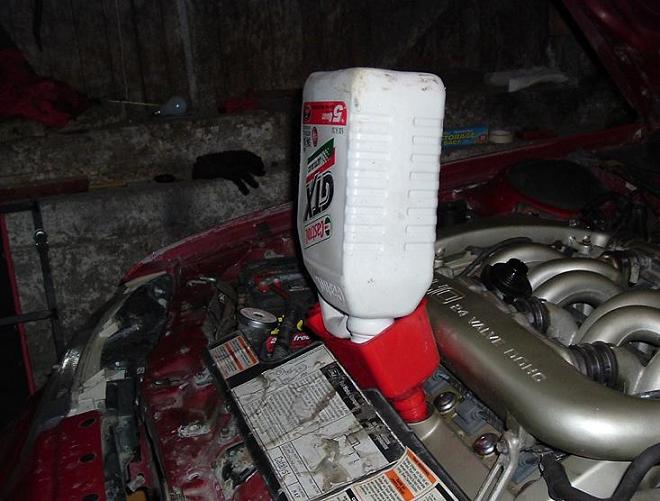
Replace the oil filler cap, and
you're about
ready to go! When you start the engine, let it run for a few minutes,
then stop it and double-check the oil level on the dipstick.
What do I do with my
old oil? You should put it into a sealed container
(the 5-quart jug pictured above works well) and you can bring it to a garage.
Many automotive garages will dispose of old oil, sometimes for a very small
fee.
What kind of oil should I use? Which oil filter should I use?