 |
 |

How
to change your heater core
Thanks to firstgen89sho for this contribution
then there is a 7mm bolt that needs to be removed from the drivers side of the evap case to a support bracket, once the bolt is undone, just slightly bend the bracket to the left to clear the case.

now these 2 are the buggers that we have fought so hard to access and get at, the heater core is on the left, and the blend door actuator is on the right
there are 2 upper bolts that need to be undone with an 8mm socket, and also a couple relays mounted onto the right brace that need to be taken off with a 7mm socket.
now back under the hood, we need to remove the 2 cooling lines that go into the heater core, and also the vaccuum connector going inside the vehicle.
to make easier access to get down to where the lower a/c line and the lower case bolt is, I disconnected the PCM connector using a 10mm socket and moved the main vaccuum line from the intake manifold, with those disconnected it allowed me to get my hands down in there to do what is needed to do.
we need to undo the upper and lower A/C to evap core lines, to remove the upper one, we need to take the saftey clip off and use a 3/4" a/c line disconnect tool to disconnect the line from the case
there are 3 bolts holding the evap case to the firewall, the first one is right to the right and above the lower a/c line, and needs to be removed with a 11mm combination wrench
the upper center one is located right next to the upper a/c line, and can be removed with an 11mm deep socket
the lower left one is hidden a bit, but it is directly under the left heater core line, and needs to be removed with a 11mm combination wrench.
once all that has been disconnected, there is nothing else holding the evap case to the firewall, you can go inside the vehicle and proceed to pull the case back inside the vehicle
to remove the blend door actuator, there are 3 screws that need to be removed with an 8mm socket
here I am comparing the old heater core to the new one, they are the same, Aluminum, but in 8, they still used brass, so watch out there, also note that the old heater core has a foam strip running around it to seal the core into the evap case.
Thanks to firstgen89sho for this contribution
This guide covers both
the 90-91 SHO and the 92-5 SHO
I have over 91 pics in this post, so please bear with me.
The reason why I pulled my dash and heater box out was for a few reasons. 1) the BDA (blend door actuator) was failing, sometimes I would not get heat when asked, and would not cool down when asked, and other times it would work fine, 2) had some wiring issues that needed to be taken care of (re-routing and cleaning up) 3) Clutch self-adjuster would not adjust, found that the spring had broken.
Tools Required for the Job:
Flathead Screwdriver
Philips Screwdriver
5.5mm socket
7mm socket
8mm socket
10mm socket
11mm socket
13mm socket
18mm socket(required to remove the seats)
19mm socket
11mm combination wrench
9/16 combination wrench
1/4" ratchet
3/8" ratchet
Torx #27 bit
Torx #20 bit
A/C line disconnect tools (3/4" and 1/2" disconnects required)
catch basin (to catch coolant from lines when disconnected
So, first things first:
Have your A/C System discharged by a qualified professional
I had already done that
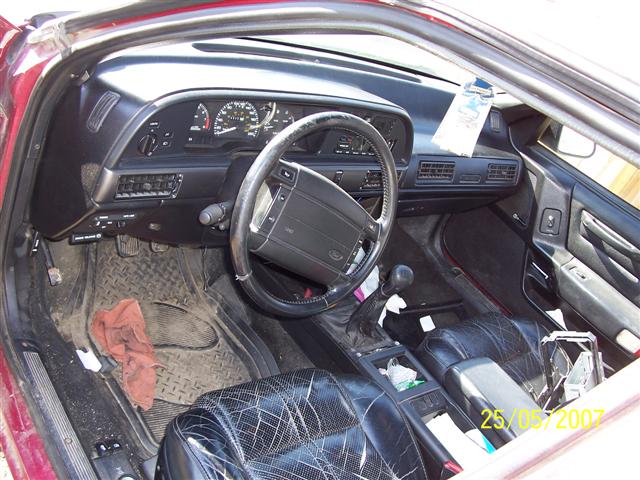
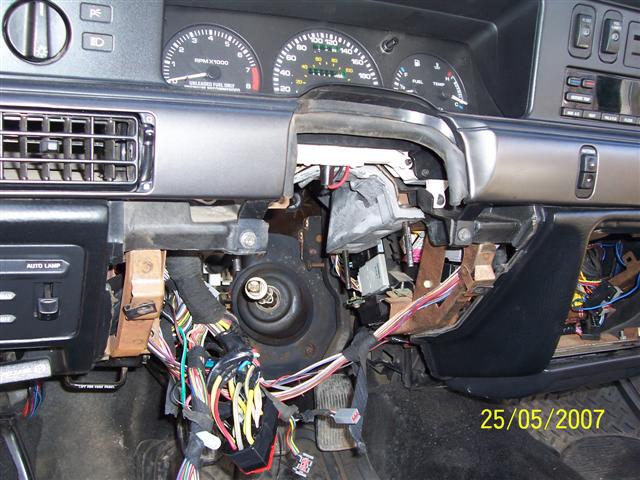
Here is a pic of the beginning
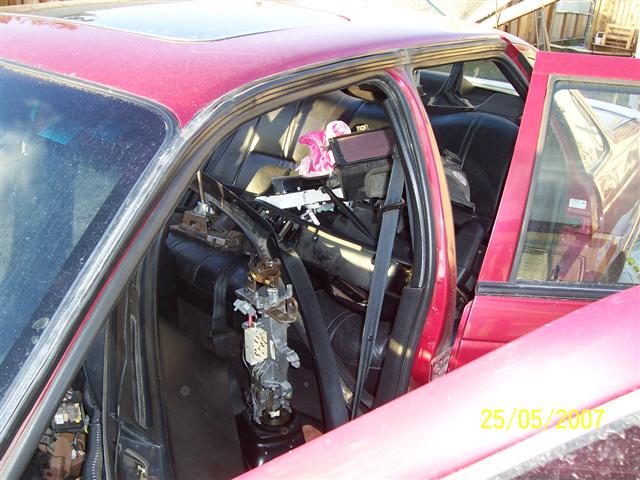
I made it a little easier on myself by removing the seats and the center console (also I have a set of newer seats going in)
A view from the backseat of the task that is ahead of us, removal of that behemoth
Disconnect the battery, as we don't need any power inside the vehicle at this point.
Alright, now that the intros have been completed, onto the first thing to remove, the lower dash cover, it is held on by 4 Torx #27 screws
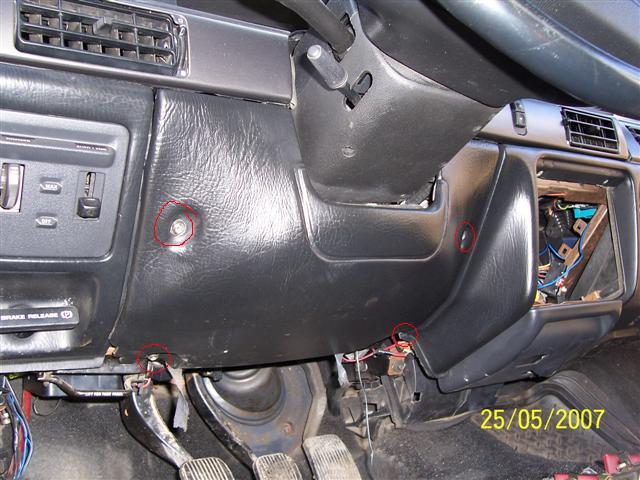
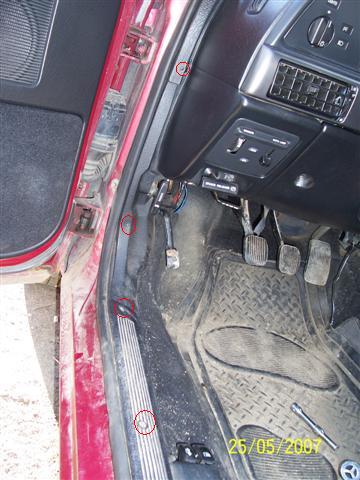
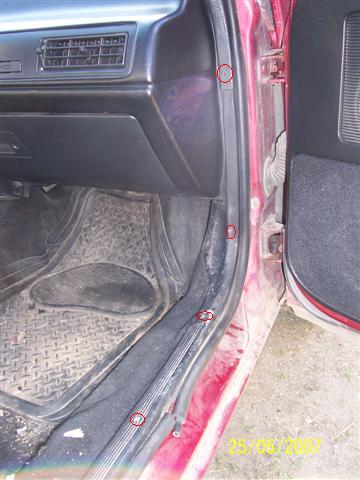
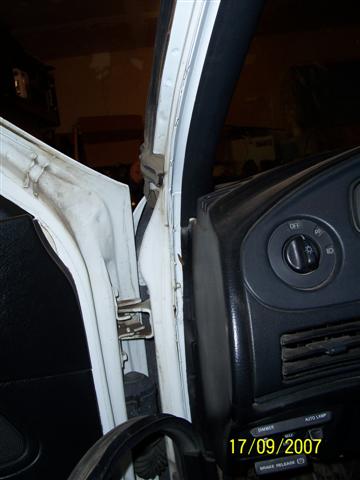
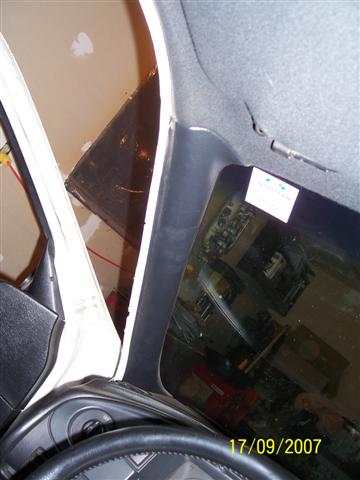
now that, that is out of the way, take your philips screwdriver and undo 2 screws holding the lower scuffplate, 1 screw holding the kick panel and 1 screw holding the lower portion of the A-pillar trim on both the left and right side, and remove the kick panel trim. On the 92 dash, pull back the door weatherstripping, and remove the a-pillar trim on both sides (they are just held on by friction clips)
I have over 91 pics in this post, so please bear with me.
The reason why I pulled my dash and heater box out was for a few reasons. 1) the BDA (blend door actuator) was failing, sometimes I would not get heat when asked, and would not cool down when asked, and other times it would work fine, 2) had some wiring issues that needed to be taken care of (re-routing and cleaning up) 3) Clutch self-adjuster would not adjust, found that the spring had broken.
Tools Required for the Job:
Flathead Screwdriver
Philips Screwdriver
5.5mm socket
7mm socket
8mm socket
10mm socket
11mm socket
13mm socket
18mm socket(required to remove the seats)
19mm socket
11mm combination wrench
9/16 combination wrench
1/4" ratchet
3/8" ratchet
Torx #27 bit
Torx #20 bit
A/C line disconnect tools (3/4" and 1/2" disconnects required)
catch basin (to catch coolant from lines when disconnected
So, first things first:
Have your A/C System discharged by a qualified professional
I had already done that
Here is a pic of the beginning
I made it a little easier on myself by removing the seats and the center console (also I have a set of newer seats going in)
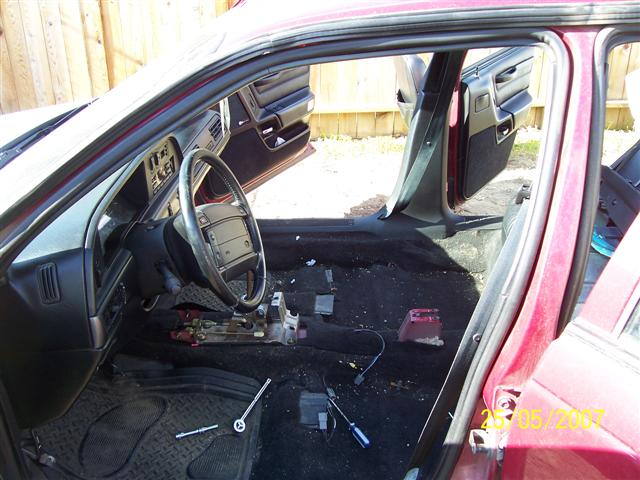
A view from the backseat of the task that is ahead of us, removal of that behemoth
Disconnect the battery, as we don't need any power inside the vehicle at this point.
Alright, now that the intros have been completed, onto the first thing to remove, the lower dash cover, it is held on by 4 Torx #27 screws
now that, that is out of the way, take your philips screwdriver and undo 2 screws holding the lower scuffplate, 1 screw holding the kick panel and 1 screw holding the lower portion of the A-pillar trim on both the left and right side, and remove the kick panel trim. On the 92 dash, pull back the door weatherstripping, and remove the a-pillar trim on both sides (they are just held on by friction clips)
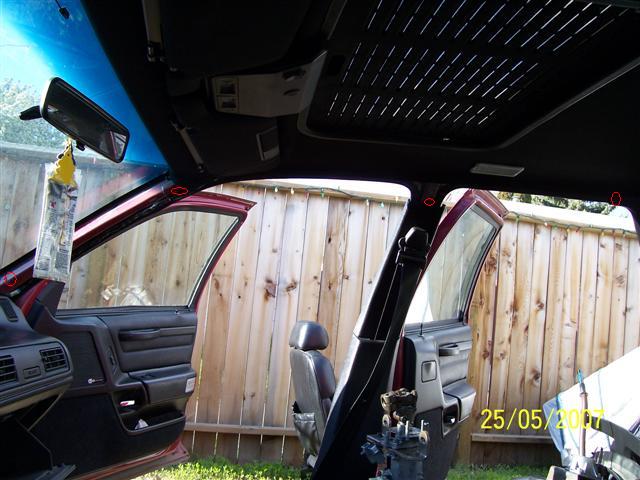
While you are at it,
the A-pillar trim needs to be removed on both the drivers and
passengers side, there are 4 philips screws per side that need to come
off, and once those are removed, the trim needs to be gently removed.
On the 92 dash, pull back the door weatherstripping, and remove the
a-pillar trim on both sides (they are just held on by friction clips)
Now that, that is all
done, we can remove the lower brace from under the steering column,
this will allow us the room to drop the steering column out. the 2
bolts are removed using a 8mm socket.
next we want to remove the anti-submarine brace under the steering column, it is held in place by 4 13mm nuts
now we can go ahead and start removing some of the electrical connections to the column, lets start with the ignition switch,it is removed with a 7mm socket
second, release both of the airbag/cruise/horn connectors to the right of the column
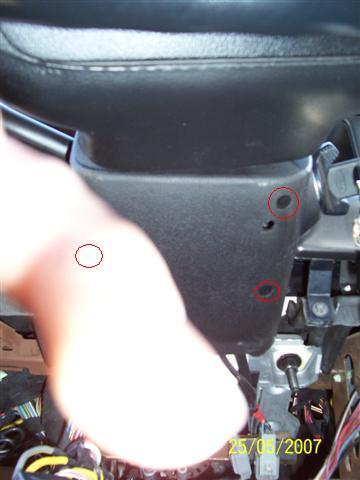
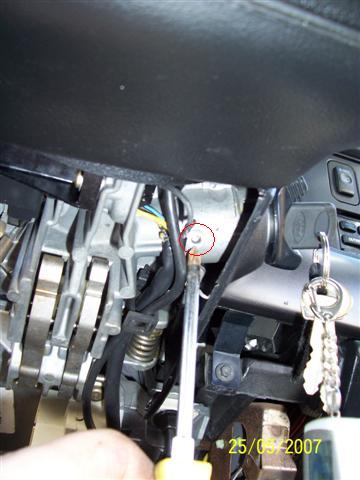
once those are disconnected, we need to remove the column covers to be able to disconnect the multifunction switch wiring, to accomplish that, we need to first remove the tilt lever, mine was loose, but you might need an 8mm wrench to break free the threadlock compound that Ford used.
now remove the lower column cover by undoing the 3 philips screws holding it in place (unfortunatly my finger got in the way of the left one, but you get the idea)
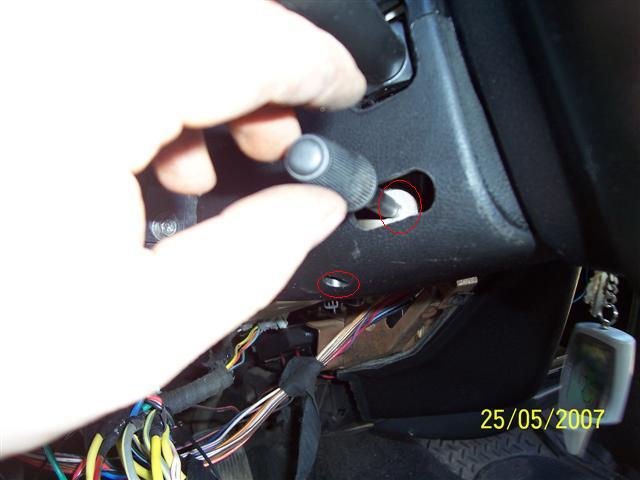
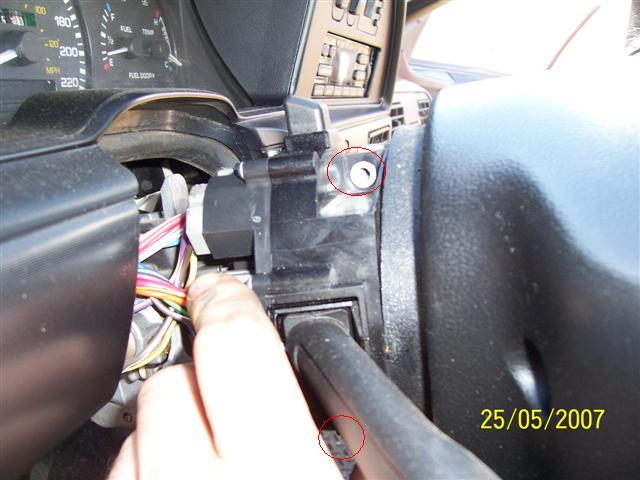
the actual lock cylinder needs to be removed to remove the upper cover, so that is accomplished by turning the lock cylinder to the run position and getting a charp object and sticking it into the hole circled and pressing up while pulling the cylinder outwards.
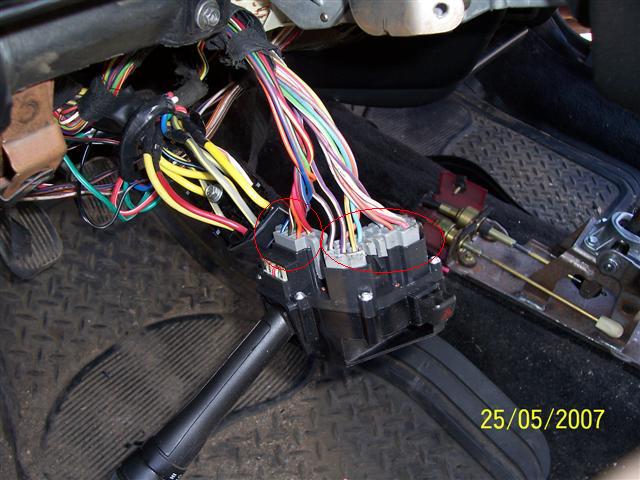
to get the upper cover out, it requires a little wiggling, but it will come out. once those are out of the way, you will need to remove the multifunction switch to be able to remove the connectors on the back, and that is accomplished with a Torx #20 bit, there are 2 screws that hold it in place
and then undo the 2 connectors off the multifunction switch
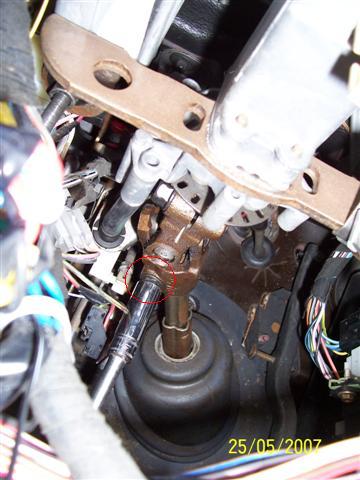
wow, moving right along here, the steering u-joint will need to be removed to allow the column to come right out, but before that happens, you will need to stick the lock cylinder back into it's hole and turn the key back to lock, once the wheels are centered, because with an air bag system,if the steering wheel is turned after the steering column has been disconnected from the rack and pinion, you have a very good chance of damaging the clockspring. to remove the u-joint, you will require a 13mm socket to remove the lower bolt holding the joint to the shaft.
next we want to remove the anti-submarine brace under the steering column, it is held in place by 4 13mm nuts
now we can go ahead and start removing some of the electrical connections to the column, lets start with the ignition switch,it is removed with a 7mm socket
second, release both of the airbag/cruise/horn connectors to the right of the column
once those are disconnected, we need to remove the column covers to be able to disconnect the multifunction switch wiring, to accomplish that, we need to first remove the tilt lever, mine was loose, but you might need an 8mm wrench to break free the threadlock compound that Ford used.
now remove the lower column cover by undoing the 3 philips screws holding it in place (unfortunatly my finger got in the way of the left one, but you get the idea)
the actual lock cylinder needs to be removed to remove the upper cover, so that is accomplished by turning the lock cylinder to the run position and getting a charp object and sticking it into the hole circled and pressing up while pulling the cylinder outwards.
to get the upper cover out, it requires a little wiggling, but it will come out. once those are out of the way, you will need to remove the multifunction switch to be able to remove the connectors on the back, and that is accomplished with a Torx #20 bit, there are 2 screws that hold it in place
and then undo the 2 connectors off the multifunction switch
wow, moving right along here, the steering u-joint will need to be removed to allow the column to come right out, but before that happens, you will need to stick the lock cylinder back into it's hole and turn the key back to lock, once the wheels are centered, because with an air bag system,if the steering wheel is turned after the steering column has been disconnected from the rack and pinion, you have a very good chance of damaging the clockspring. to remove the u-joint, you will require a 13mm socket to remove the lower bolt holding the joint to the shaft.
now, to remove the
actual column now, there are another 4 13mm bolts that hold the column
in place, they are in the same location as the 4 bolts that held the
anti-submarine bracket in place. once those 4 are removed, the column
will drop down at the rear, but still be held into place at the front.
give the column a good yank down and it will release off the front
studs. once that is all done, this is what it will look like with it
removed.
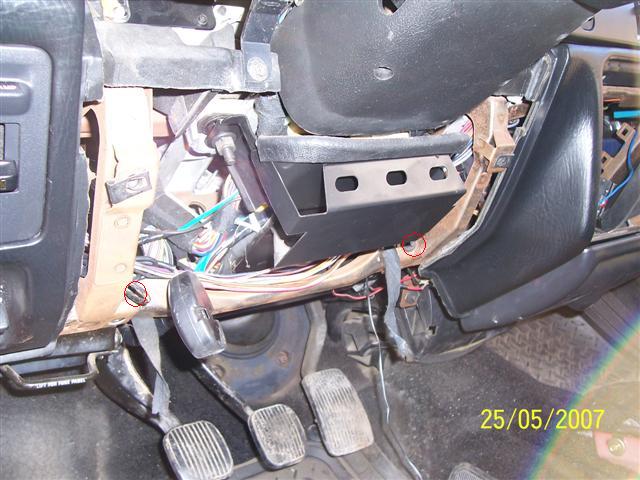
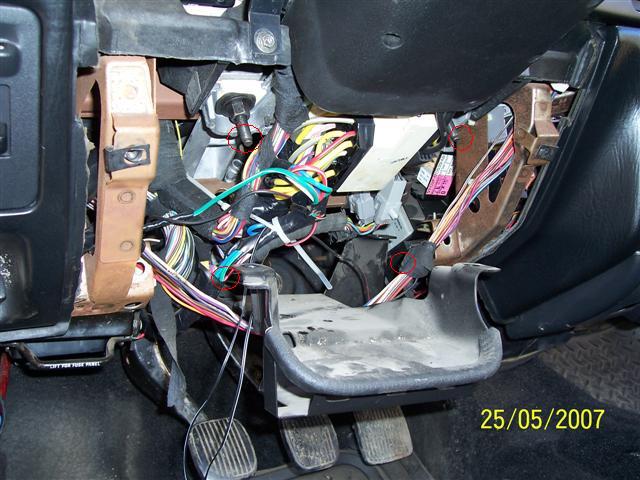
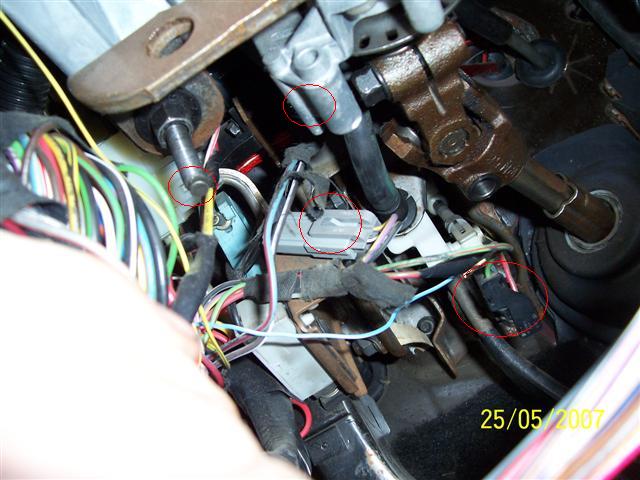
now we can see a few
more connectors that need to be disconnected here, there are 4, brake
light switch, clutch saftey start switch, clutch cruise switch and abs
enable switch, very left is clutch saftey start, bottom is brake light
switch, top is abs enable and center is clutch cruise.
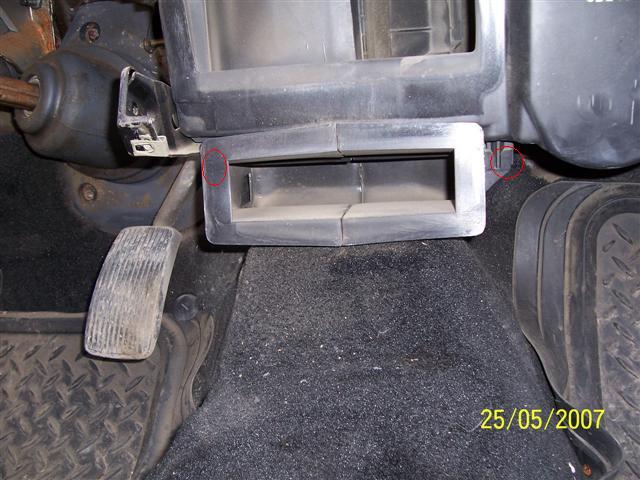
good, those are out of the way, now we can move to the left of the dash and disconnect the e-brake release cable and e-brake warning light, the e-brake release cable is held onto the actual mechanism by a slip collar, so grab that flat headed screwdriver, stick it in behind the slip collar and pry out, that will release the outer cable to the pedal assy, then reach under and unhook the inner cable from the release mechanism. don't forget to unplug the e-brake warning light as well
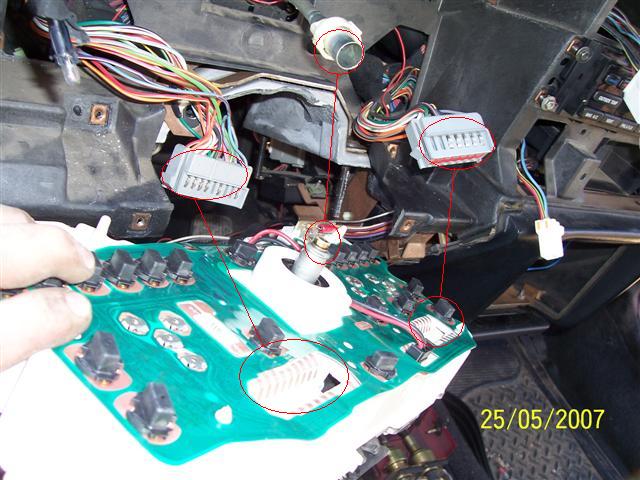
lets get the instrument cluster bezel out of out way, since the actual cluster needs to be removed to allow the dash to come back. there are 4 7mm screws holding it into place along with a large nut underneath the headlight switch (which I beleive is a 3/4" socket), once those are undone, just give a nice light tug to the bezel and it will come off it's friction tabs.
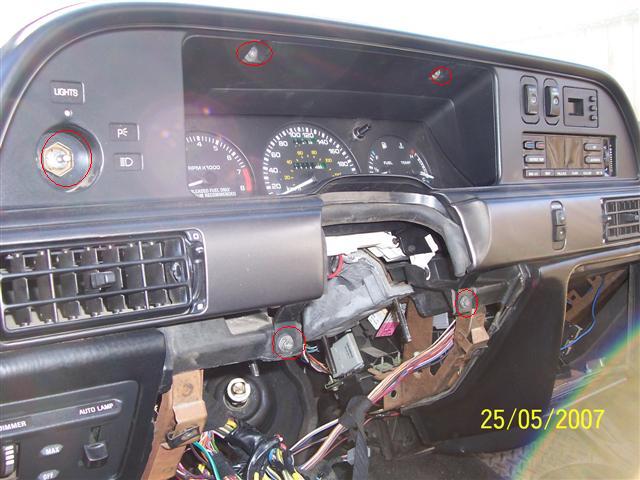
on the 92-95 dash, remove the 2 lower screws, and the 2 upper screws using a 7mm socket, pull the bezel back (it is held on by friction clips as well)
undo the 4 connector that hold the bezel into place, Fog light, Rear Defog, clock and antenna, also there is a little light bulb twisted in by the headlight switch that needs to be removed.
on the 92-5, unplug the headlight connector, headlight switch light(that is twisted in above the headlight switch), rear defogger, radio controls, clock and fog light switch. then pull the cluster right out.
good, those are out of the way, now we can move to the left of the dash and disconnect the e-brake release cable and e-brake warning light, the e-brake release cable is held onto the actual mechanism by a slip collar, so grab that flat headed screwdriver, stick it in behind the slip collar and pry out, that will release the outer cable to the pedal assy, then reach under and unhook the inner cable from the release mechanism. don't forget to unplug the e-brake warning light as well
lets get the instrument cluster bezel out of out way, since the actual cluster needs to be removed to allow the dash to come back. there are 4 7mm screws holding it into place along with a large nut underneath the headlight switch (which I beleive is a 3/4" socket), once those are undone, just give a nice light tug to the bezel and it will come off it's friction tabs.
on the 92-95 dash, remove the 2 lower screws, and the 2 upper screws using a 7mm socket, pull the bezel back (it is held on by friction clips as well)
undo the 4 connector that hold the bezel into place, Fog light, Rear Defog, clock and antenna, also there is a little light bulb twisted in by the headlight switch that needs to be removed.
on the 92-5, unplug the headlight connector, headlight switch light(that is twisted in above the headlight switch), rear defogger, radio controls, clock and fog light switch. then pull the cluster right out.
now, to remove the
instrument cluster, there are 4 7mm bolts that need to be removed.
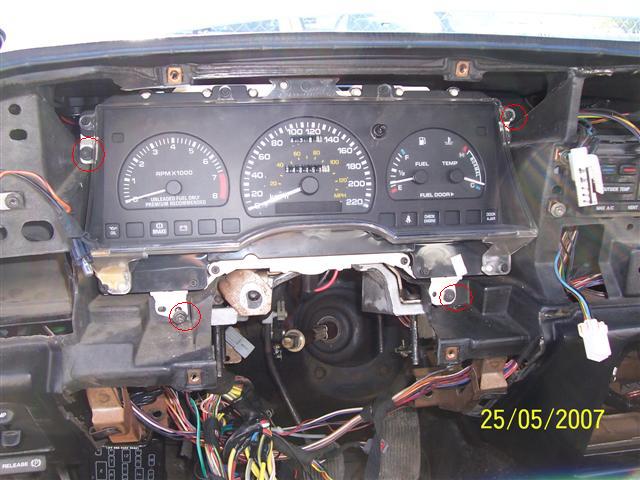
and under the hood, the speedometer cable needs to be released to allow the cluster to be pulled forwards to allow the cable to be disconnected from the cluster, just give it a good firm tug, and it will pop off
and under the hood, the speedometer cable needs to be released to allow the cluster to be pulled forwards to allow the cable to be disconnected from the cluster, just give it a good firm tug, and it will pop off
Pull the cluster
forwards, undo the 2 electrical connectors and also undo the
speedometer cable, by pressing on the tab on the white plastic
connector and pulling off.
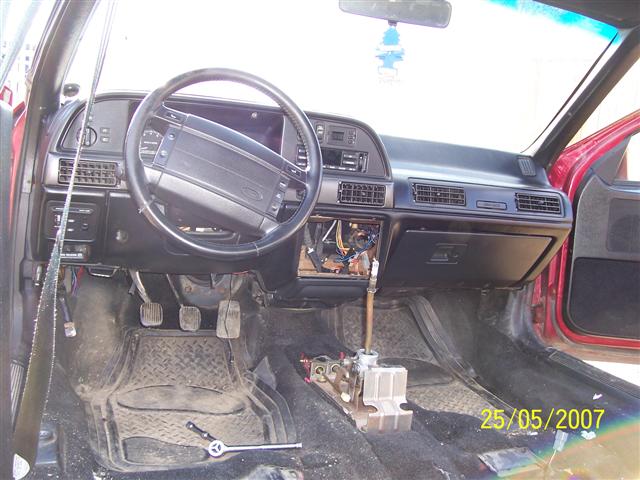
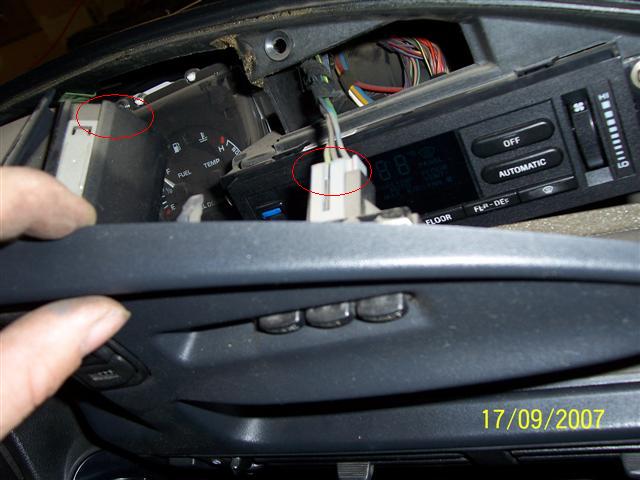
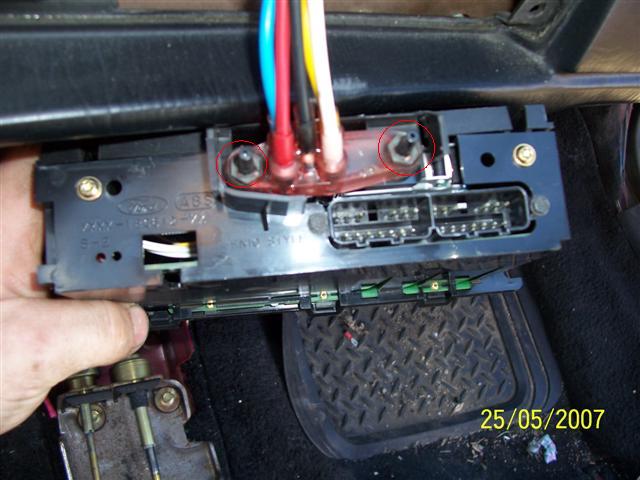
if you are needing to replace the EATC while you are at it, to remove the EATC, there are 4 7mm screws that need to be undone to pull it out
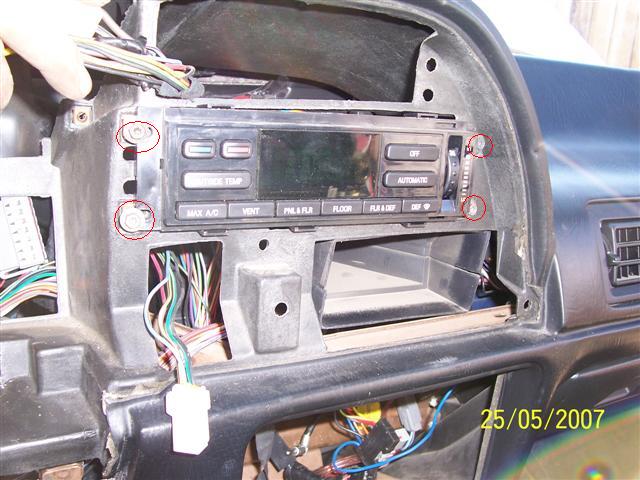
once that is loose, undo the 2 connectors off the back by pressing the tabs on the top of the connectors
then using a 10mm deep socket, undo the 2 nuts holding the vaccuum lines to the EATC module.
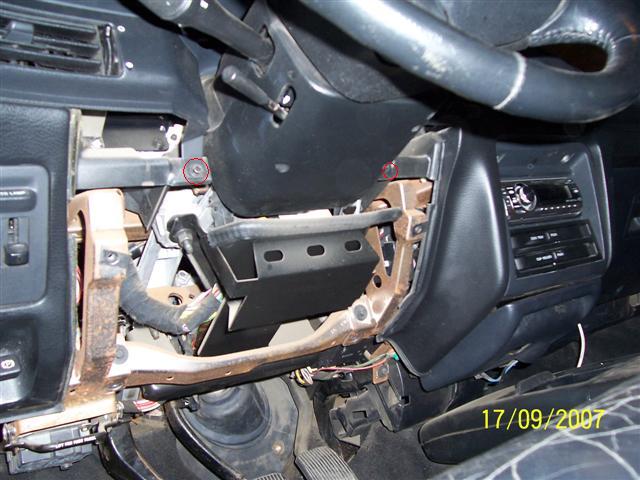
now we get down to the nitty gritty, undo 3 lower dash bolts by using a 8mm socket

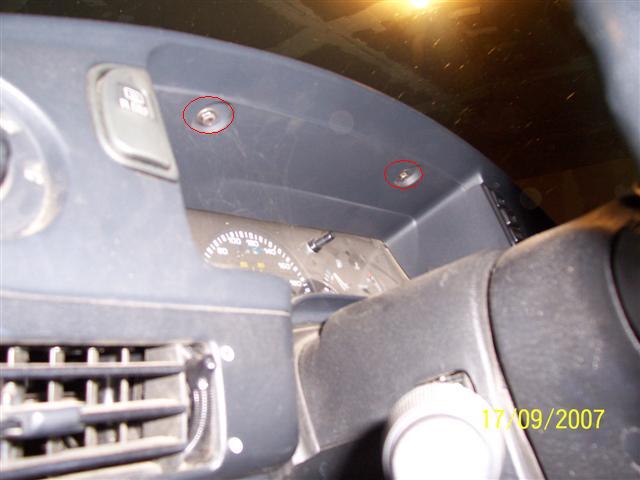
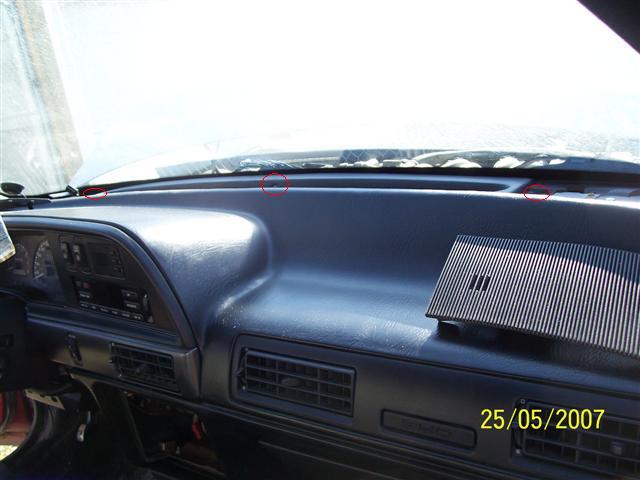
remove both of the upper speaker grilles on the top of the dash and undo the 3 7mm bolts that hold the upper part of the dash in place


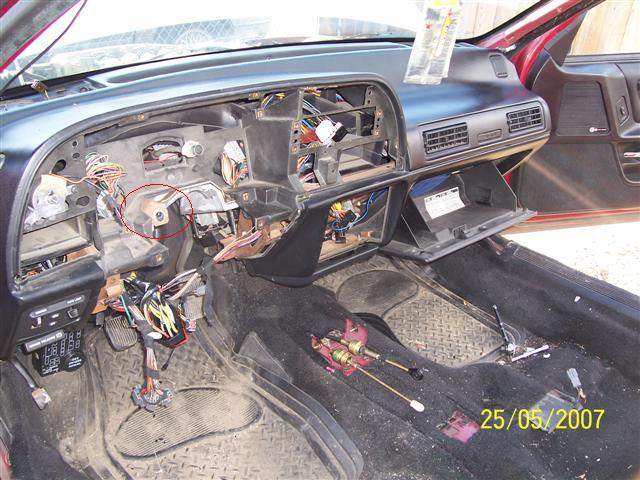
we are now pretty much ready to pull the dash back, but first, there is one more bolt holding the whole thing into place, it is a 10mm bolt just under the instrument cluster. once that bolt is out, we can start pulling the dash back, this gets to be a little tricky, because where that 10mm bolt was, that area has to be lifted up a good inch to an inch and a half to get it to clear the steering column brace.
now, with the dash starting to come back, there are a few electical and vaccuum connections that need to be disconnected. first of all there is the premium sound connectors hidden under the carpet under the right sill plate
if you are needing to replace the EATC while you are at it, to remove the EATC, there are 4 7mm screws that need to be undone to pull it out
once that is loose, undo the 2 connectors off the back by pressing the tabs on the top of the connectors
then using a 10mm deep socket, undo the 2 nuts holding the vaccuum lines to the EATC module.
now we get down to the nitty gritty, undo 3 lower dash bolts by using a 8mm socket
remove both of the upper speaker grilles on the top of the dash and undo the 3 7mm bolts that hold the upper part of the dash in place
we are now pretty much ready to pull the dash back, but first, there is one more bolt holding the whole thing into place, it is a 10mm bolt just under the instrument cluster. once that bolt is out, we can start pulling the dash back, this gets to be a little tricky, because where that 10mm bolt was, that area has to be lifted up a good inch to an inch and a half to get it to clear the steering column brace.
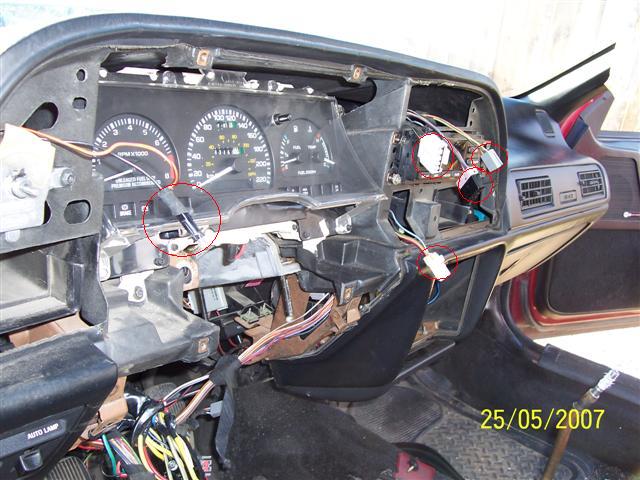
now, with the dash starting to come back, there are a few electical and vaccuum connections that need to be disconnected. first of all there is the premium sound connectors hidden under the carpet under the right sill plate
then there is your
antenna cable and power antenna wiring, disconnect the power antenna
connector, and then reach over and disconnect the antenna lead out of
the stereo and unclip the clips along the way
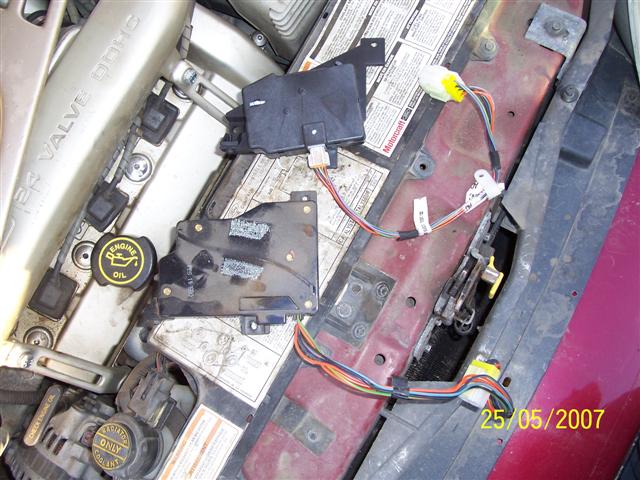
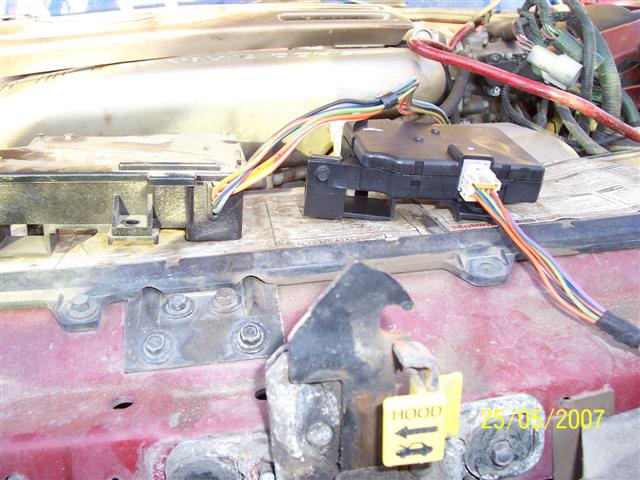
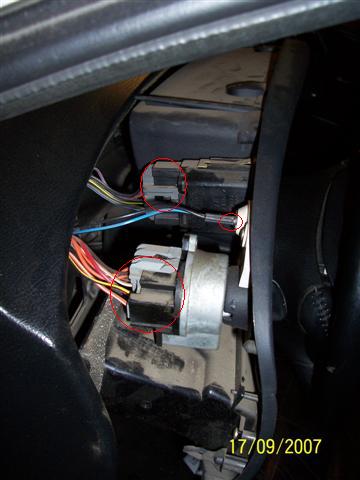
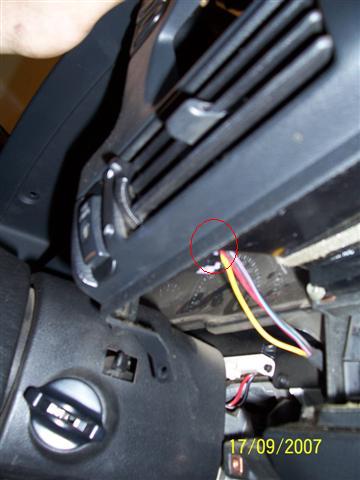
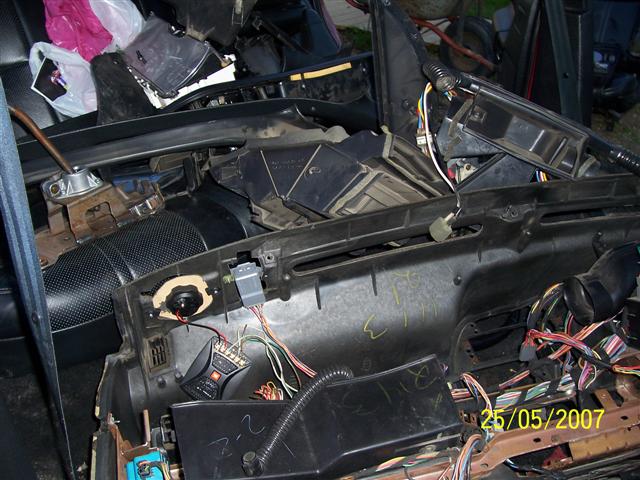
next we have to disconnect the blend door actuator, blower motor, blower motor controller, inside air temp tube, and the vaccuum connector.
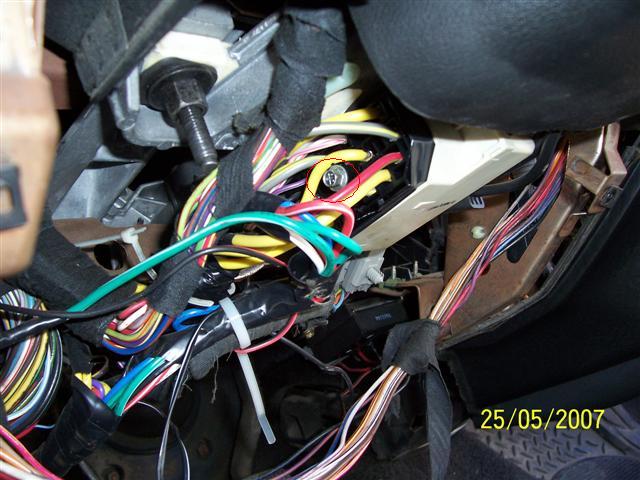
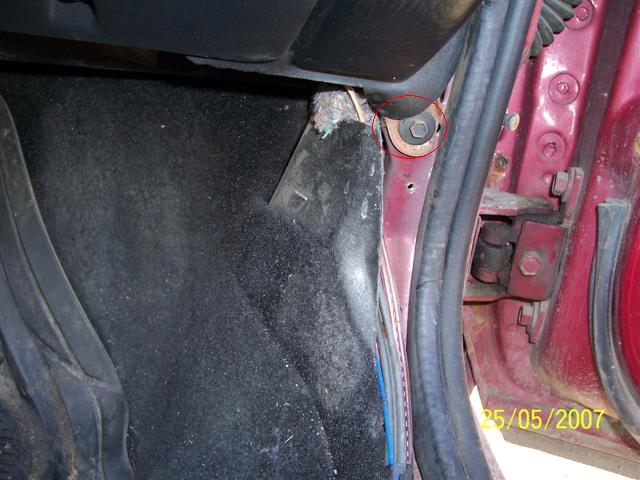
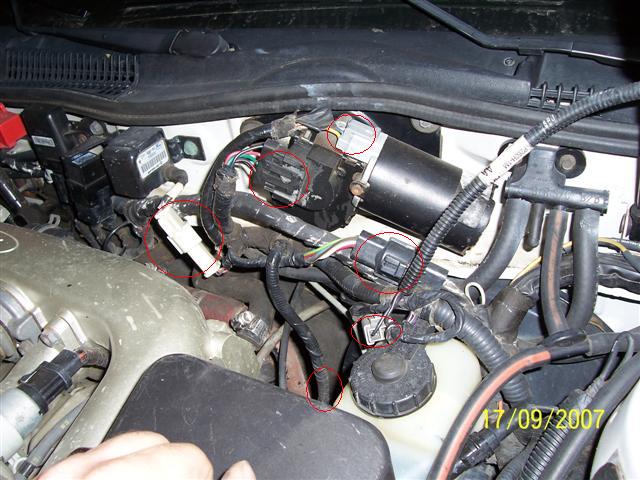
on the drivers side, the dash will not come back that far due to the wiring that goes through the firewall for the front harness and engine harness, that we will touch on next. Now if you are going to be pulling the whole dash and harness out, there are 4 connectors bolted to the drivers side wall that have to be disconnected for the harness to come out.
Now, if you are needing to remove the complete dash from the vehicle for any reason, these next steps are for you, it will walk you through what all connectors are required to be disconnected and released to get the thick harness through the small hole in the firewall.
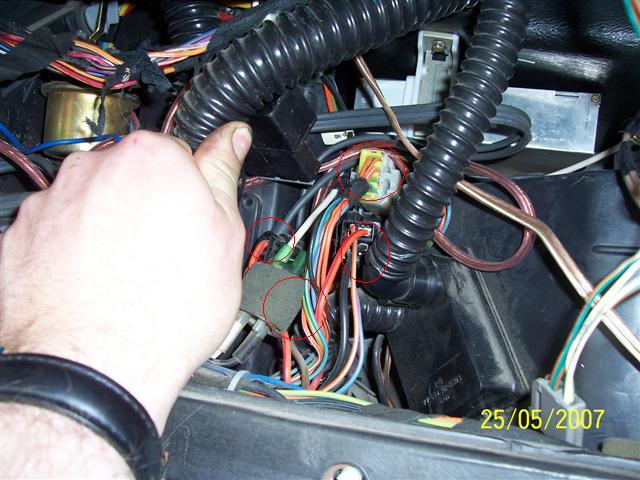
so lets start with a few of the connectors, like the wiper motor connectors
and the brake fluid level sensor and hood light connector
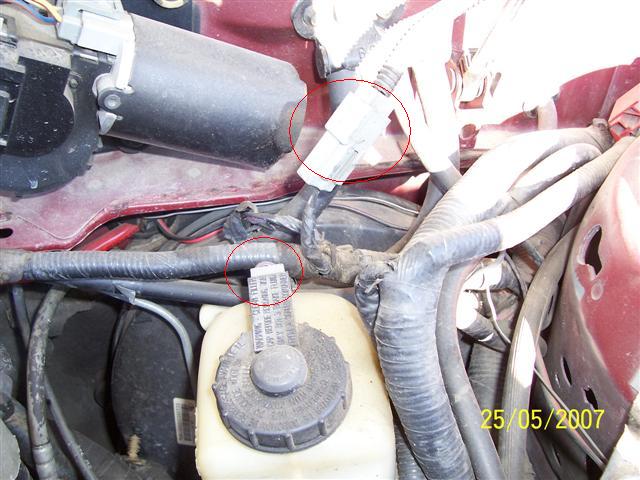
and with EATC, there is the Cold engine lockout switch
on the 92-5, it is the same as above, with the addition of the connector for the wire that leads to the starter.
next we have to disconnect the blend door actuator, blower motor, blower motor controller, inside air temp tube, and the vaccuum connector.
on the drivers side, the dash will not come back that far due to the wiring that goes through the firewall for the front harness and engine harness, that we will touch on next. Now if you are going to be pulling the whole dash and harness out, there are 4 connectors bolted to the drivers side wall that have to be disconnected for the harness to come out.
Now, if you are needing to remove the complete dash from the vehicle for any reason, these next steps are for you, it will walk you through what all connectors are required to be disconnected and released to get the thick harness through the small hole in the firewall.
so lets start with a few of the connectors, like the wiper motor connectors
and the brake fluid level sensor and hood light connector
and with EATC, there is the Cold engine lockout switch
on the 92-5, it is the same as above, with the addition of the connector for the wire that leads to the starter.
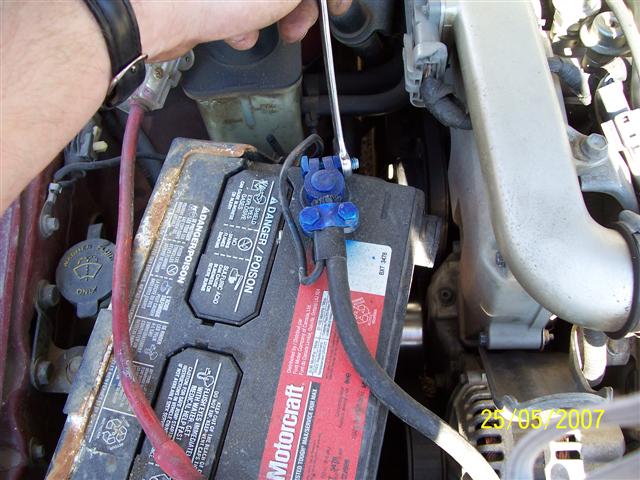
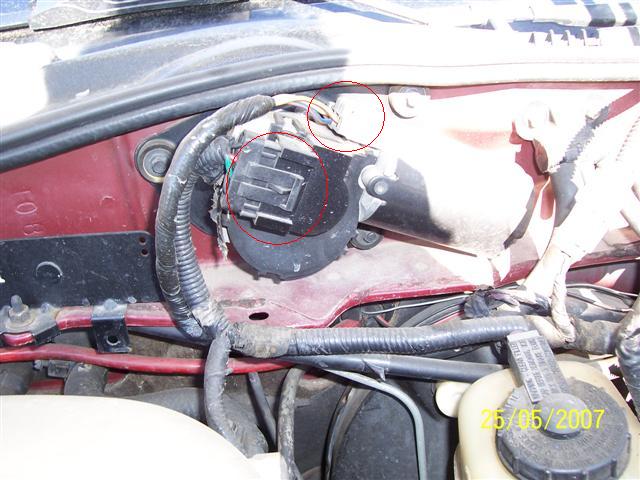
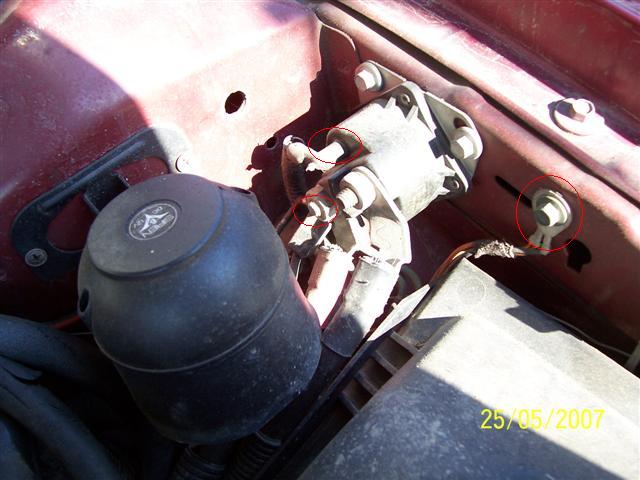
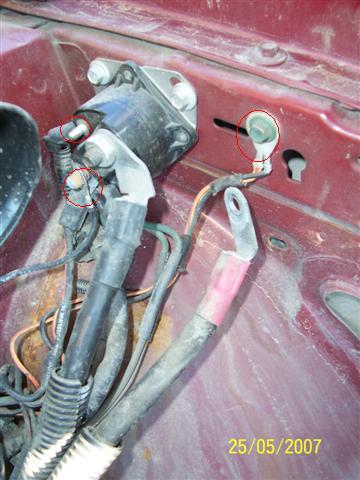
Now we move over to
the fender well, what you see here is typical of 89-91 SHO's, the 92-95
have a large single connector with a 10mm bolt to undo, there are a few
connections here, there is the ground to the right of the solonoid,
there is the upper push on connector that will pull off, and there is
the 5 ring terminals underneath the large power cable coming from the
battery that needs to be removed with a 9/16" wrench.
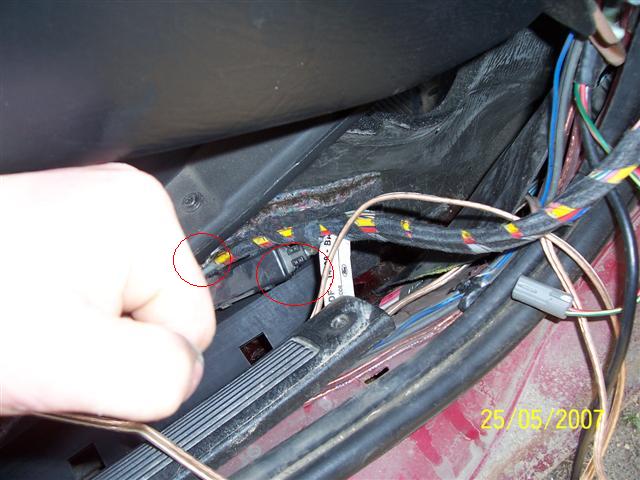
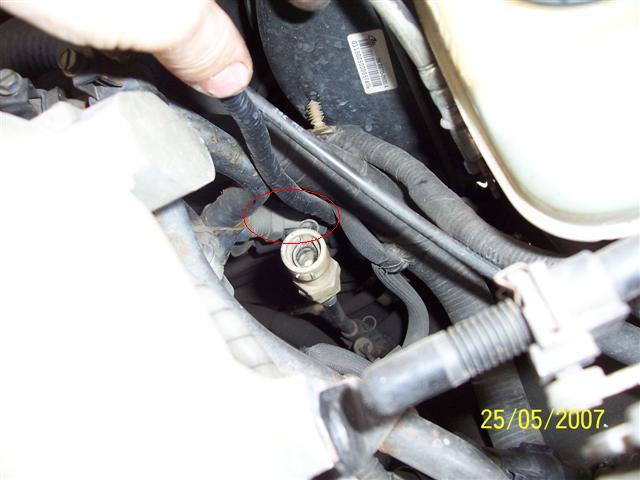
moving up to the front of the car, there are a few connections up front that need to be disconnected, and those would be the 2 front harness connectors
the DRL module and one of the airbag sensors (the DRL module is hidden under the drivers side innder fender, the inner fender will need to be pulled back to allow access to the connector). also there is one wire heading down to the horns that will need to be disconnected as well.
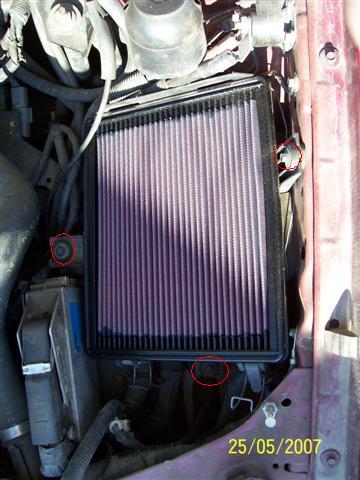
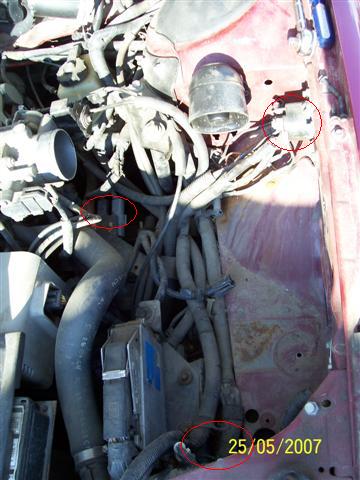
Alright, lets remove the airbox now to allow more room to work, there are 2 connectors, one clamp and 3 screws that need to come undone, the one clamp is holding the intake hose to the throttlebody, the 2 connectors is for the MAF and the IAT (intake air temprature) on the side of the lower airbox, and the 3 screws require a 8mm socket to remove.
moving up to the front of the car, there are a few connections up front that need to be disconnected, and those would be the 2 front harness connectors
the DRL module and one of the airbag sensors (the DRL module is hidden under the drivers side innder fender, the inner fender will need to be pulled back to allow access to the connector). also there is one wire heading down to the horns that will need to be disconnected as well.
Alright, lets remove the airbox now to allow more room to work, there are 2 connectors, one clamp and 3 screws that need to come undone, the one clamp is holding the intake hose to the throttlebody, the 2 connectors is for the MAF and the IAT (intake air temprature) on the side of the lower airbox, and the 3 screws require a 8mm socket to remove.
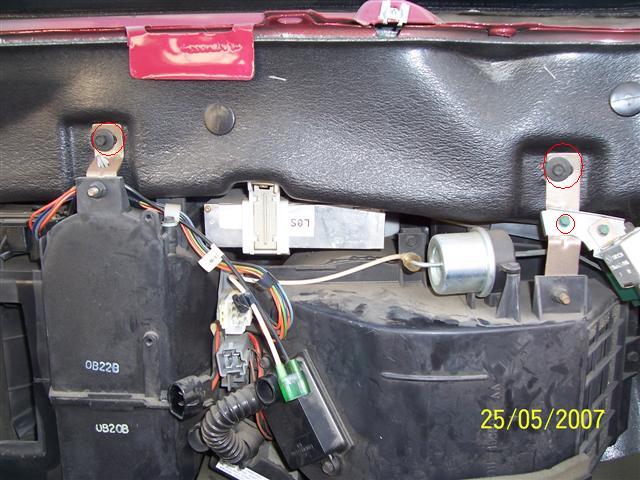
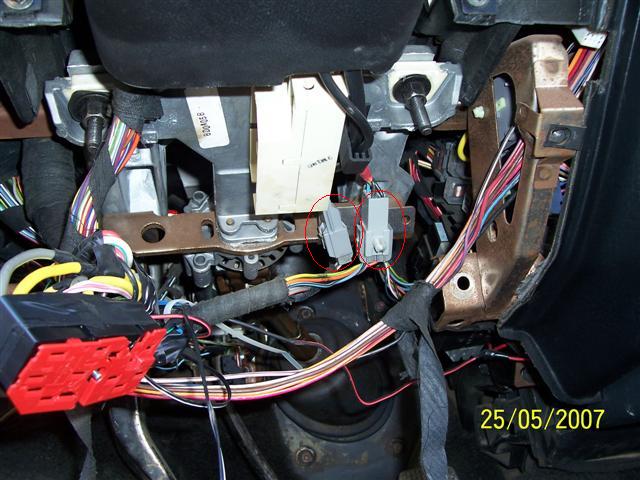
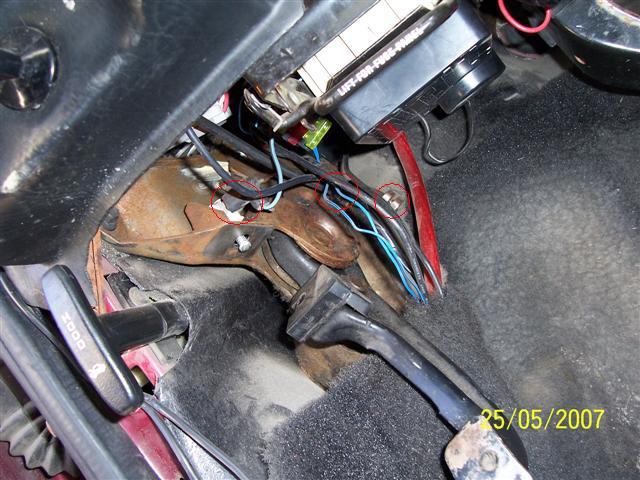
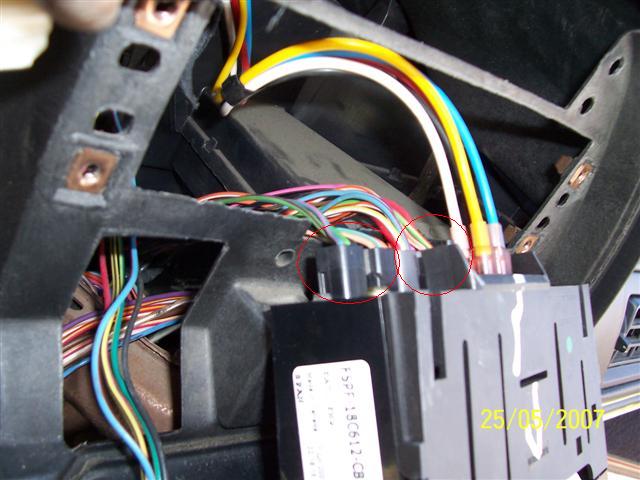
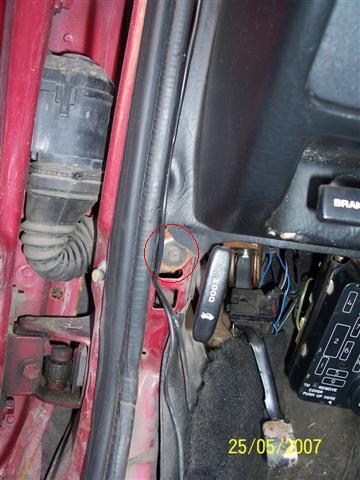
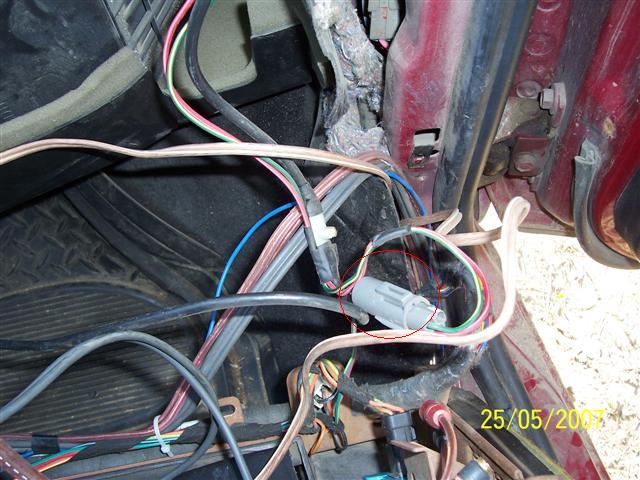
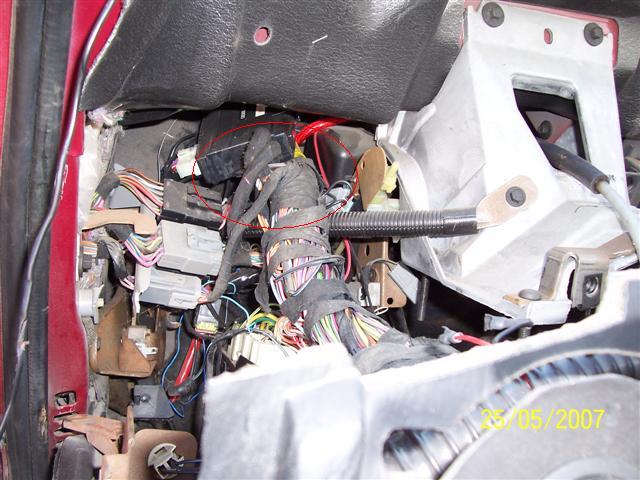
there are also 3
connectors that need to be disconnected for the dash to engine harness,
they would be the 3 on the left circle
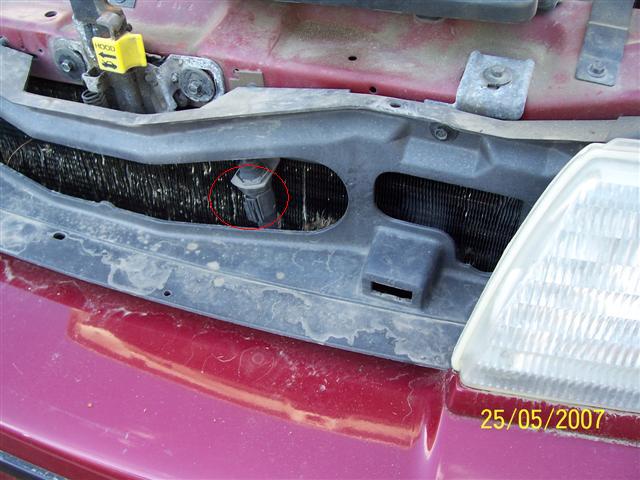
the front grille needs to be removed, to access the outside air temprature sensor, using the philips screwdriver, undo the 2 upper clips, then get the flat head screwdriver down and press down on the lower clips to remove the grille, then disconnect the OAT sensor connector.
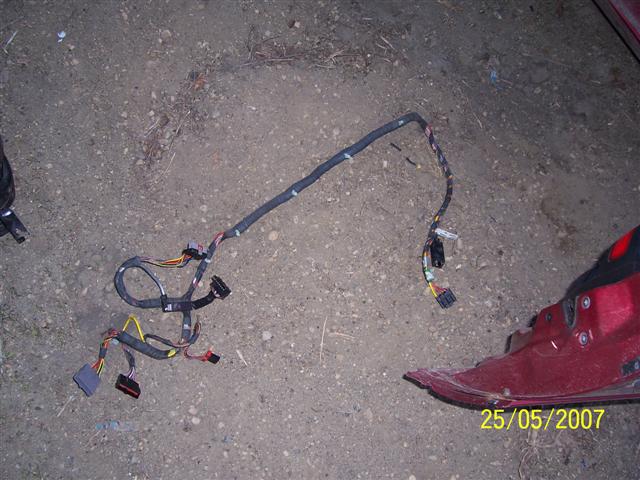
Now comes the fun part, getting all that wiring harness through the small hole, I know that it is not fun, having done it a few times before but if you just take your time and do it slowly it will all come through.
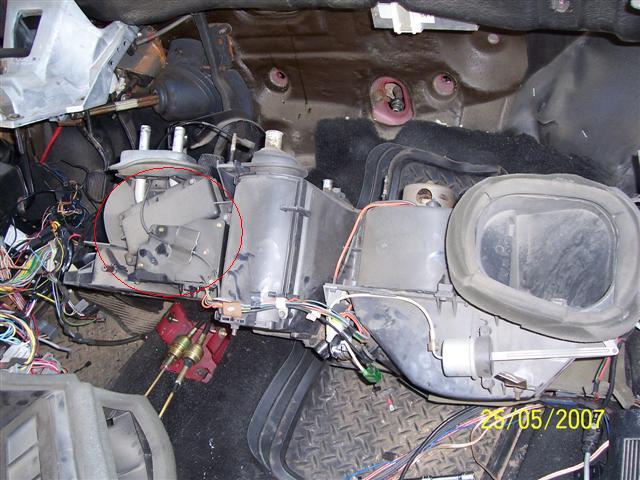
If you have followed me so far, we get into pulling the actual Evap case from the vehicle, we have worked so hard to get to this point to even see the Blend door Actuator and the heater core.
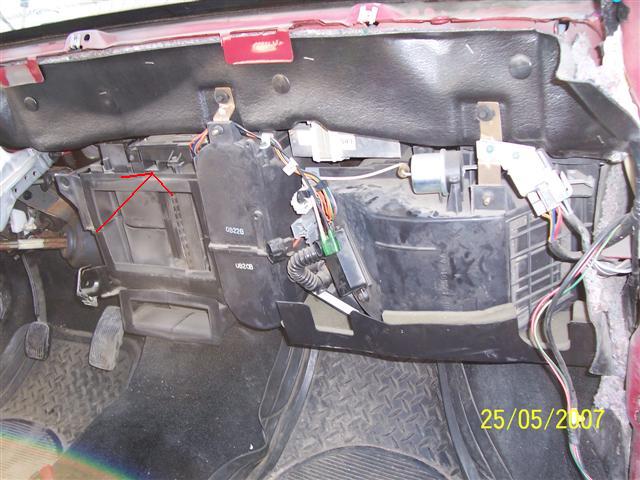
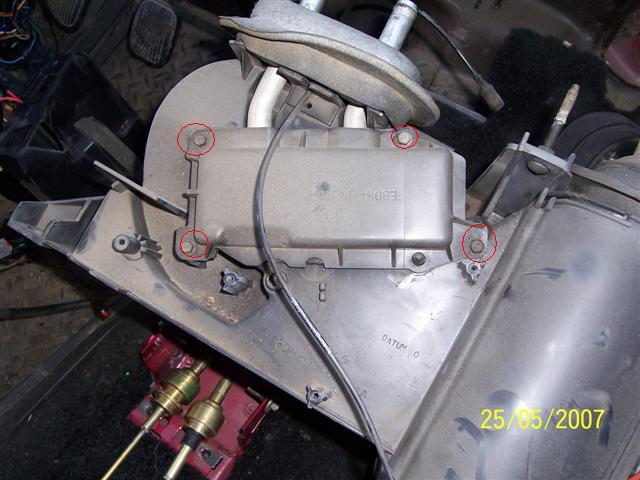
for starters, to start removing the evap case, there are 2 5.5mm bolts on the bottom of the case to the floor ducts that need to be removed.
the front grille needs to be removed, to access the outside air temprature sensor, using the philips screwdriver, undo the 2 upper clips, then get the flat head screwdriver down and press down on the lower clips to remove the grille, then disconnect the OAT sensor connector.
Now comes the fun part, getting all that wiring harness through the small hole, I know that it is not fun, having done it a few times before but if you just take your time and do it slowly it will all come through.
If you have followed me so far, we get into pulling the actual Evap case from the vehicle, we have worked so hard to get to this point to even see the Blend door Actuator and the heater core.
for starters, to start removing the evap case, there are 2 5.5mm bolts on the bottom of the case to the floor ducts that need to be removed.
then there is a 7mm bolt that needs to be removed from the drivers side of the evap case to a support bracket, once the bolt is undone, just slightly bend the bracket to the left to clear the case.
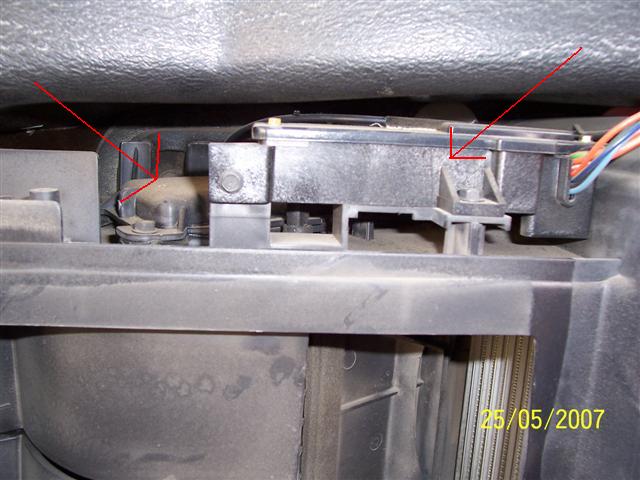
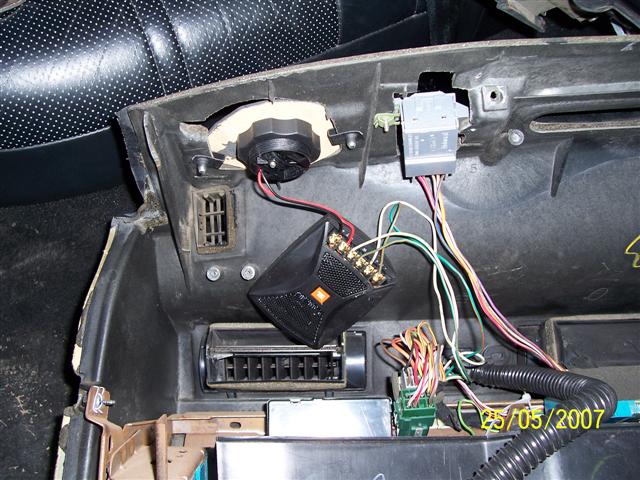
now these 2 are the buggers that we have fought so hard to access and get at, the heater core is on the left, and the blend door actuator is on the right
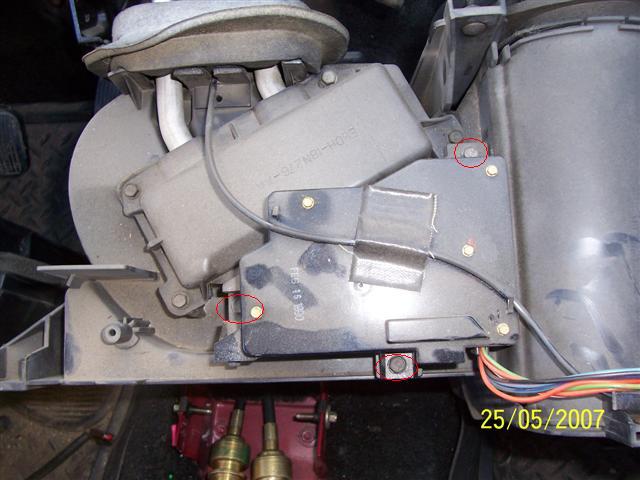
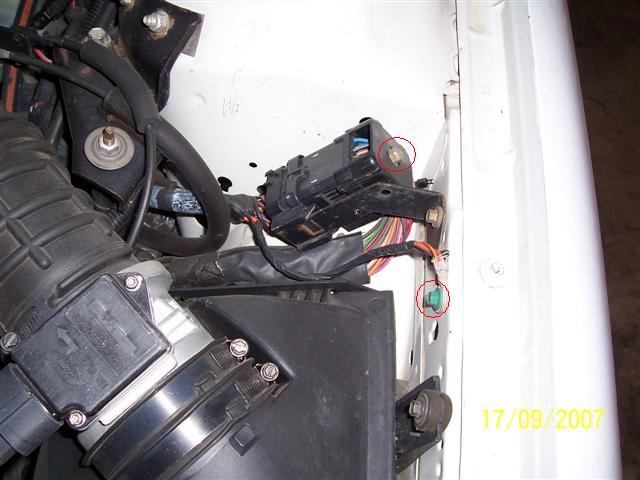
there are 2 upper bolts that need to be undone with an 8mm socket, and also a couple relays mounted onto the right brace that need to be taken off with a 7mm socket.
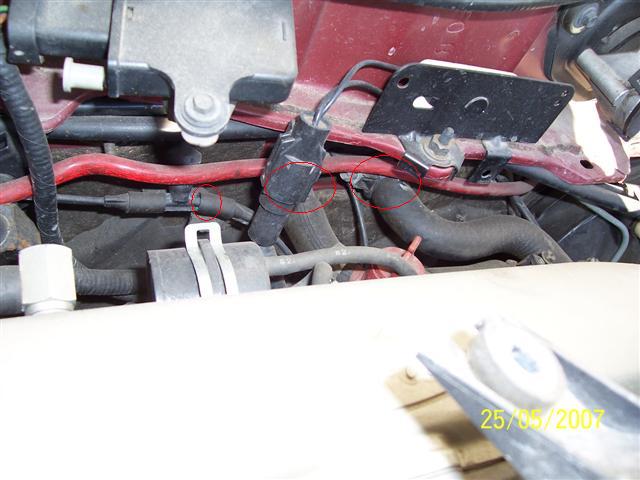
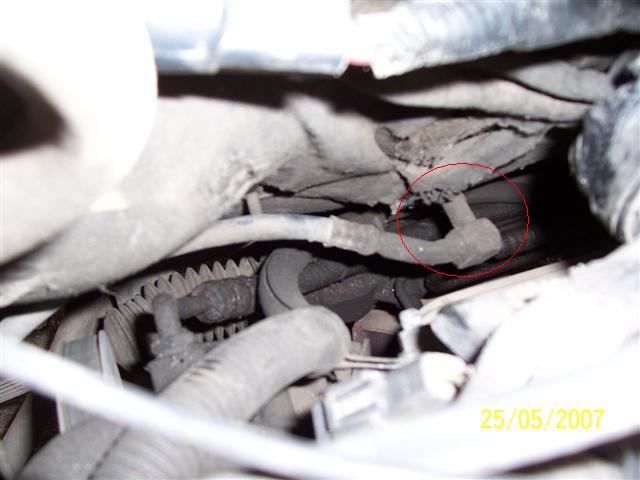
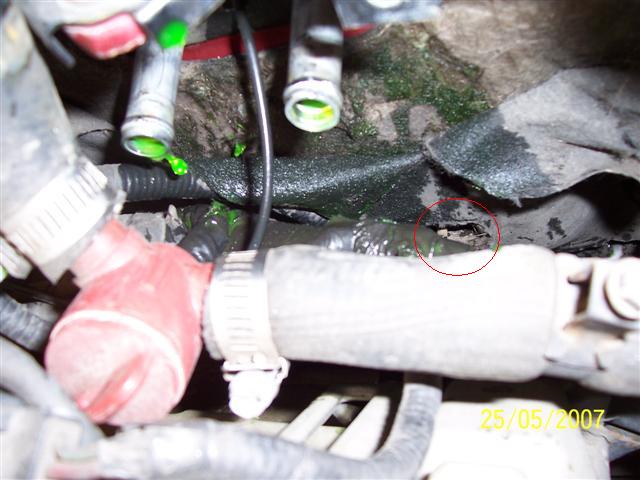
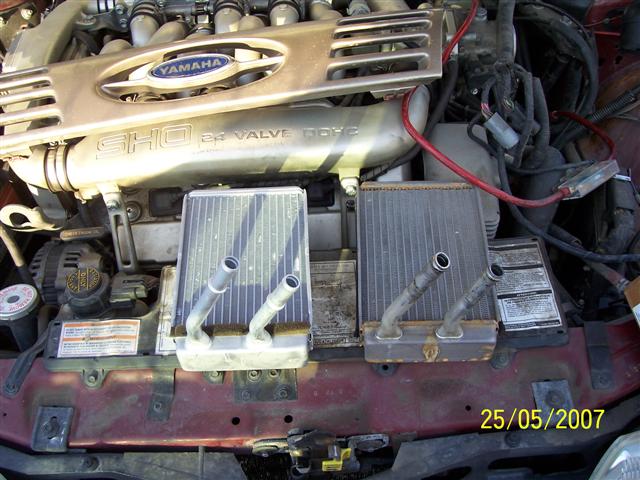
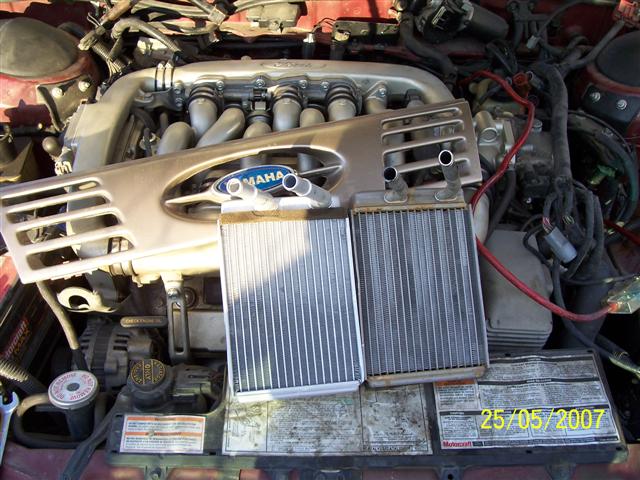
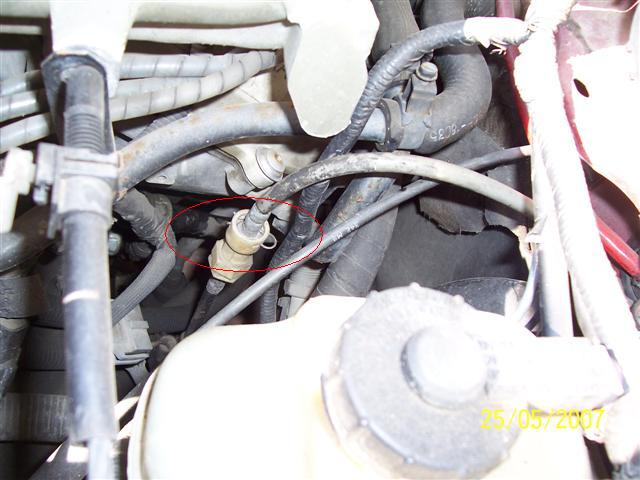
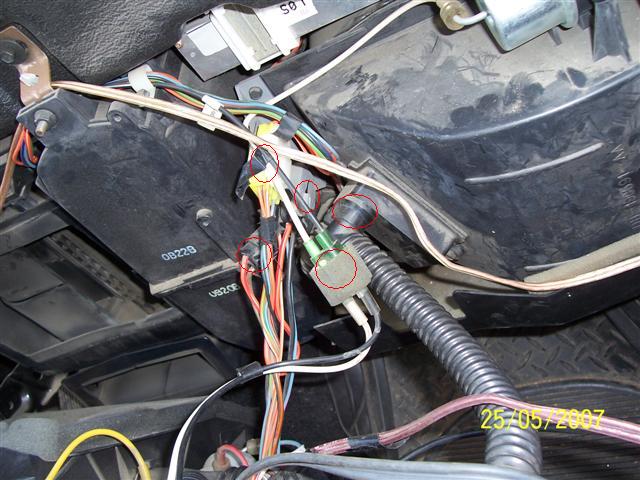
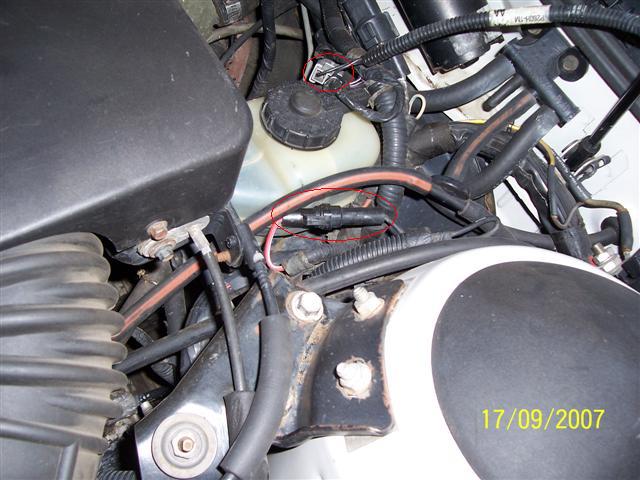
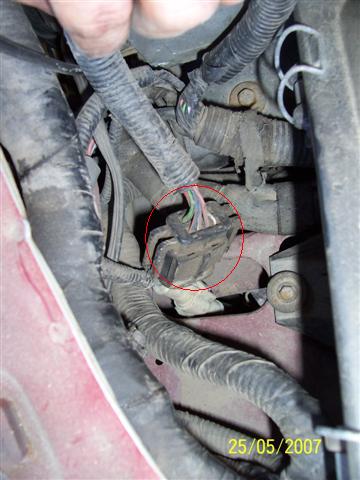
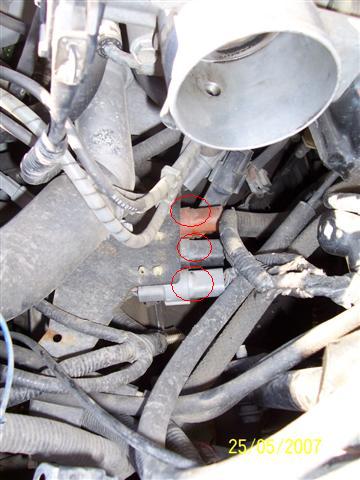
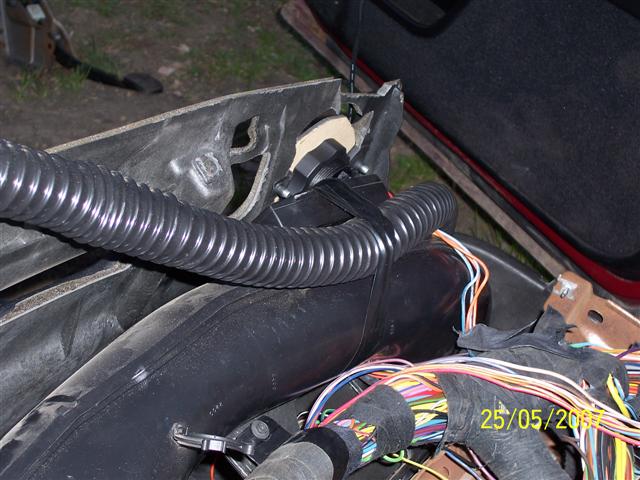
now back under the hood, we need to remove the 2 cooling lines that go into the heater core, and also the vaccuum connector going inside the vehicle.
to make easier access to get down to where the lower a/c line and the lower case bolt is, I disconnected the PCM connector using a 10mm socket and moved the main vaccuum line from the intake manifold, with those disconnected it allowed me to get my hands down in there to do what is needed to do.
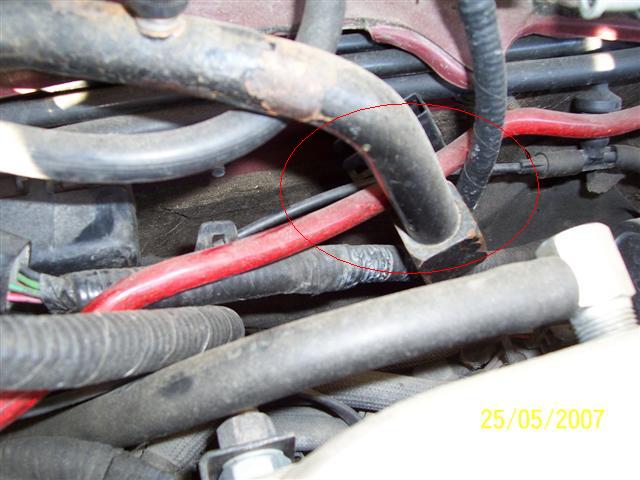
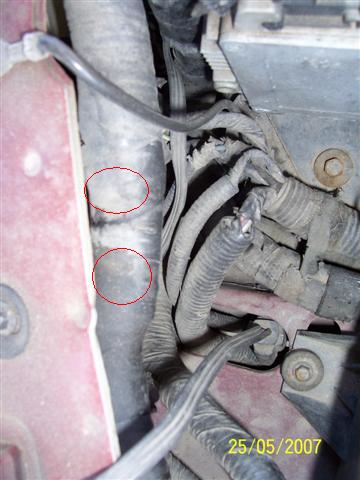
we need to undo the upper and lower A/C to evap core lines, to remove the upper one, we need to take the saftey clip off and use a 3/4" a/c line disconnect tool to disconnect the line from the case
the lower one is
again held on by a saftey clip and requires the use of a 5/8" a/c line
disconnect tool
there are 3 bolts holding the evap case to the firewall, the first one is right to the right and above the lower a/c line, and needs to be removed with a 11mm combination wrench
the upper center one is located right next to the upper a/c line, and can be removed with an 11mm deep socket
the lower left one is hidden a bit, but it is directly under the left heater core line, and needs to be removed with a 11mm combination wrench.
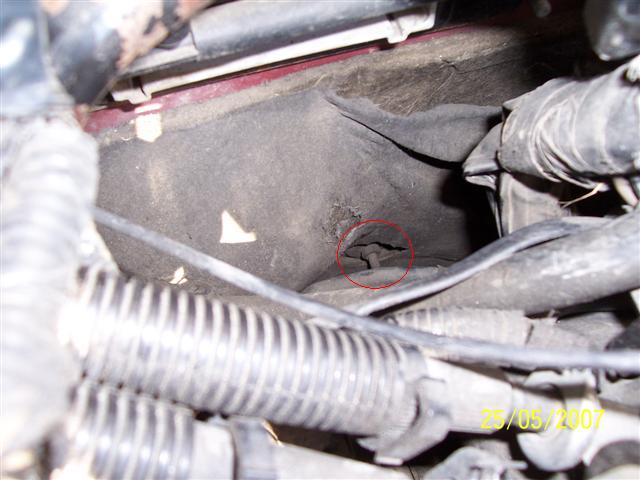
once all that has been disconnected, there is nothing else holding the evap case to the firewall, you can go inside the vehicle and proceed to pull the case back inside the vehicle
to remove the blend door actuator, there are 3 screws that need to be removed with an 8mm socket
now that the blend
door actuator is out of the way, we can undo the 4 screws that house
the heater core with an 8mm socket.
here I am comparing the old heater core to the new one, they are the same, Aluminum, but in 8, they still used brass, so watch out there, also note that the old heater core has a foam strip running around it to seal the core into the evap case.
and on to the blend
door actuators, the old is on the left, the new on the right, you can
see the difference between the 2 of them, the one on the left has the
wiring harness hardwired into place and the right one has a secondary
jumper harness, that is still available through Ford Vintage.
Once
everything is out, this is the pile of stuff that is left over....
Some things that I have had to do while the dash is out, is repair my clutch pedal assy for it would not auto adjust, it would just slacken off, found out that the spring for the self adjuster had let go.
had to rewire my dash speaker crossovers move them from the trunk and into the dash for a cleaner look and also so that I can get rid of the premium sound connections
Well, that's it for now, assembly of the dash and the heater core is reverse of removal