 |
 |

I Have noticed that many members have had some issues when trying to replace the CID (Cam Sensor), which is located on the rear (right) bank, on the exhaust cam. This is due to the fact that space is limited in that area, and most of us don't have hands of a 5year old. These pictures were taken on my 93'.
Here is the tool list:
1/4'' Drive Ratchet
1/4'' Extensions (at a minimum, 2-3 4'' units; the pics will explain)
1/4'' 5/32'' socket
1/4'' swivel
NOTE: If your car has been lowered, you may need to raise the
passenger side slightly to gain access to the fender well.
Grab your tools (and connect them properly), and follow the pics.
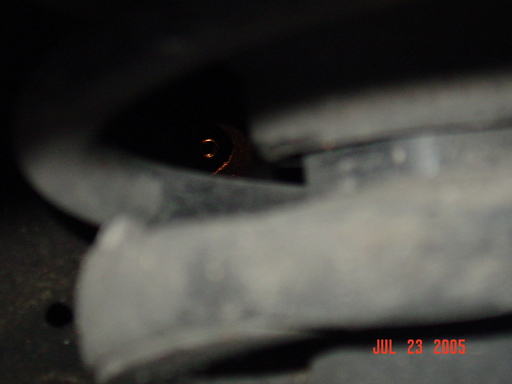
--Here we are looking through the passenger wheel well. Notice the
strut/spring. As you can see through the small hole, you have access to
the rear, P.I.T.A, CID bolt.
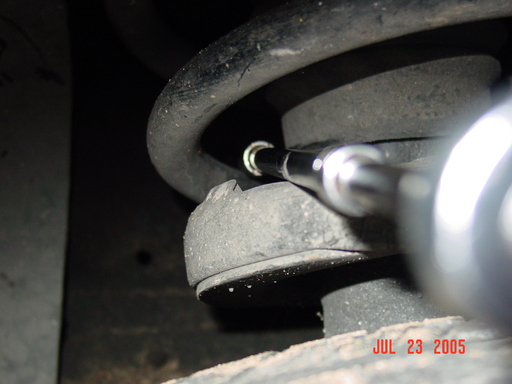
--Here we can see our tools connected
together, and inserted into the small hole in picture 1. Notice that
going through the strut/spring is a direct shot. If you do not have
access to long extensions, you may be able to use just one short
extension and use the ratchet close to the unibody.
--Finally, a picture from inside the engine bay. Self-explanatory there...
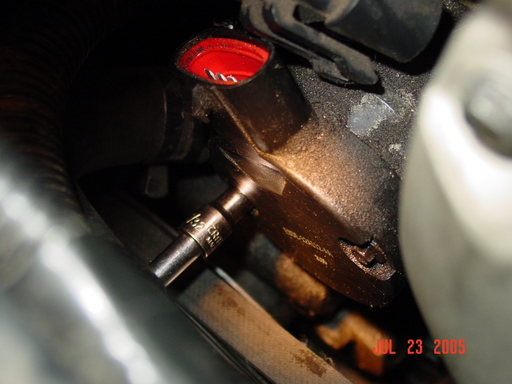
As for the 'front' bolt, you can use the
swivel and get to that one as well.
For ATX cars; This method is not needed as much as on the MTX.
Reason being, the ATX engine sits farther forward, which in turn makes
for a slightly easier access to the CID. I HAVE used this method on ATX
cars, mainly because of the ease of the removal/install. If you do use
this method on an ATX car, you WILL need a swivel regardless, and the
front bolt will be slightly harder to get to (due to the location of the
engine).
For those of you who might not have figured
it out, reassembly is reverse order of disassembly.
