 |
 |

"Rust Belt" Ford Taurus
Subframe Bushing Replacement
Pictures and Guide by John Wood
Edited and produced by Joshua Langevin
* This
guide is not SHO specific as the Taurus and Taurus SHO share the same subframe
bushings/bolts/basic design
Living in Minnesota cars are prone to rust. The time this occurs most is in the winter when harsh salts are used in order to melt the ice and snow. The Taurus SHO is no exception. SHOs can range anywhere from 5 to 15 years of age, and if they've spent their whole lives in the rust belt you had better believe there's a fair amount of rust on the underbody of your beloved car.
We all know why SHOs are attractive to enthusiasts. Four doors and a whopping punch at your right foot are nothing to sneeze at. As our SHOs age however they are prone to sloppy handling and poor performance. The sloppy handling can be fixed with extensive suspension work as well as bushing replacement. I will cover replacing the subframe bushings in this article.
The subframe is what the engine, steering rack, and transmission rest on. There are four rubber bushings holding the subframe on. These are, like many parts on an automobile, a wear item and with many SHOs topping the 100,000 mile mark these are almost a necessary replacement.
There are three main types of subframe bushings available for the SHO. Delrin, aluminum and rubber are the most common forms of subframe bushing material available for the Taurus. Delrin tends to crack and is not a suitable material as it needs to be re-torqued every now and then due to compression of the material.The stock rubber (3rd generation bushings) are an improvement over your old, worn ones, but they are still made out of rubber which can wear out and causes movement in the subframe. If you want the original feel back go with rubber. Aluminum is becoming more and more popular among enthusiasts because it never wears out and stops movement of the subframe. Thus improves handling characteristics as well as shift feel. I went with aluminum bushings.
Be SURE that your Taurus has had the subframe recall performed. Dealers MUST do this for free if your car was originally sold in one of the "rust belt" states. Check with your dealer and have them run your VIN #. You can pull up your carpet to check as well. There should be rubber caps on both the passenger side and drivers side. Take those caps off and you should see your sub frame bolts and a plate underneath.
What you need for this project:
Your new bushings ($75.00 for aluminum)
New subframe bolts (about $15 @ a Ford dealer)
2 jack stands ($15 @ Wal-Mart)
1 jack, 2 jacks preferably ($30 @ Wal-Mart)
PB Blaster (you know why...) ($3 @ Wal-Mart)
An 18mm socket, 1/2" drive
Some time
Patience (very important!)
One heck of a breaker bar, 1/2" drive (or air tools like I have)
2 wooden blocks
A hammer
1. Start this project a
day in advance soaking your front and rear sub frame bolts in some PB Blaster
and let them sit. You'll be glad you did this. Be sure to lubricate all
4 of them and the bolt head.To lubricate the front bolts there's a hole
at the end of the splash guard. It may not be exact but close enough.
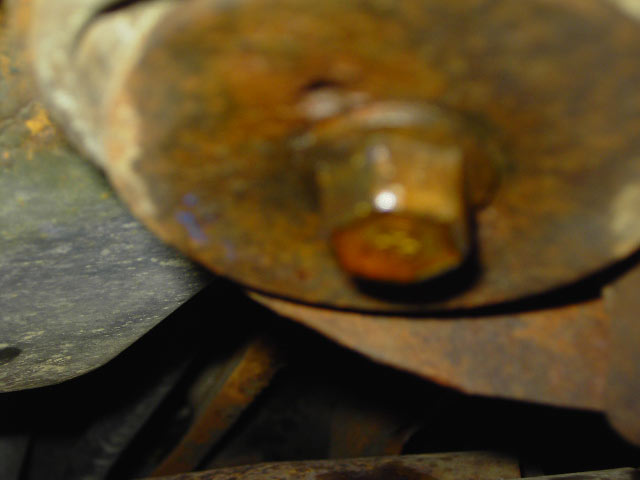
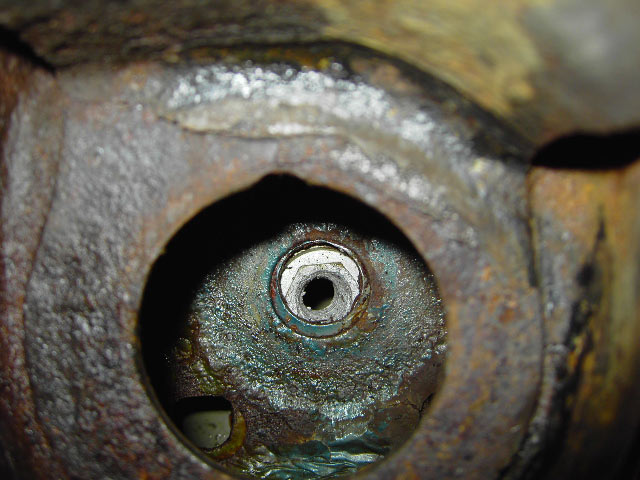
The drivers side sub frame bolt sprayed liberally with PB Blaster (recall kit installed, notice the plate)

Lubricate all 4 bolt heads as well (passenger side rear bolt shown)
2. After you have waited a day or so find a good spot to jack up your car. I know this sounds like an obvious thing I have seen some pretty bad places people jack their cars up from. The surface should be stable and hard. You will be supporting thousands of pounds and lifting them up and down respectively. This requires a surface with good integrity. I suggest concrete. Blacktop might cause jacks to sink into the surface if it's hot.
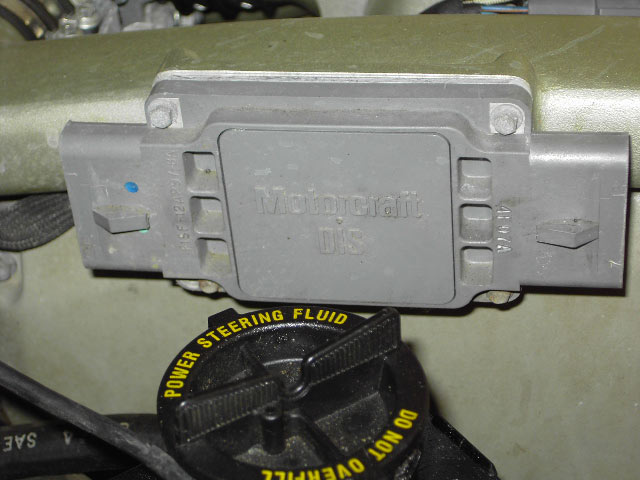
Before you lower your subframe you'll want to unplus your DIS module because sometimes the ends can get cracked by hitting brackets during movement. Here the DIS is unplugged and we are ready to lower the subframe on one side.
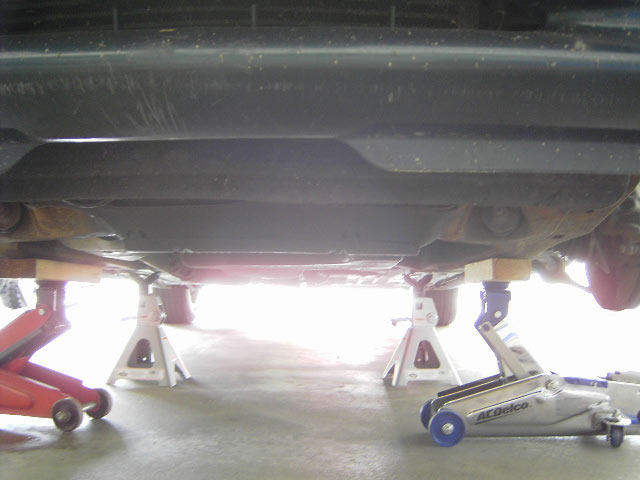
3. First loosen the lug nuts on both front wheels. Then start by jacking up the car's unibody and putting a jack stand under the unibody frame (not the subframe) to support one side. Do the same procedure for the other side. Here you have 2 jackstands supporting the unibody frame.

4. Next remove your front wheels so you can acccess the middle of each side of the subframe easily. Then you will want to get your 2 wooden blocks and 2 jacks and put each block and jack combination under the left middle and right middle of the subframe. Raise the jacks until they come into firm contact with the subframe. This will allow raising and lowering of the subframe in an easy manner. If you only have one jack, start with the driver's side.
NOTE: You do not need to use two jacks, you can do this whole procedure with just one. However, using two makes it easier.
Here we have all the jacks in proper positions
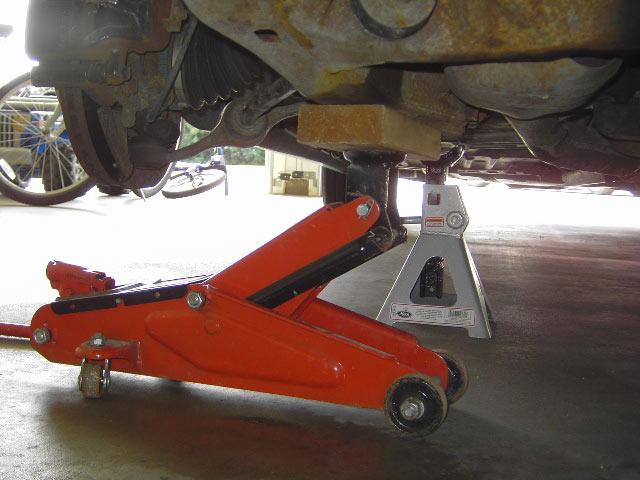
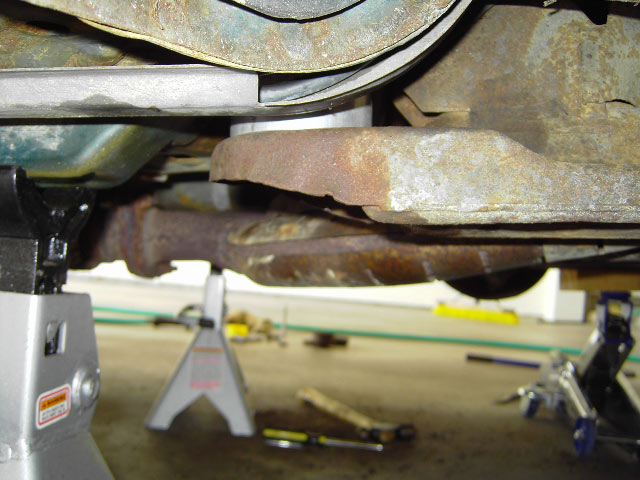
This is a close up of the passenger side, notice the position of the jack.
5. Now it is imperative that you only do one side at a time for safety's sake. You don't want a jack to fail when both sides of the subframe are lowered. Spray down the bolts and bolt heads with PB Blaster. Wait a few minutes, then loosen the two subframe bolts of one side. Loosen them several turns, about a 1/2 inch out. Now slowly lower the jack supporting that side so that the subframe is hanging by the bolts. (example: lower the driver's side of the subframe about a 1/2 inch, the one with the silver jack above) This is done so that you can lower the other side (passenger side) of the subframe without bending it. You can now take that jack out. (Or, if you have two, just leave it there.)
Now make sure the the side you are lowering is supported, ie, jacked up all the way. (If you have two jacks this already will have been done). Then loosen and remove the subframe bolts. It might take some time to get them loose but once they are they should be easy to get out.
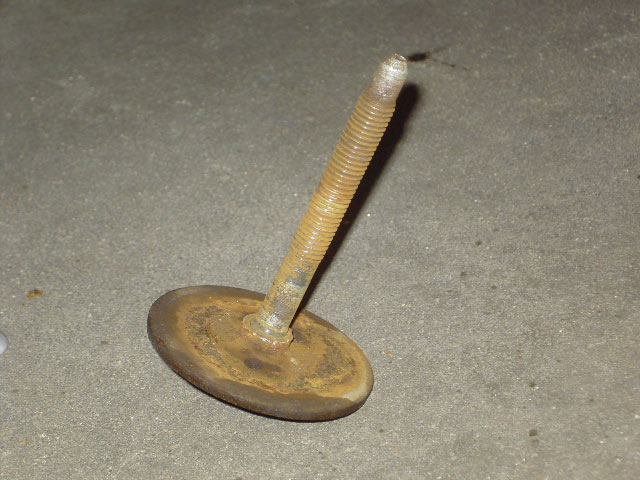
That's the bolt (and the bottom washer) that came out of my drivers side rear bushing. It looks to be in decent shape and it didn't break!
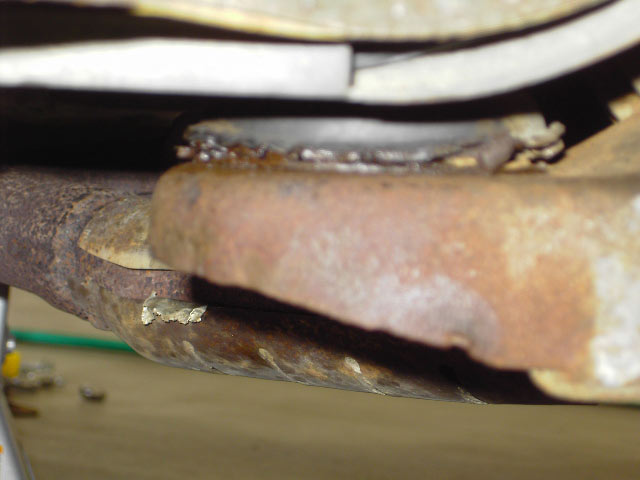
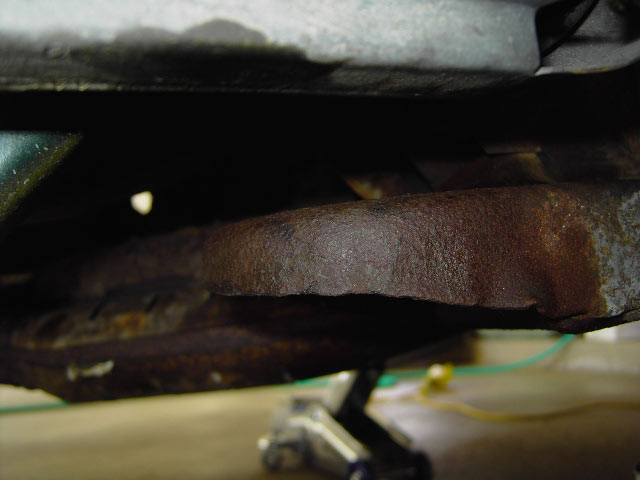
6. Now you will want to be careful and lower the subframe SLOWLY. If you loosened the other side properly you should be able to lower it several inches. Make sure the jack is supporting it at all times. Go until you can get your hand around the top of the bushing. Here we see the passenger side starting to be lowered. You will want to remove the top bushing and get a 10mm socket or wrench to remove the nuts that hold the bottom bushing on. On the rear the top bushing is a bit of work. You'll want to keep your PB Blaster on hand and lubricate where in touches the subframe on the inside bottom and the top. Now you're going to have to twist it out. When you can move it a good amount lift up and the top bushing should come free.
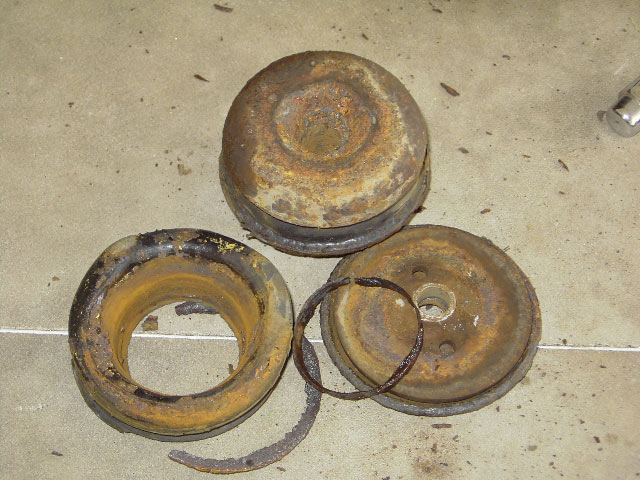
That's the top bushing with the top plate inside it. Ugly isn't it?

7. Now you're almost ready to line up your new bushings but there's a large washer type piece that you need to remove. Get your PB Baster and spray it, then get a screw driver and pry up. Do this all around the washer and get a hammer and hammer it out from the bottom. This will also get nasty rust off of the bottom bushing mating area. There we go! A clean surface for your new bushings!
Look at all that junk that came out!
Heres a view from below. Theres the subframe plate!
8. Now it's time to check the fittment of your new bushings. Mine did not fit in at all. The circular area was too small, so you'll probably want to file it down to fit. I used a die grinder to make the bushing fit properly. It's not the fault of the aftermarket bushings but the rust. Line up the top portion of the new bushings with the holes and jack up the subframe until they are almost snug with the unibody frame. There's my new top bushing all lined up!
9. Get one of the subframe bolts and put a coating of antisieze on it. Now line up the lower portion of the bushings and get a washer and subframe bolt and lightly start screwing it in. If the bolt does not go in then check the plate on the inside. Reposition the plate and you should be able to screw it in gently. Now that you know the bushings are going in right, jack the subframe up all the way. Once you cannot screw the bolts in under your own power then use a rachet or an air rachet to tighten them up. Important Notes: Do not under any circumstances tighten up the subframe bolts without first jacking the subframe up. You should never "jack up" the subframe by tightening the bolts. Also when doing the first side, don't tighten the bolts up all the way, leave about a 1/2 inch of room so that you can lower the other side.

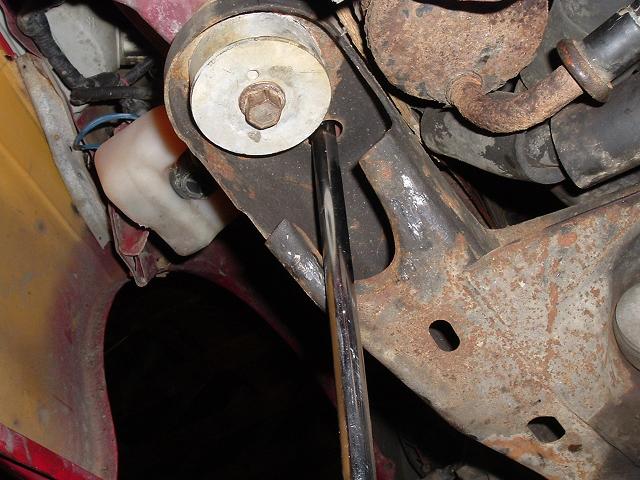
10. Now lower the jack slowly and let the subframe hang by the bolts. Go to the driver's side where you started and jack the subframe all the way up. Go back to step 5 and repeat the process. Once these bushings are installed, go ahead and tighten then up all the way. Important: As you tighten up the subframe, use a rod or dowel of some kind to keep it aligned. There is a hole right behind the front subframe bushing where you insert the rod (An 18" breaker bar is shown) and make sure that the rod is straight up and down. It's important to use a rod or pipe for the alignment that fits the hole fairly tight. It's a 3/4" hole. 1/2" EMT conduit which is almost exactly 3/4" OD works very well. You will see there are actually two holes, one in the subframe and one in the unibody that need to be lined up.
Then grab your torque wrench and torque the bolt to 75-100ft/lbs. I did mine to 95 ft/lbs. Now go back to the passenger side, jack up the subframe all the way, and torque the bolts, making sure that it is aligned the same way.
There you have it, the finished product! Now sit back, relax and have a beer, or you can get all excited, put your wheels back on (DON'T FORGET TO TORQUE THEM!), plug in your DIS module (or you'll have a strange no start issue after bushing replacement) and enjoy your new bushings in the twisties!
The drivers side sub frame bolt sprayed liberally with PB Blaster (recall kit installed, notice the plate)
Lubricate all 4 bolt heads as well (passenger side rear bolt shown)
2. After you have waited a day or so find a good spot to jack up your car. I know this sounds like an obvious thing I have seen some pretty bad places people jack their cars up from. The surface should be stable and hard. You will be supporting thousands of pounds and lifting them up and down respectively. This requires a surface with good integrity. I suggest concrete. Blacktop might cause jacks to sink into the surface if it's hot.
Before you lower your subframe you'll want to unplus your DIS module because sometimes the ends can get cracked by hitting brackets during movement. Here the DIS is unplugged and we are ready to lower the subframe on one side.
3. First loosen the lug nuts on both front wheels. Then start by jacking up the car's unibody and putting a jack stand under the unibody frame (not the subframe) to support one side. Do the same procedure for the other side. Here you have 2 jackstands supporting the unibody frame.
4. Next remove your front wheels so you can acccess the middle of each side of the subframe easily. Then you will want to get your 2 wooden blocks and 2 jacks and put each block and jack combination under the left middle and right middle of the subframe. Raise the jacks until they come into firm contact with the subframe. This will allow raising and lowering of the subframe in an easy manner. If you only have one jack, start with the driver's side.
NOTE: You do not need to use two jacks, you can do this whole procedure with just one. However, using two makes it easier.
Here we have all the jacks in proper positions
This is a close up of the passenger side, notice the position of the jack.
5. Now it is imperative that you only do one side at a time for safety's sake. You don't want a jack to fail when both sides of the subframe are lowered. Spray down the bolts and bolt heads with PB Blaster. Wait a few minutes, then loosen the two subframe bolts of one side. Loosen them several turns, about a 1/2 inch out. Now slowly lower the jack supporting that side so that the subframe is hanging by the bolts. (example: lower the driver's side of the subframe about a 1/2 inch, the one with the silver jack above) This is done so that you can lower the other side (passenger side) of the subframe without bending it. You can now take that jack out. (Or, if you have two, just leave it there.)
Now make sure the the side you are lowering is supported, ie, jacked up all the way. (If you have two jacks this already will have been done). Then loosen and remove the subframe bolts. It might take some time to get them loose but once they are they should be easy to get out.
That's the bolt (and the bottom washer) that came out of my drivers side rear bushing. It looks to be in decent shape and it didn't break!
6. Now you will want to be careful and lower the subframe SLOWLY. If you loosened the other side properly you should be able to lower it several inches. Make sure the jack is supporting it at all times. Go until you can get your hand around the top of the bushing. Here we see the passenger side starting to be lowered. You will want to remove the top bushing and get a 10mm socket or wrench to remove the nuts that hold the bottom bushing on. On the rear the top bushing is a bit of work. You'll want to keep your PB Blaster on hand and lubricate where in touches the subframe on the inside bottom and the top. Now you're going to have to twist it out. When you can move it a good amount lift up and the top bushing should come free.
That's the top bushing with the top plate inside it. Ugly isn't it?
7. Now you're almost ready to line up your new bushings but there's a large washer type piece that you need to remove. Get your PB Baster and spray it, then get a screw driver and pry up. Do this all around the washer and get a hammer and hammer it out from the bottom. This will also get nasty rust off of the bottom bushing mating area. There we go! A clean surface for your new bushings!
Look at all that junk that came out!
Heres a view from below. Theres the subframe plate!
8. Now it's time to check the fittment of your new bushings. Mine did not fit in at all. The circular area was too small, so you'll probably want to file it down to fit. I used a die grinder to make the bushing fit properly. It's not the fault of the aftermarket bushings but the rust. Line up the top portion of the new bushings with the holes and jack up the subframe until they are almost snug with the unibody frame. There's my new top bushing all lined up!
9. Get one of the subframe bolts and put a coating of antisieze on it. Now line up the lower portion of the bushings and get a washer and subframe bolt and lightly start screwing it in. If the bolt does not go in then check the plate on the inside. Reposition the plate and you should be able to screw it in gently. Now that you know the bushings are going in right, jack the subframe up all the way. Once you cannot screw the bolts in under your own power then use a rachet or an air rachet to tighten them up. Important Notes: Do not under any circumstances tighten up the subframe bolts without first jacking the subframe up. You should never "jack up" the subframe by tightening the bolts. Also when doing the first side, don't tighten the bolts up all the way, leave about a 1/2 inch of room so that you can lower the other side.
10. Now lower the jack slowly and let the subframe hang by the bolts. Go to the driver's side where you started and jack the subframe all the way up. Go back to step 5 and repeat the process. Once these bushings are installed, go ahead and tighten then up all the way. Important: As you tighten up the subframe, use a rod or dowel of some kind to keep it aligned. There is a hole right behind the front subframe bushing where you insert the rod (An 18" breaker bar is shown) and make sure that the rod is straight up and down. It's important to use a rod or pipe for the alignment that fits the hole fairly tight. It's a 3/4" hole. 1/2" EMT conduit which is almost exactly 3/4" OD works very well. You will see there are actually two holes, one in the subframe and one in the unibody that need to be lined up.
Then grab your torque wrench and torque the bolt to 75-100ft/lbs. I did mine to 95 ft/lbs. Now go back to the passenger side, jack up the subframe all the way, and torque the bolts, making sure that it is aligned the same way.
There you have it, the finished product! Now sit back, relax and have a beer, or you can get all excited, put your wheels back on (DON'T FORGET TO TORQUE THEM!), plug in your DIS module (or you'll have a strange no start issue after bushing replacement) and enjoy your new bushings in the twisties!