 |
 |

Front Motor Mount Replacement
Pictures and Guide by Joshua Langevin
Signs of a bad motor mount are a polished
spot on the intake manifold just to the right of the "SHO" lettering, sloppy
shifts, excessive movement of the engine, and unusual noise from the engine
bay. The job is not at all difficult if you follow these steps.
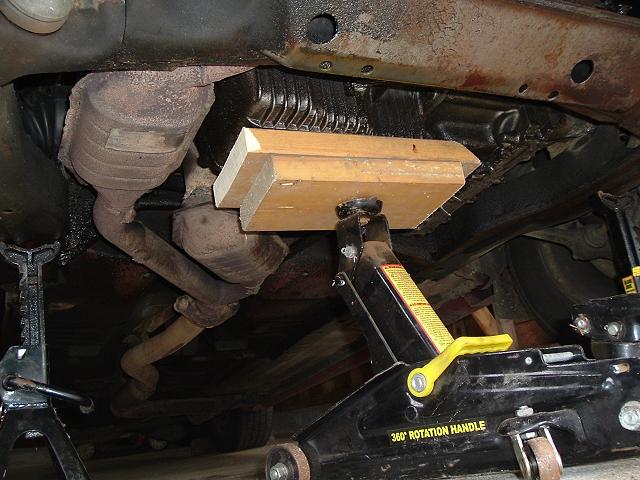
1. Loosen the lug nuts on the passenger wheel, chaulk the rear wheels, and safely jack up the car. Place jackstands under each side of the subframe. (Note location in picture) Then use your jack with at least one wide piece of wood to distribute the weight over the bottom of the oil pan. Support the engine this way, you'll have to lift it up a few inches to get the motor mount out, so make sure that either your jack will go high enough to do this, or put more pieces of wood on the jack. (In this picture, I did not have enough clearance with the jack and I needed to add another piece of 2x4.)
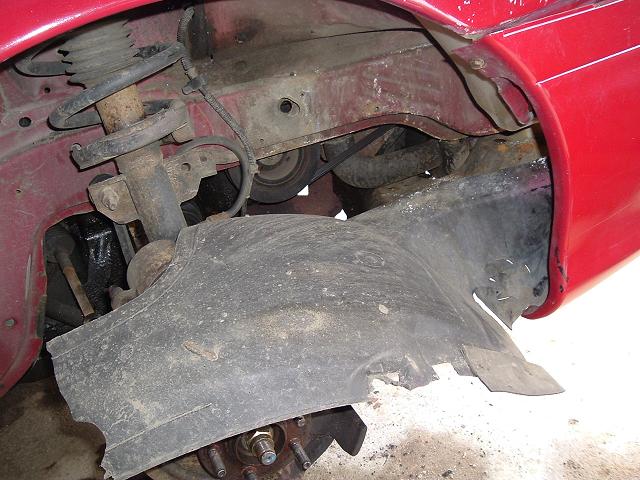
2. Remove the wheel along with the splash shield.
3. Now drain the radiator. Use a piece of tubing attached to the drain cock running down into a pan, and then loosen it. You will have to remove the radiator cap as well to get it to drain.
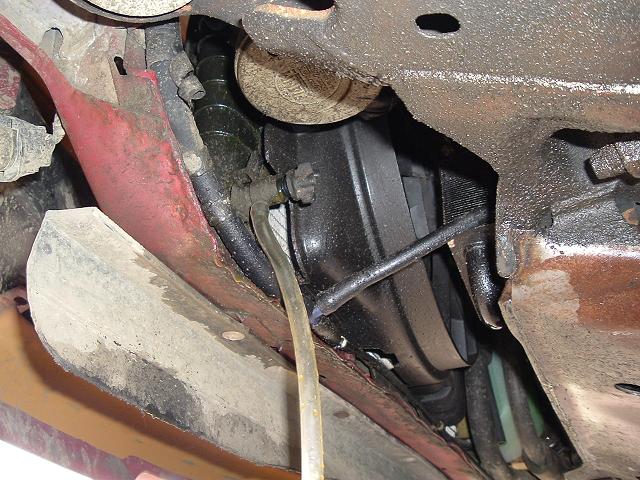
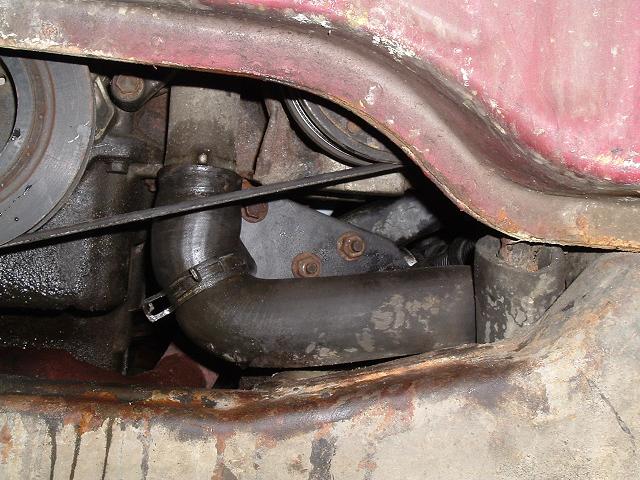
4. Now you can pull the lower radiator hose off of the tube that connects to the waterpump. Personally I find removing the lower hose from the radiator to be a pain (as well as getting it back on there) so I avoided it by pushing the hose out of the way as shown in this picture. However, this is a good time to check it and if it needs to be replaced, do it now. Then remove the two 15mm nuts and the two 13mm bolts from the motor mount.
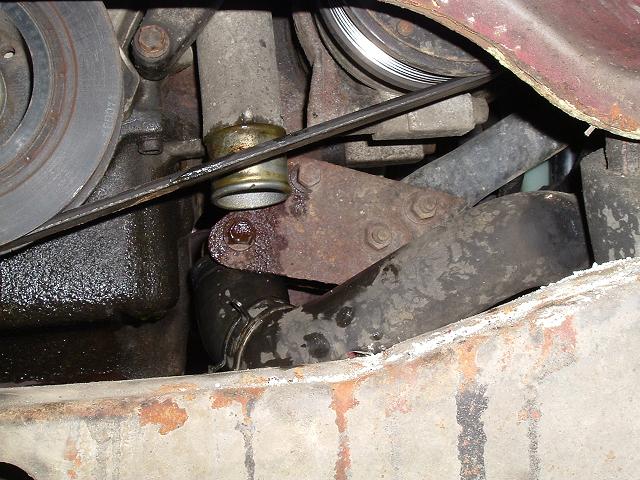
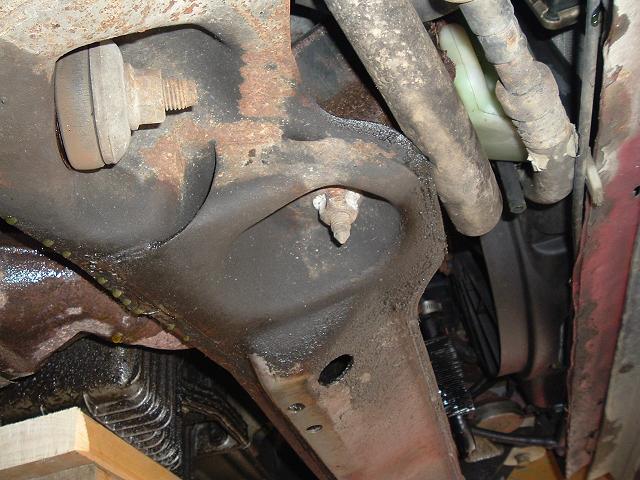
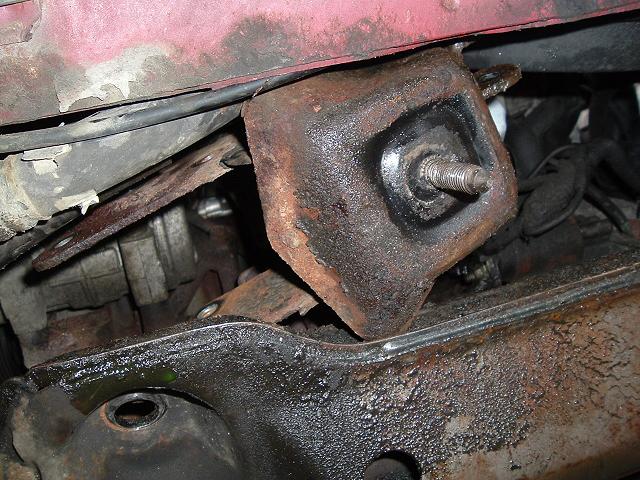
5. And remove the 21mm nut here. This nut is a little tricky, ideally you should have a deep socket for it. However, I did not, but I managed to use a regular socket with the 1/2" drive extension only partially in the socket. I had to be very careful, but it worked.
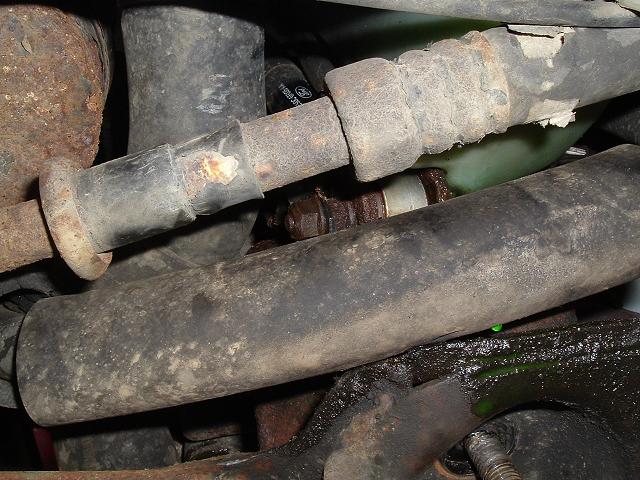
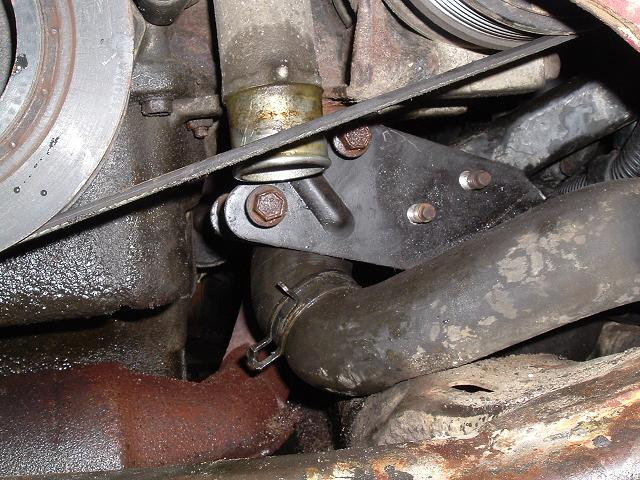
6. The two 15mm nuts that you just took off in step 4 hold the engine mount dampener. The other end of the dampener is located here. You first have to remove one nut, then the wiring harness, and another nut. You might have to use a wrench on the bolt to keep it from turning. Then remove the bolt.
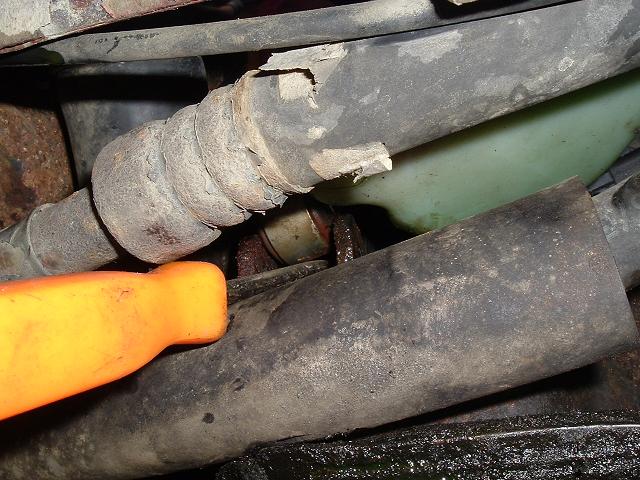
7. Then pry out the dampener shock with a screwdriver.
8. Remove the dampener assembly though the top of the engine bay. Note the location of the wiring harness as you pull this out.
9. Now with the mount totally free, wiggle it out and remove it through the front of the subframe. You will likely have to jack the engine up a little more to get it out.
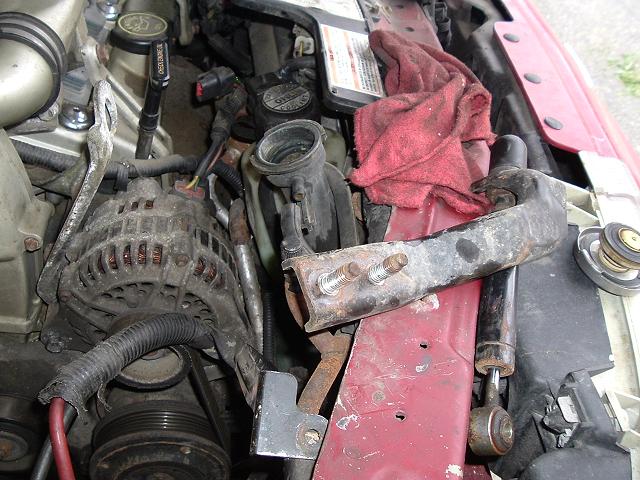
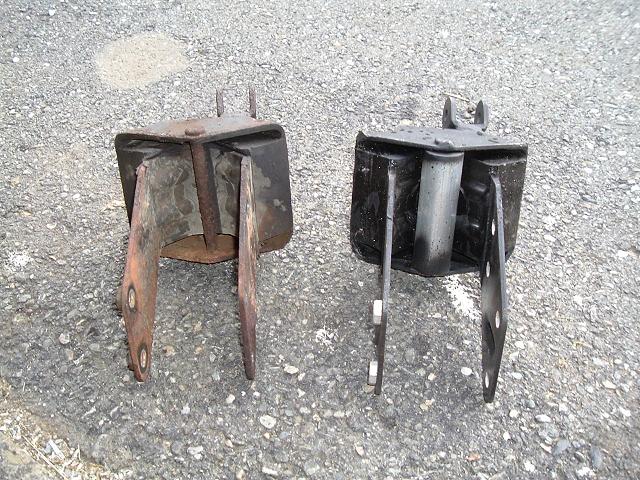
10. Notice the difference between the stock motor mount and the SHONUT reinforced motor mount. Install the new mount the same way you removed the old one.
11. Now install the dampener assembly through the top of the engine bay. When you install it, pay special attention to where the wiring harness goes. It should be in-between the dampener assembly and the motor mount. Insert the bolt and attach the first nut, then the wiring harness, then the second nut.

12. Then install and tighten the two 15mm nuts and the two 13mm bolts. At this point you will want to lower the engine onto the mount in order to install it correctly.
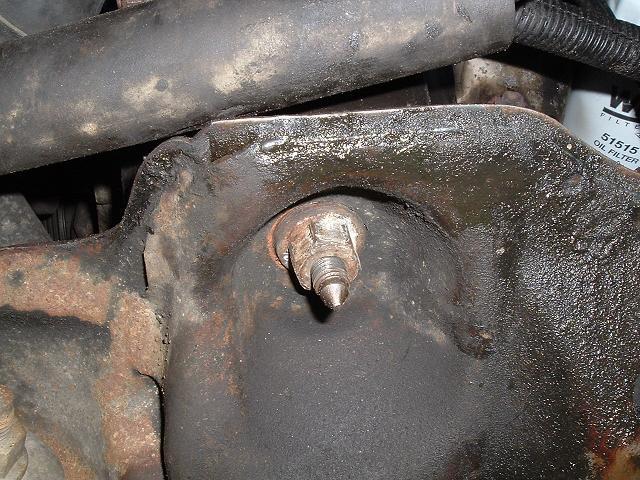
13. And then with the engine completely lowered, install and tighten the 21mm motor mount nut.
14. Make sure that that the nuts and bolts are tight, and reinstall the lower radiator hose.
Now install the splash shield, the wheel, lower the vehicle, torque the lug nuts, refill the radiator with coolant, and enjoy your new motor mount!
1. Loosen the lug nuts on the passenger wheel, chaulk the rear wheels, and safely jack up the car. Place jackstands under each side of the subframe. (Note location in picture) Then use your jack with at least one wide piece of wood to distribute the weight over the bottom of the oil pan. Support the engine this way, you'll have to lift it up a few inches to get the motor mount out, so make sure that either your jack will go high enough to do this, or put more pieces of wood on the jack. (In this picture, I did not have enough clearance with the jack and I needed to add another piece of 2x4.)
2. Remove the wheel along with the splash shield.
3. Now drain the radiator. Use a piece of tubing attached to the drain cock running down into a pan, and then loosen it. You will have to remove the radiator cap as well to get it to drain.
4. Now you can pull the lower radiator hose off of the tube that connects to the waterpump. Personally I find removing the lower hose from the radiator to be a pain (as well as getting it back on there) so I avoided it by pushing the hose out of the way as shown in this picture. However, this is a good time to check it and if it needs to be replaced, do it now. Then remove the two 15mm nuts and the two 13mm bolts from the motor mount.
5. And remove the 21mm nut here. This nut is a little tricky, ideally you should have a deep socket for it. However, I did not, but I managed to use a regular socket with the 1/2" drive extension only partially in the socket. I had to be very careful, but it worked.
6. The two 15mm nuts that you just took off in step 4 hold the engine mount dampener. The other end of the dampener is located here. You first have to remove one nut, then the wiring harness, and another nut. You might have to use a wrench on the bolt to keep it from turning. Then remove the bolt.
7. Then pry out the dampener shock with a screwdriver.
8. Remove the dampener assembly though the top of the engine bay. Note the location of the wiring harness as you pull this out.
9. Now with the mount totally free, wiggle it out and remove it through the front of the subframe. You will likely have to jack the engine up a little more to get it out.
10. Notice the difference between the stock motor mount and the SHONUT reinforced motor mount. Install the new mount the same way you removed the old one.
11. Now install the dampener assembly through the top of the engine bay. When you install it, pay special attention to where the wiring harness goes. It should be in-between the dampener assembly and the motor mount. Insert the bolt and attach the first nut, then the wiring harness, then the second nut.
12. Then install and tighten the two 15mm nuts and the two 13mm bolts. At this point you will want to lower the engine onto the mount in order to install it correctly.
13. And then with the engine completely lowered, install and tighten the 21mm motor mount nut.
14. Make sure that that the nuts and bolts are tight, and reinstall the lower radiator hose.
Now install the splash shield, the wheel, lower the vehicle, torque the lug nuts, refill the radiator with coolant, and enjoy your new motor mount!