 |
 |

Gen II Center Console Swap
Pictures and Guide Matt Wheeler
Edited and Produced by Joshua Langevin
Edited and Produced by Joshua Langevin
Tools:
11mm socket and wrench
8mm, 7mm socket
Phillips Head Screwdriver
Flat Head Screwdriver
Drill, 1/4" bit
Wire Cutters and Crimps
11mm socket and wrench
8mm, 7mm socket
Phillips Head Screwdriver
Flat Head Screwdriver
Drill, 1/4" bit
Wire Cutters and Crimps
Parts:
Center Console from 93-95 SHO, ATX or MTX
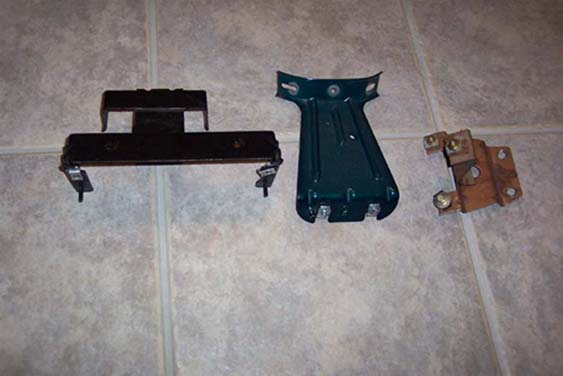
3 brackets that the center console mounted to:
Additional bracket that might help, #18 as seen in assembly picture
M4-.7x16mm bolts
#10x3/4"; or #10x1"; self-tapping screws
Wire connectors
Center Console from 93-95 SHO, ATX or MTX
3 brackets that the center console mounted to:
Additional bracket that might help, #18 as seen in assembly picture
M4-.7x16mm bolts
#10x3/4"; or #10x1"; self-tapping screws
Wire connectors
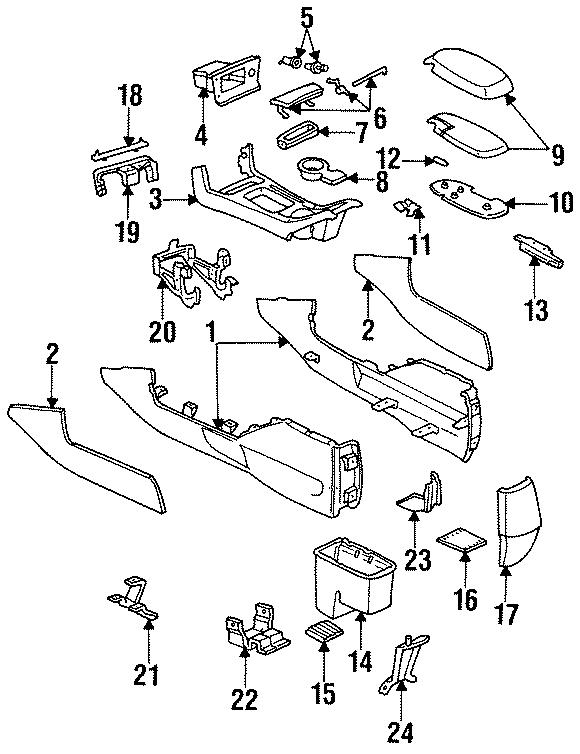
1. It doesn't matter if the center console is from an ATX or MTX since they are both the same. The one I used for my instillation came from an ATX. The 3 brackets you need are the main ones. The additional bracket may help, but I didn't know about till after I finished. When the console mounted to the dash there was a little bit of a gap, the bracket may have made up for this, but I did without it and it turned out fine. Make sure you take all clips and screws from the new console. If you happen to forget the screws or lose them, M4-.7x16mm bolts will be good replacements. First remove your shift knob. Then pull up the piece around the shifter. This piece will pull up with no problems.
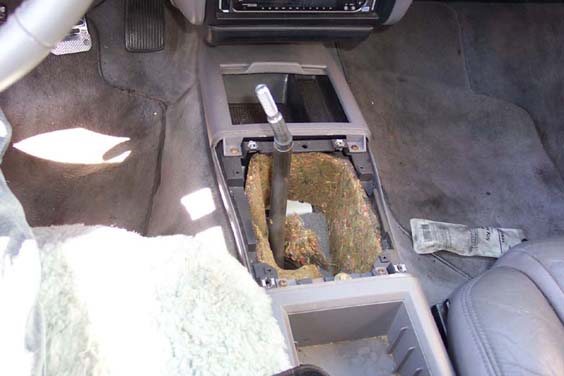
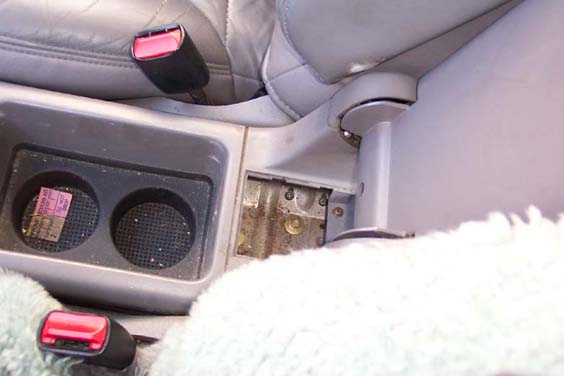
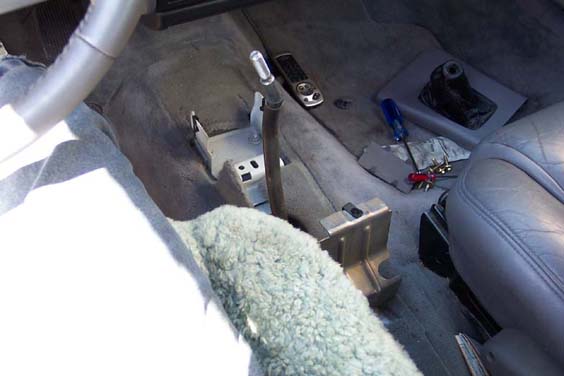
2. Remove the screw that holds the console to the bracket attached to the floor. Remove the 2 screws on the side of the console. Then pry off the panel beneath the armrest with a screwdriver. Then remove the 3 screws holding the console to the bracket.
3. Remove the center console, and disconnect the wire harness before completely removing.
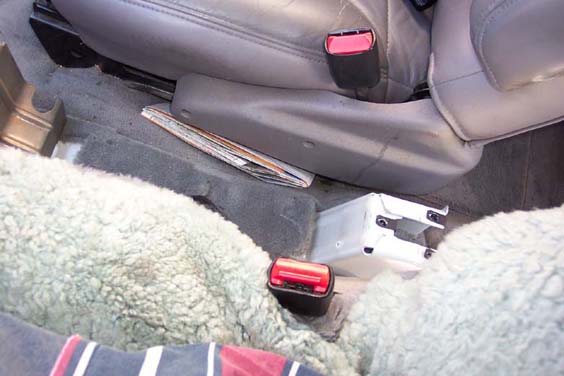
4. Remove what you have in the second Din below the stereo.

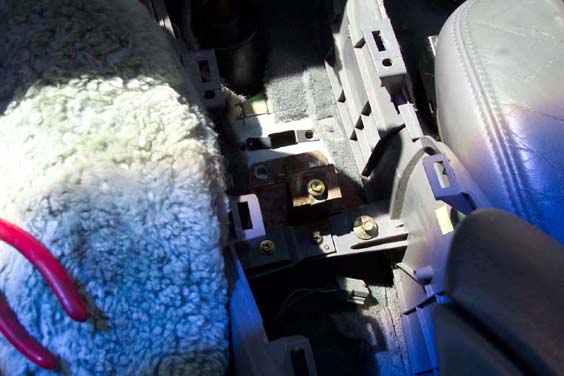
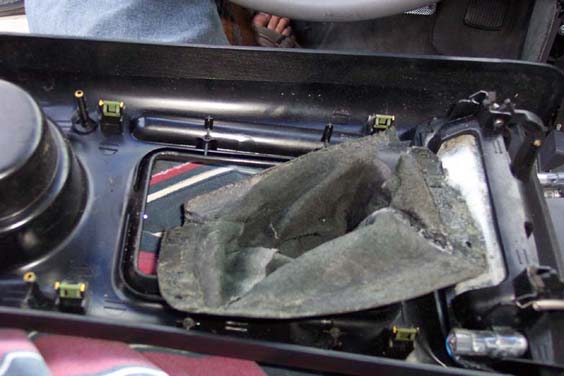
5. Then remove the 2 nuts in the Din holding the ashtray compartment. Next go to the back of the ashtray compartment where you will find 2 bolts, remove these. Remove the ashtray and disconnect all wires from it. Also disconnect the wire harness from up in the dash. Remove the center bracket from the floor. Remove the bracket from the rear. There are 2 nuts in the front and 2 in the rear, which are under the carpet and you might have to cut the carpet a little to get to them, the wrench will help in removing them.
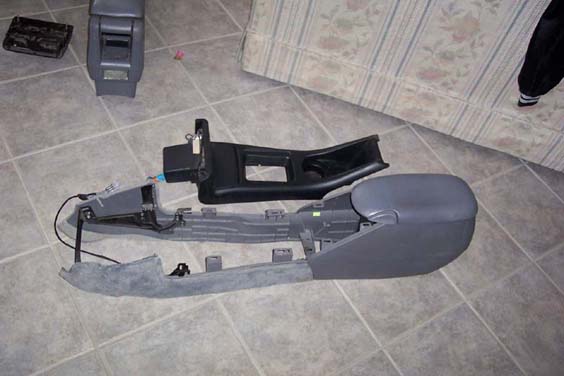
6. Now separate the top of your new center console from the bottom. They will easily pull apart. Make sure you have the storage compartment open.
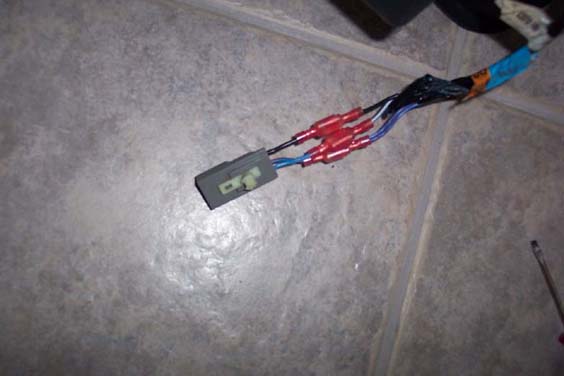
7. For some reason Ford decided to change around the wire harness for the cigarette lighter. They are the exact same, they just changed the ends. So cut off both ends one from the harness you pulled from the car and cut the one from top of your new dash. Take the one from your car and attach it to the one from your new console, just match up the wire colors. You will notice that one has, 3 wires where as the other has 4, this is fine. Just join the 2 to the one on the appropriate harness.
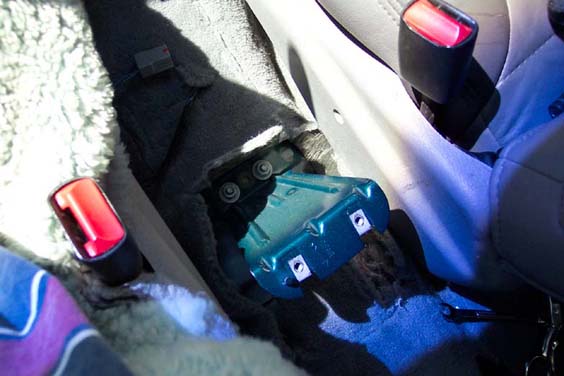
8. Now to place the brackets. To place the center bracket (which is #21 in the assembly drawing) take out the 2 clips that are in the floor for the old center bracket and place them on the 2 center holes. Be careful when taking out the clips, I lost both and ended up using other from the other brackets. Now screw in the bracket.
9. Take the new rear bracket (part #24) and line up the bottom with the 2 holes of the old bracket. Mark the holes and drill using a 1/4" bit. I ended up having to enlarge the holes by going sideways due to my bad aiming.
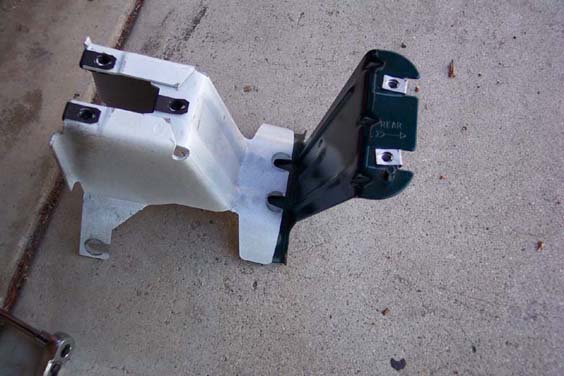
10. Then put the bracket on the 2 posts that held in the old bracket and using the old nuts screw it place.
11. Now take the bottom of the new console and put it in the car and bolt it to the brackets.
Take the 3rd bracket, #19, and place it in the center console and bolt it in. If you have bracket #18 place it as well. I don't know how bracket #18 fits so some one else can fill that in. When working with bracket #19 mark 2 holes for each screw. Remove the bracket and drill each self-tapping screw. The 3/4" will barely make it but the 1" will make it with room to spare, make sure that it will not run into anything. Remove the screws and place the bracket back in and screw it in place to the console and then the dash. If you did not happen to get the shifter boot you will need to follow thesesnext steps, if you did get it, go to step #18. Remove the shifter boot from the old console. It is held on by 4 clips, which you need to be careful when pulling up on. They do not screw off.
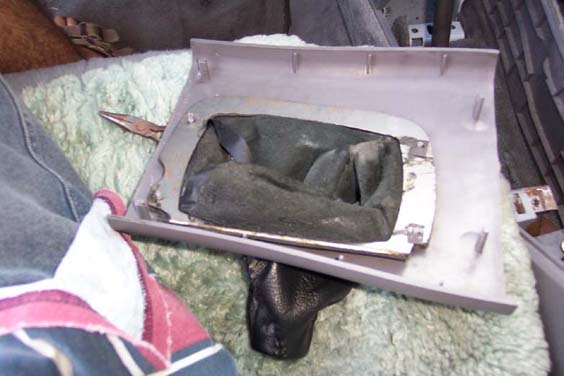
12. It would help to remove the metal backing from the boot. Then unscrew the ring that holds the boot on the new console. Place the boot beneath the ring; this may take a couple of tries to get it to fit properly. Then screw on the ring, if you want to you can drill through the leather but it is not needed.
13. Place the top of the center console on the bottom piece. Make sure to put the shifter through the boot and place the wiring so you can hook it up. Push the top on until it clicks in. You may need to remove the lid if it gets in your way too much.
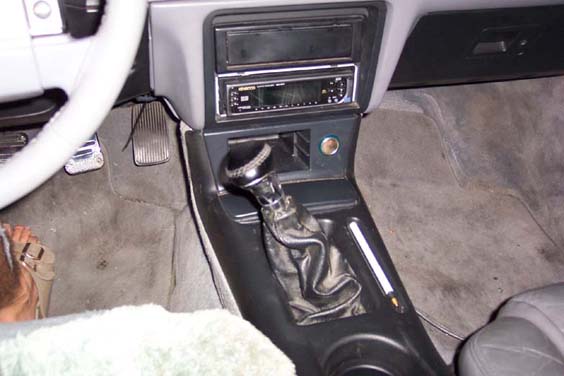

Enjoy your new console!